
By default, when someone makes a reservation with you through the TuCalendi widget, the standard confirmation page is displayed. You can customize this confirmation page and create your own.
Let's see how to set up your own confirmation page for TuCalendi bookings.
The custom confirmation page must be created with the content management system you use and hosted on your own server.
Log in to TuCalendi with your username and password. Go to the "Calendars" option:
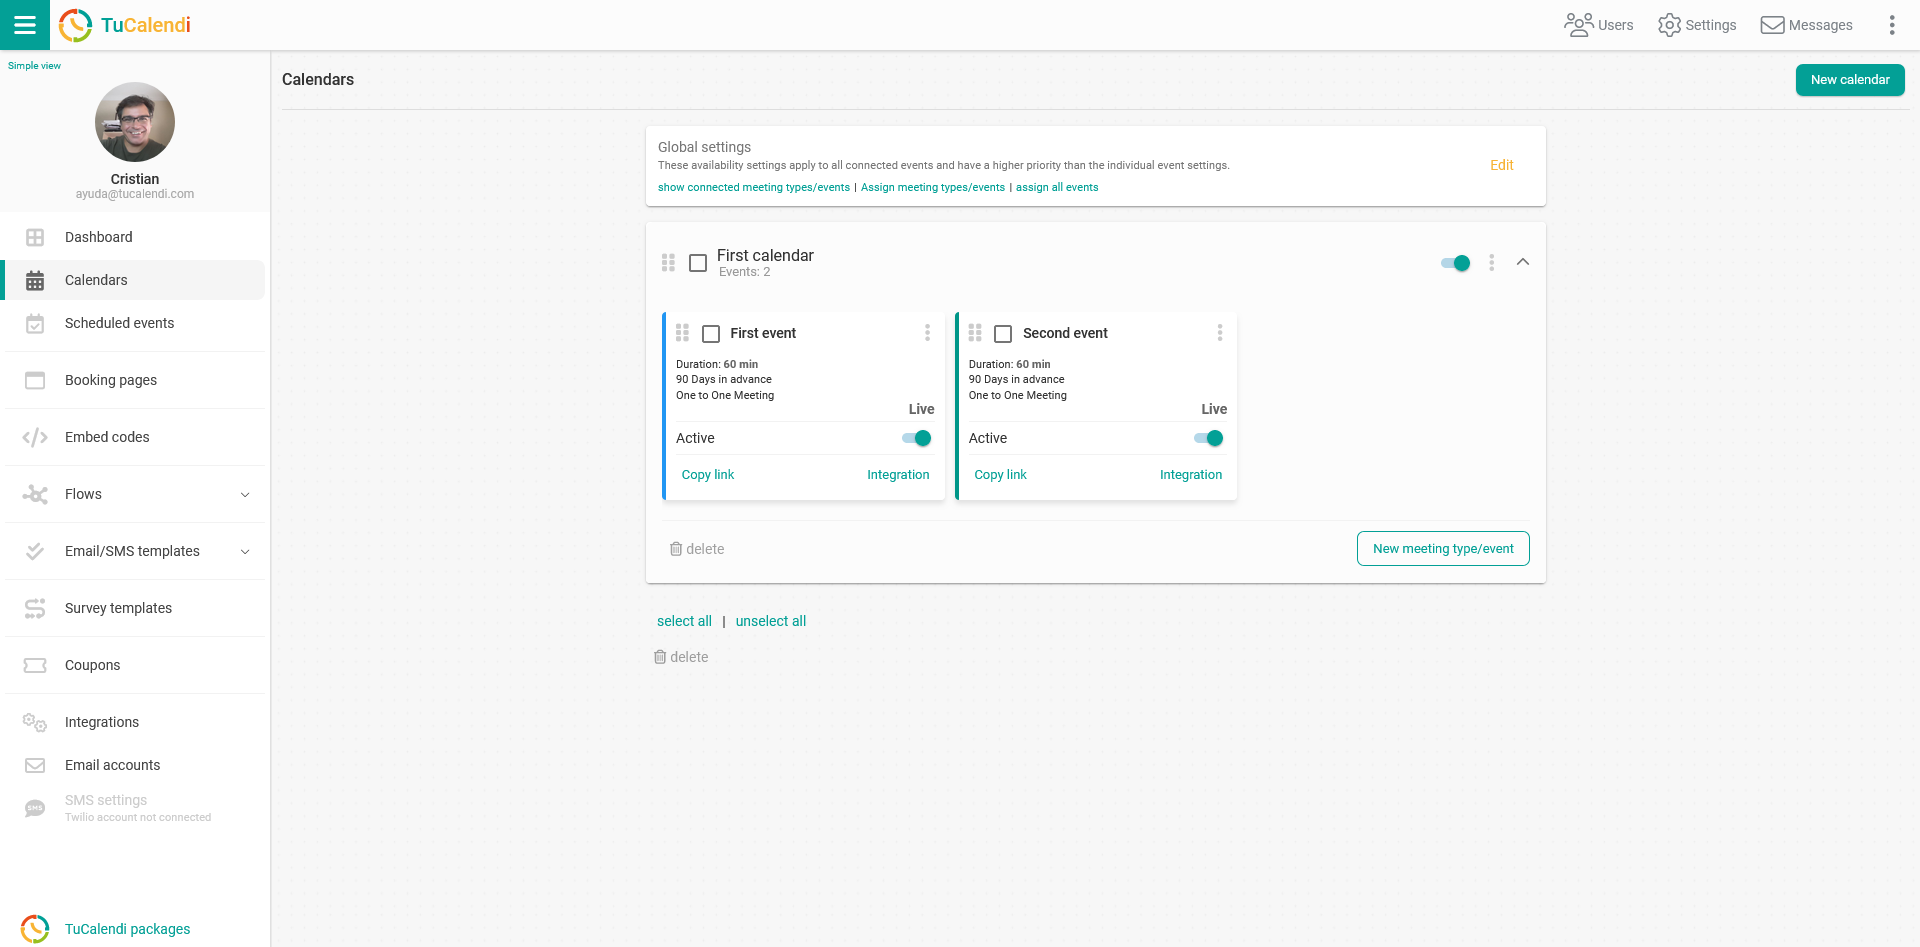
Locate the event for which you want to replace the confirmation page with your own page and click on the event name.
All the event configuration options appear in the horizontal menu.
Click on "Advanced".
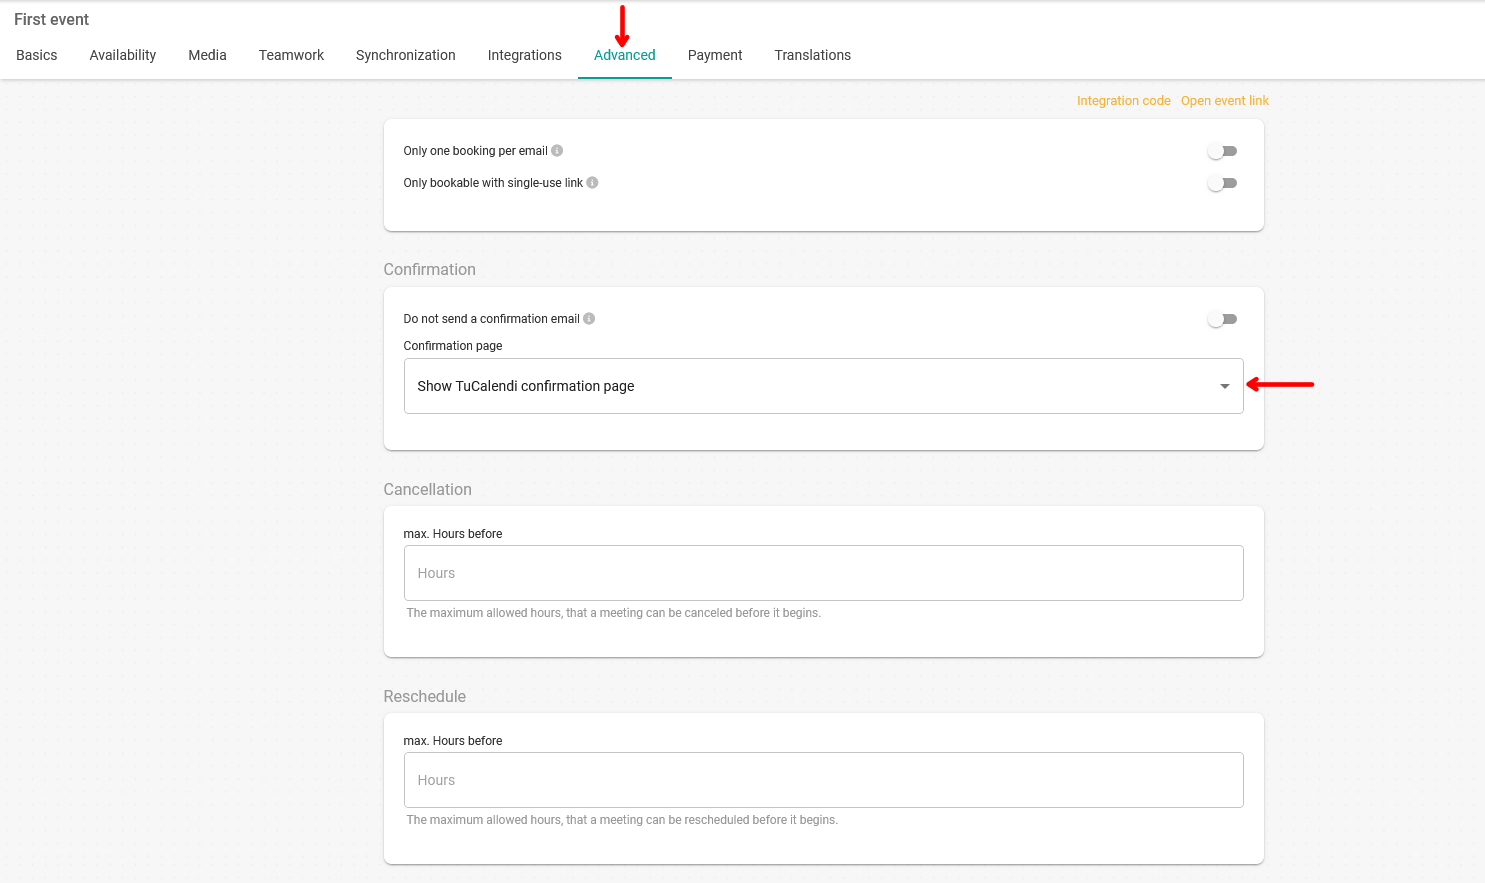
In the "Confirmation Page" field, click to open the drop-down menu:
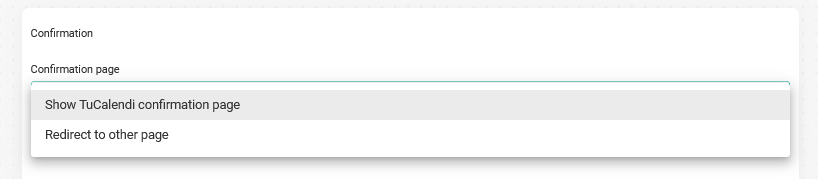
Choose the "Redirect to other page" option:
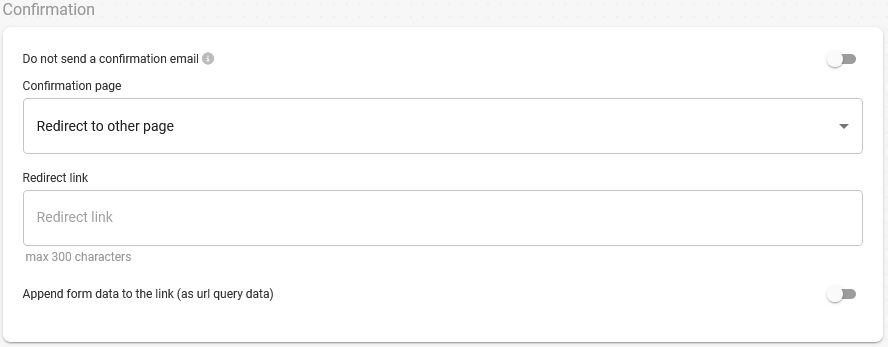
In the "Redirect link" field, just enter the URL of the confirmation page you have created and hosted on your own server.
If you also want the variables with the booking information to be added to the URL, simply activate this option. This way, you can create your own script to customize the confirmation page with the booking data.
When you're done, click on the "Save" button to save the changes. From then on, your own confirmation page is displayed whenever your customers make a reservation with you.