
TuCalendi lets you log in with the Single Sign-On feature through Microsoft Entra ID (formerly Azure Active Directory). In this article, you'll learn how to create an Entra ID application and configure Single Sign-On (SSO) for your TuCalendi account. Once you set up SSO, your users can access TuCalendi seamlessly with their Microsoft account (https://myaccount.microsoft.com).
This feature is only available with a TuCalendi Pro account.
Create and set up a Single Sign-On app in Microsoft Entra ID
Create an Entra ID application
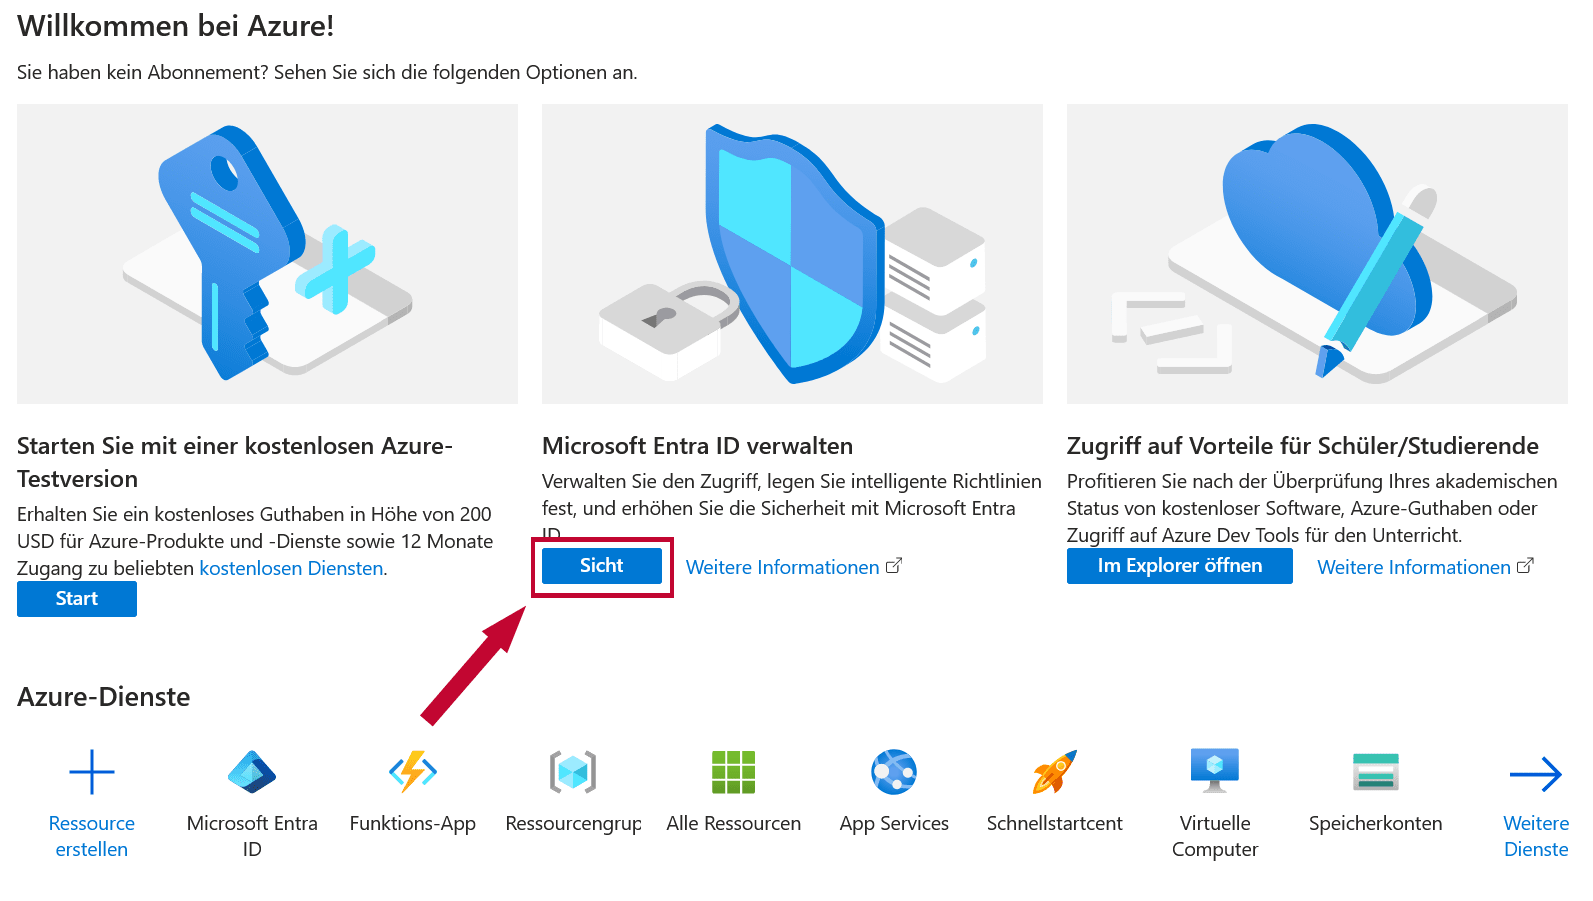
- Sign in to the Azure portal (https://portal.azure.com). Once you've successfully signed in, open Microsoft Entra ID management.
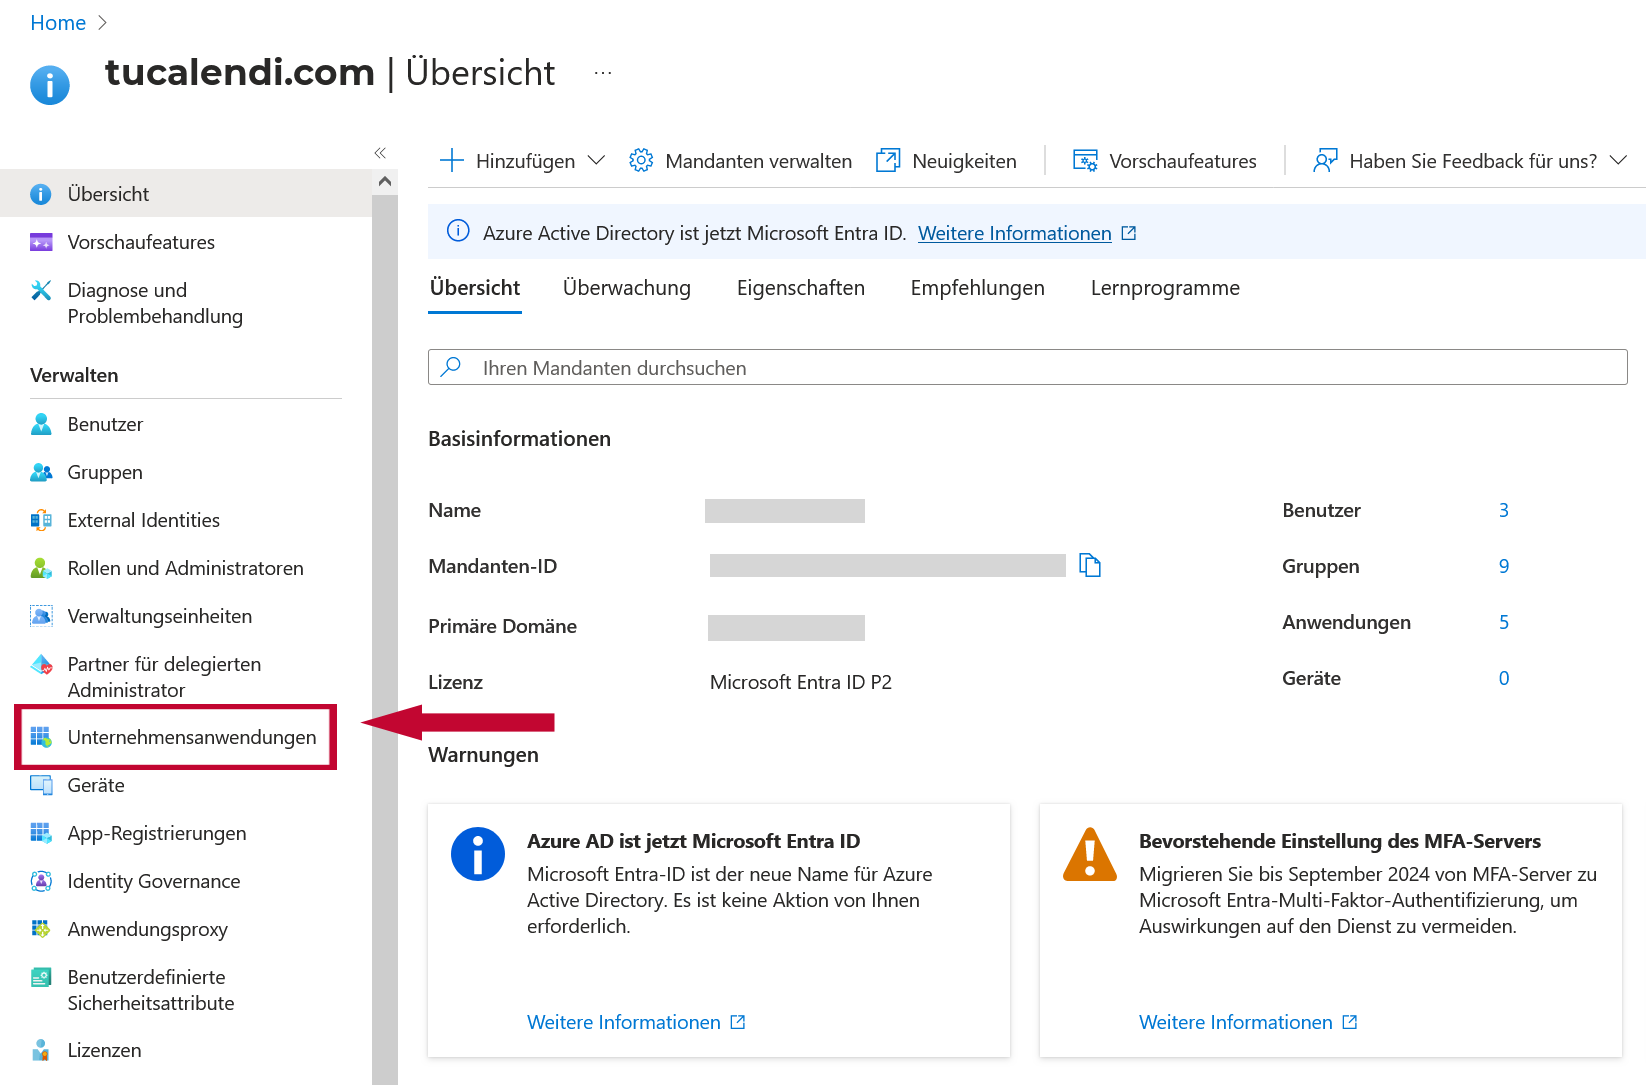
- In the left main menu, open or click "Enterprise applications" to see an overview of the applications you use.
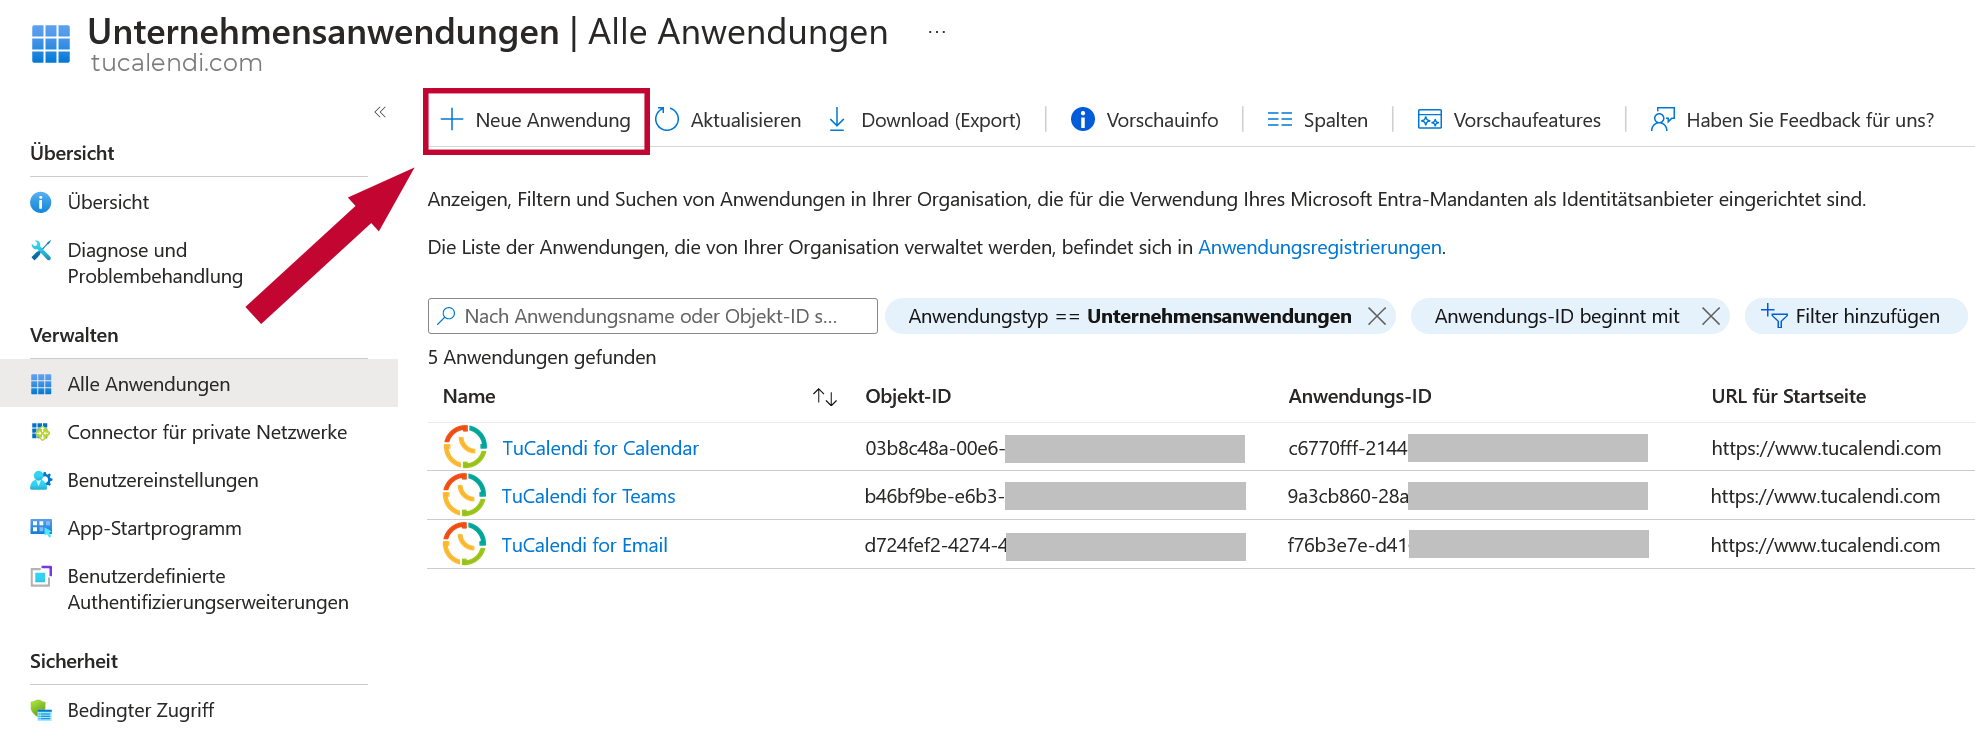
- Click "New application" to start creating the application.
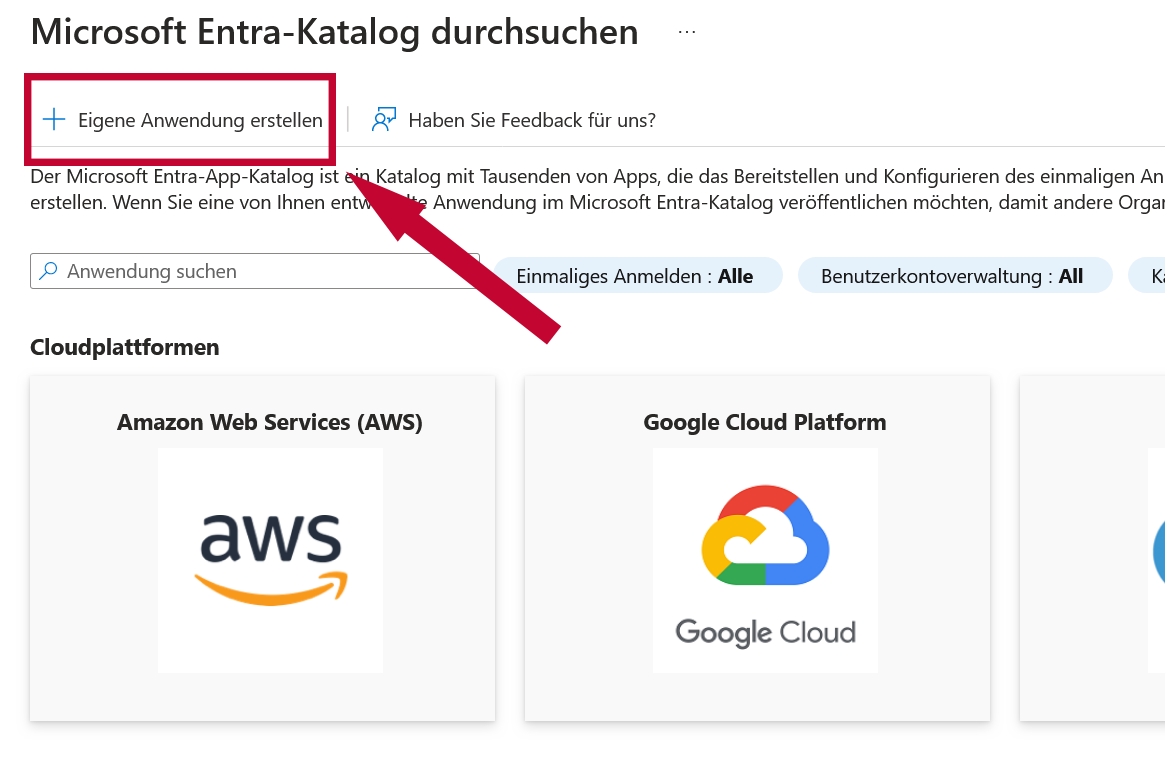
- You're now in the overview of all applications you could install, but here you need to create your own application. To do this, click "Create your own application". Then give your application a name (whatever you like), select the option "Integrate any other application you don't find in the gallery" and click "Create" to create the application.
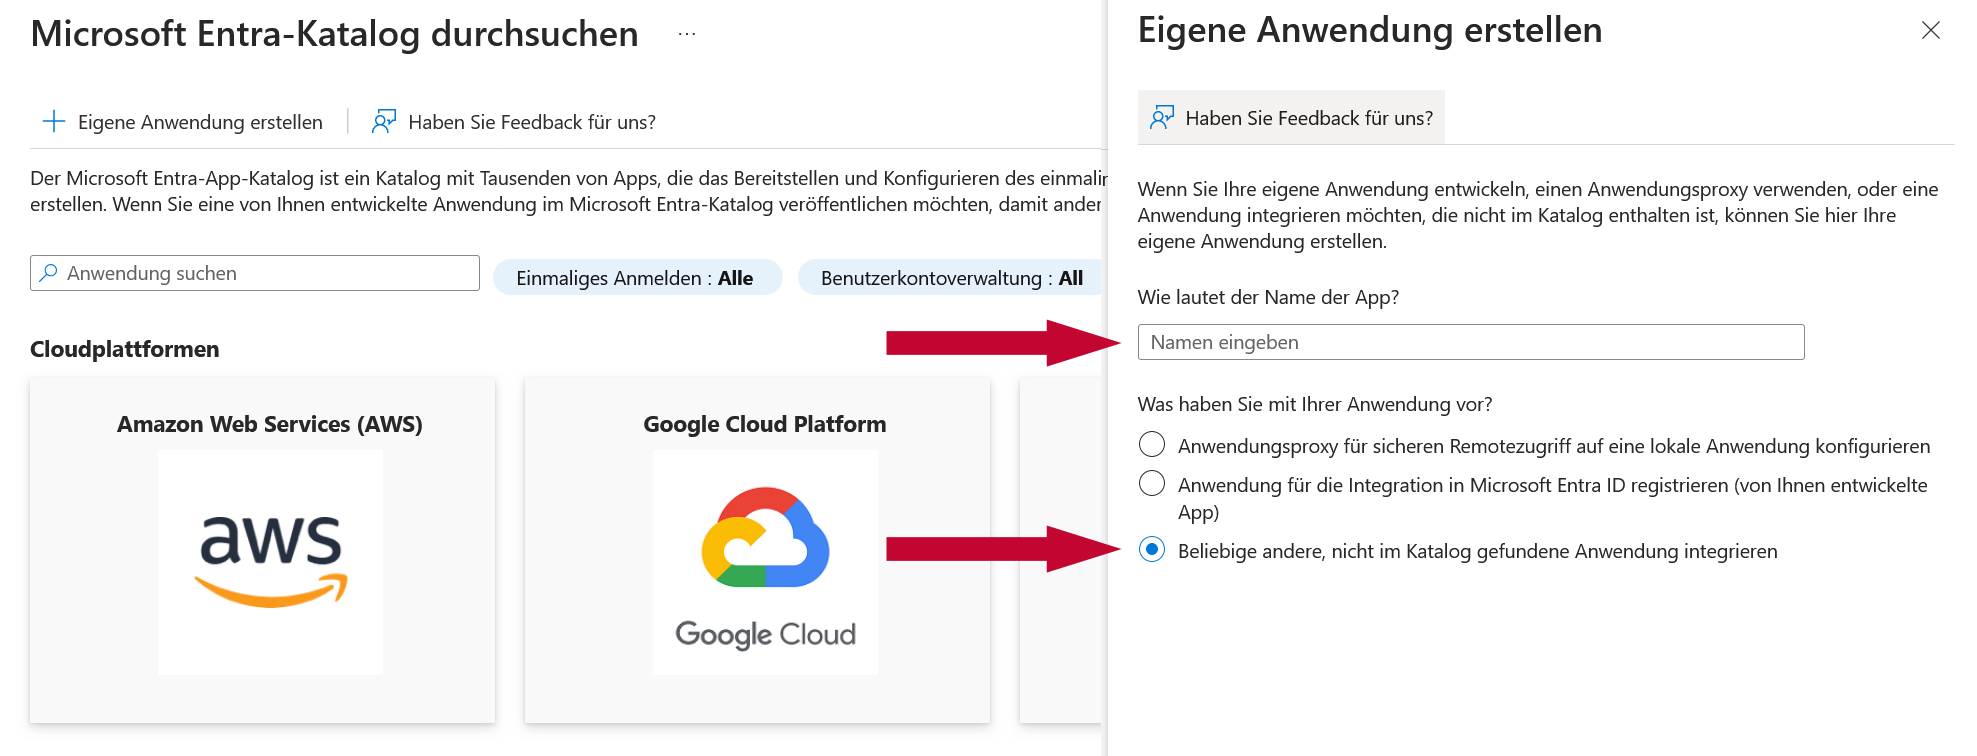
- Now that you've created your own Microsoft Entra ID application, you should be in the overview of your new application. If not, just click "All applications" in the Enterprise applications overview. There you'll see all the applications you use, including the one you just created. Click your application and you should land in its overview. Now you can start configuring your application.
Set up the Entra ID application: add users
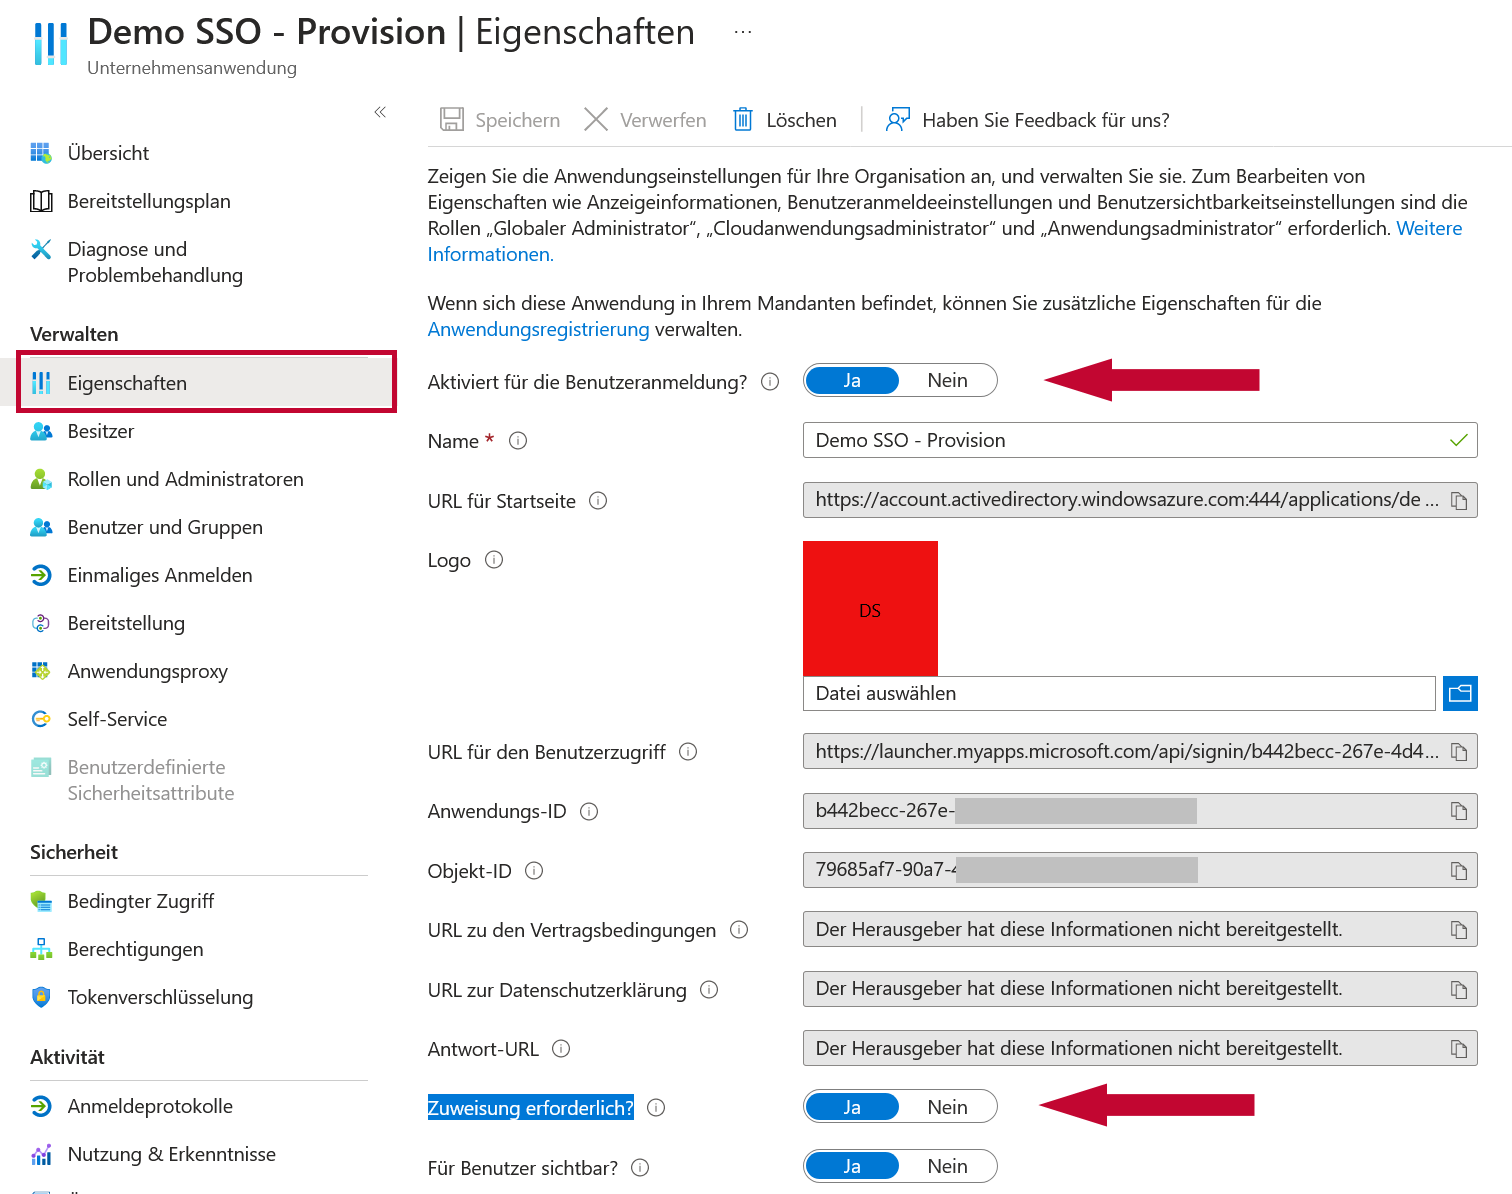
- For users to log in to TuCalendi through this application, the option "Enabled for users to sign-in?" must be set to "Yes". You can check this by clicking "Properties" under Manage in the menu. You should also check whether the option "Assignment required?" is also set to "Yes". We don't recommend setting this option to "No", because then any user could log in.
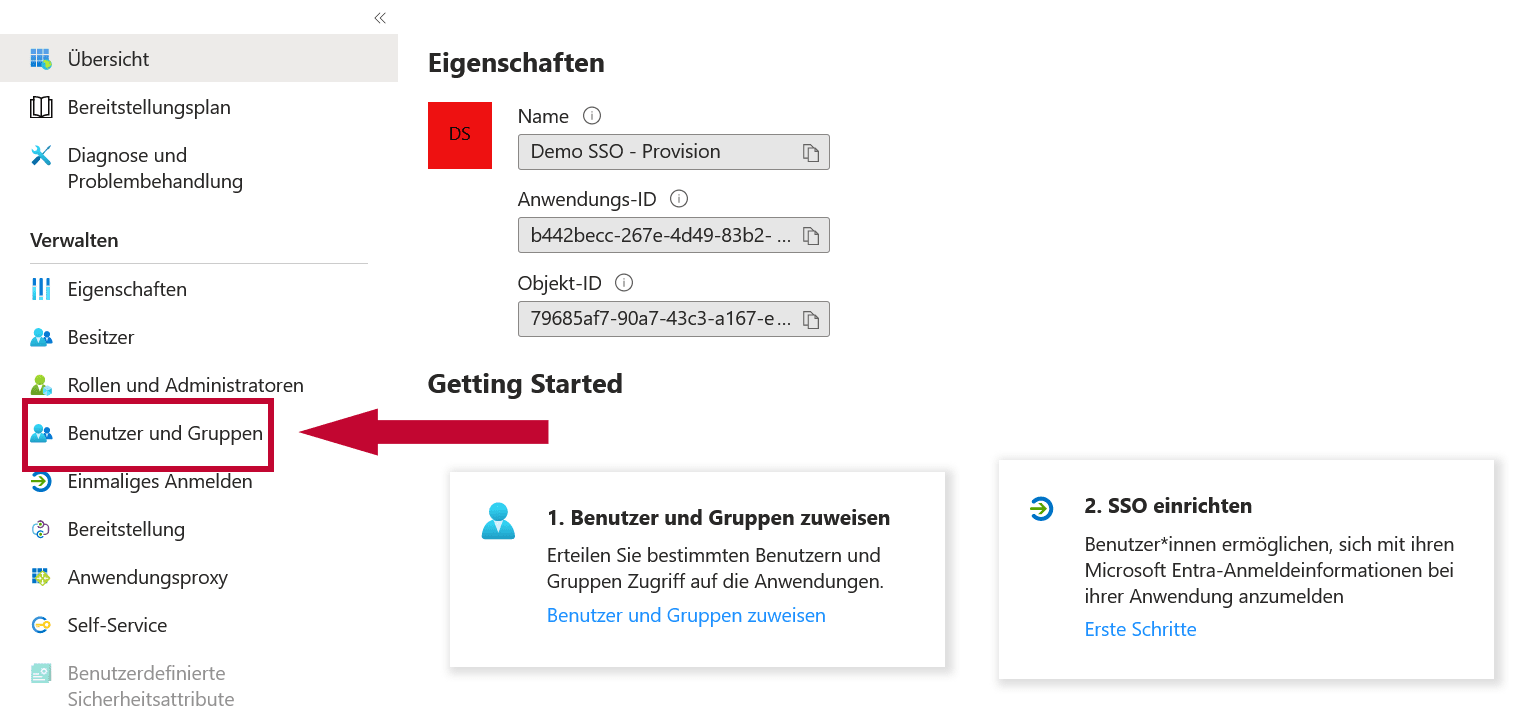
- Assign users and groups. You need to assign the users to the application who should be able to log in to TuCalendi via Single Sign-On through this application. To do this, click "Users and groups".
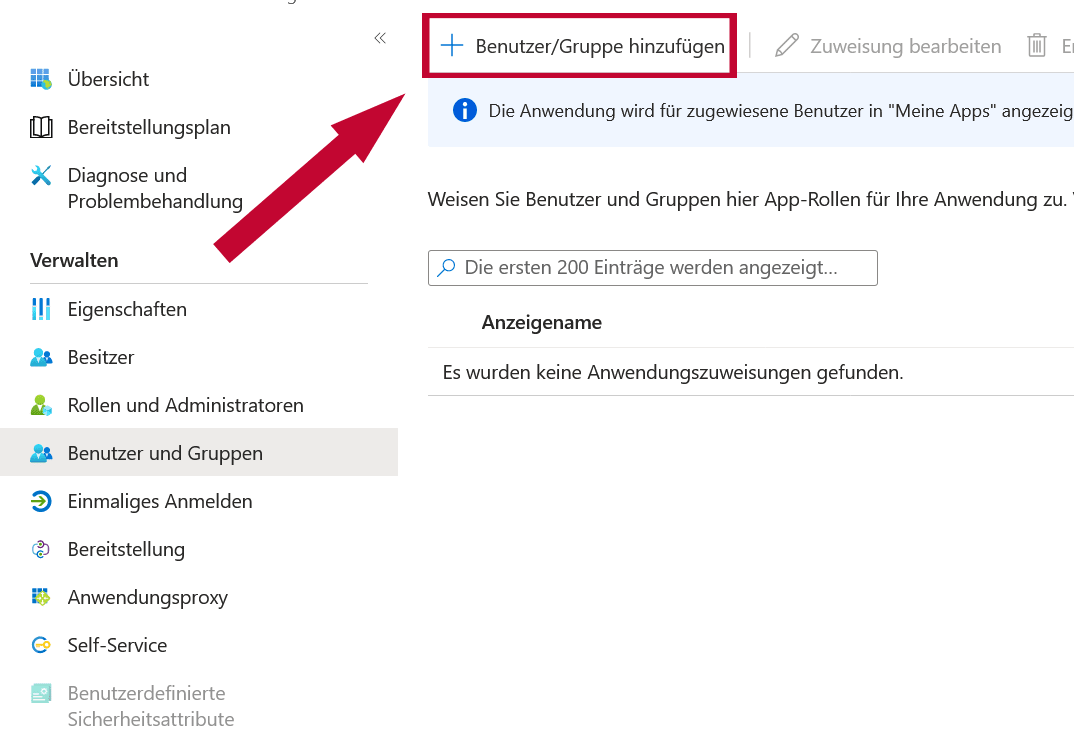
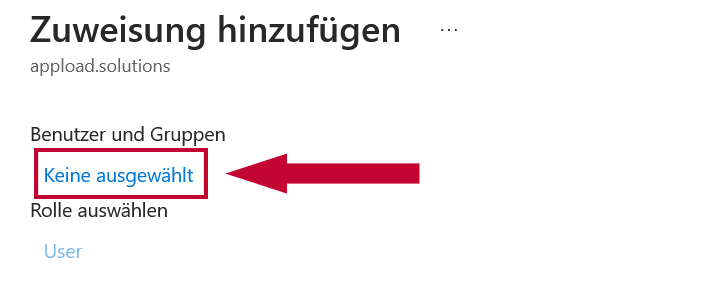
- Then click "Add user/group". In the popup that follows, select all users who are allowed to log in to TuCalendi via Single Sign-On.
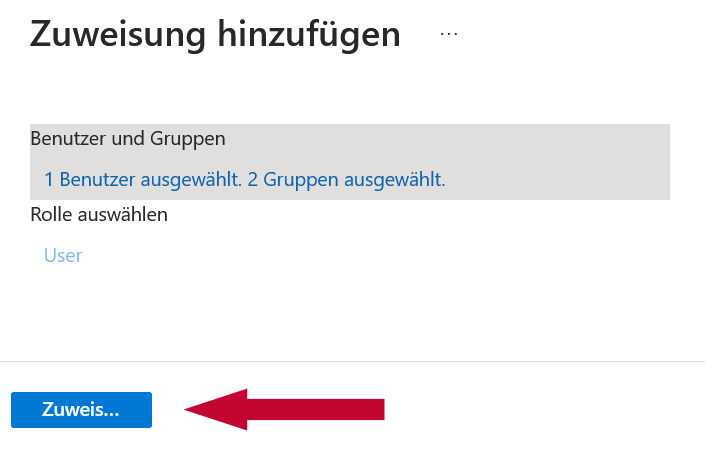
- Once you've selected all users, just click "Assign". You can add or remove users at any time.
Set up the Entra ID application: enable SAML SSO
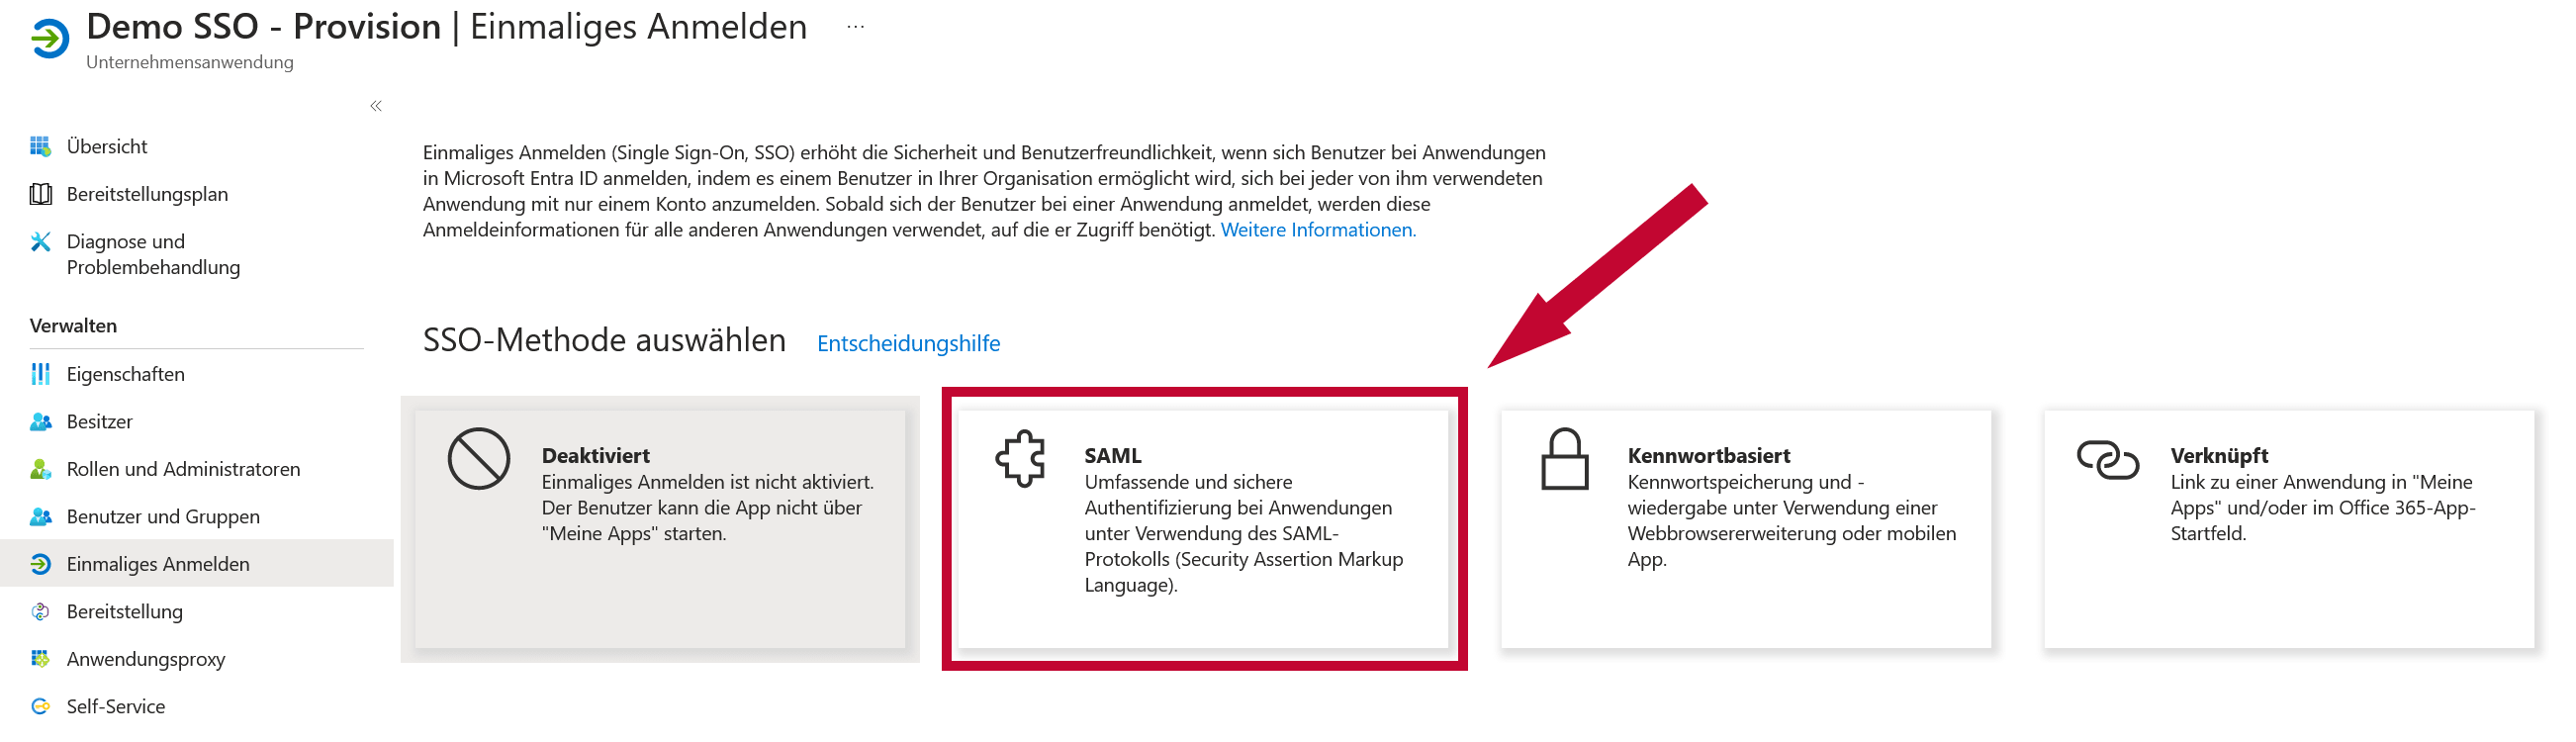
- Set up SAML SSO. To do this, click "Single sign-on" in the menu and then SAML (TuCalendi uses the SAML (Security Assertion Markup Language) protocol to exchange authorization data). Please leave the settings that open afterwards open for now and continue with the next step.
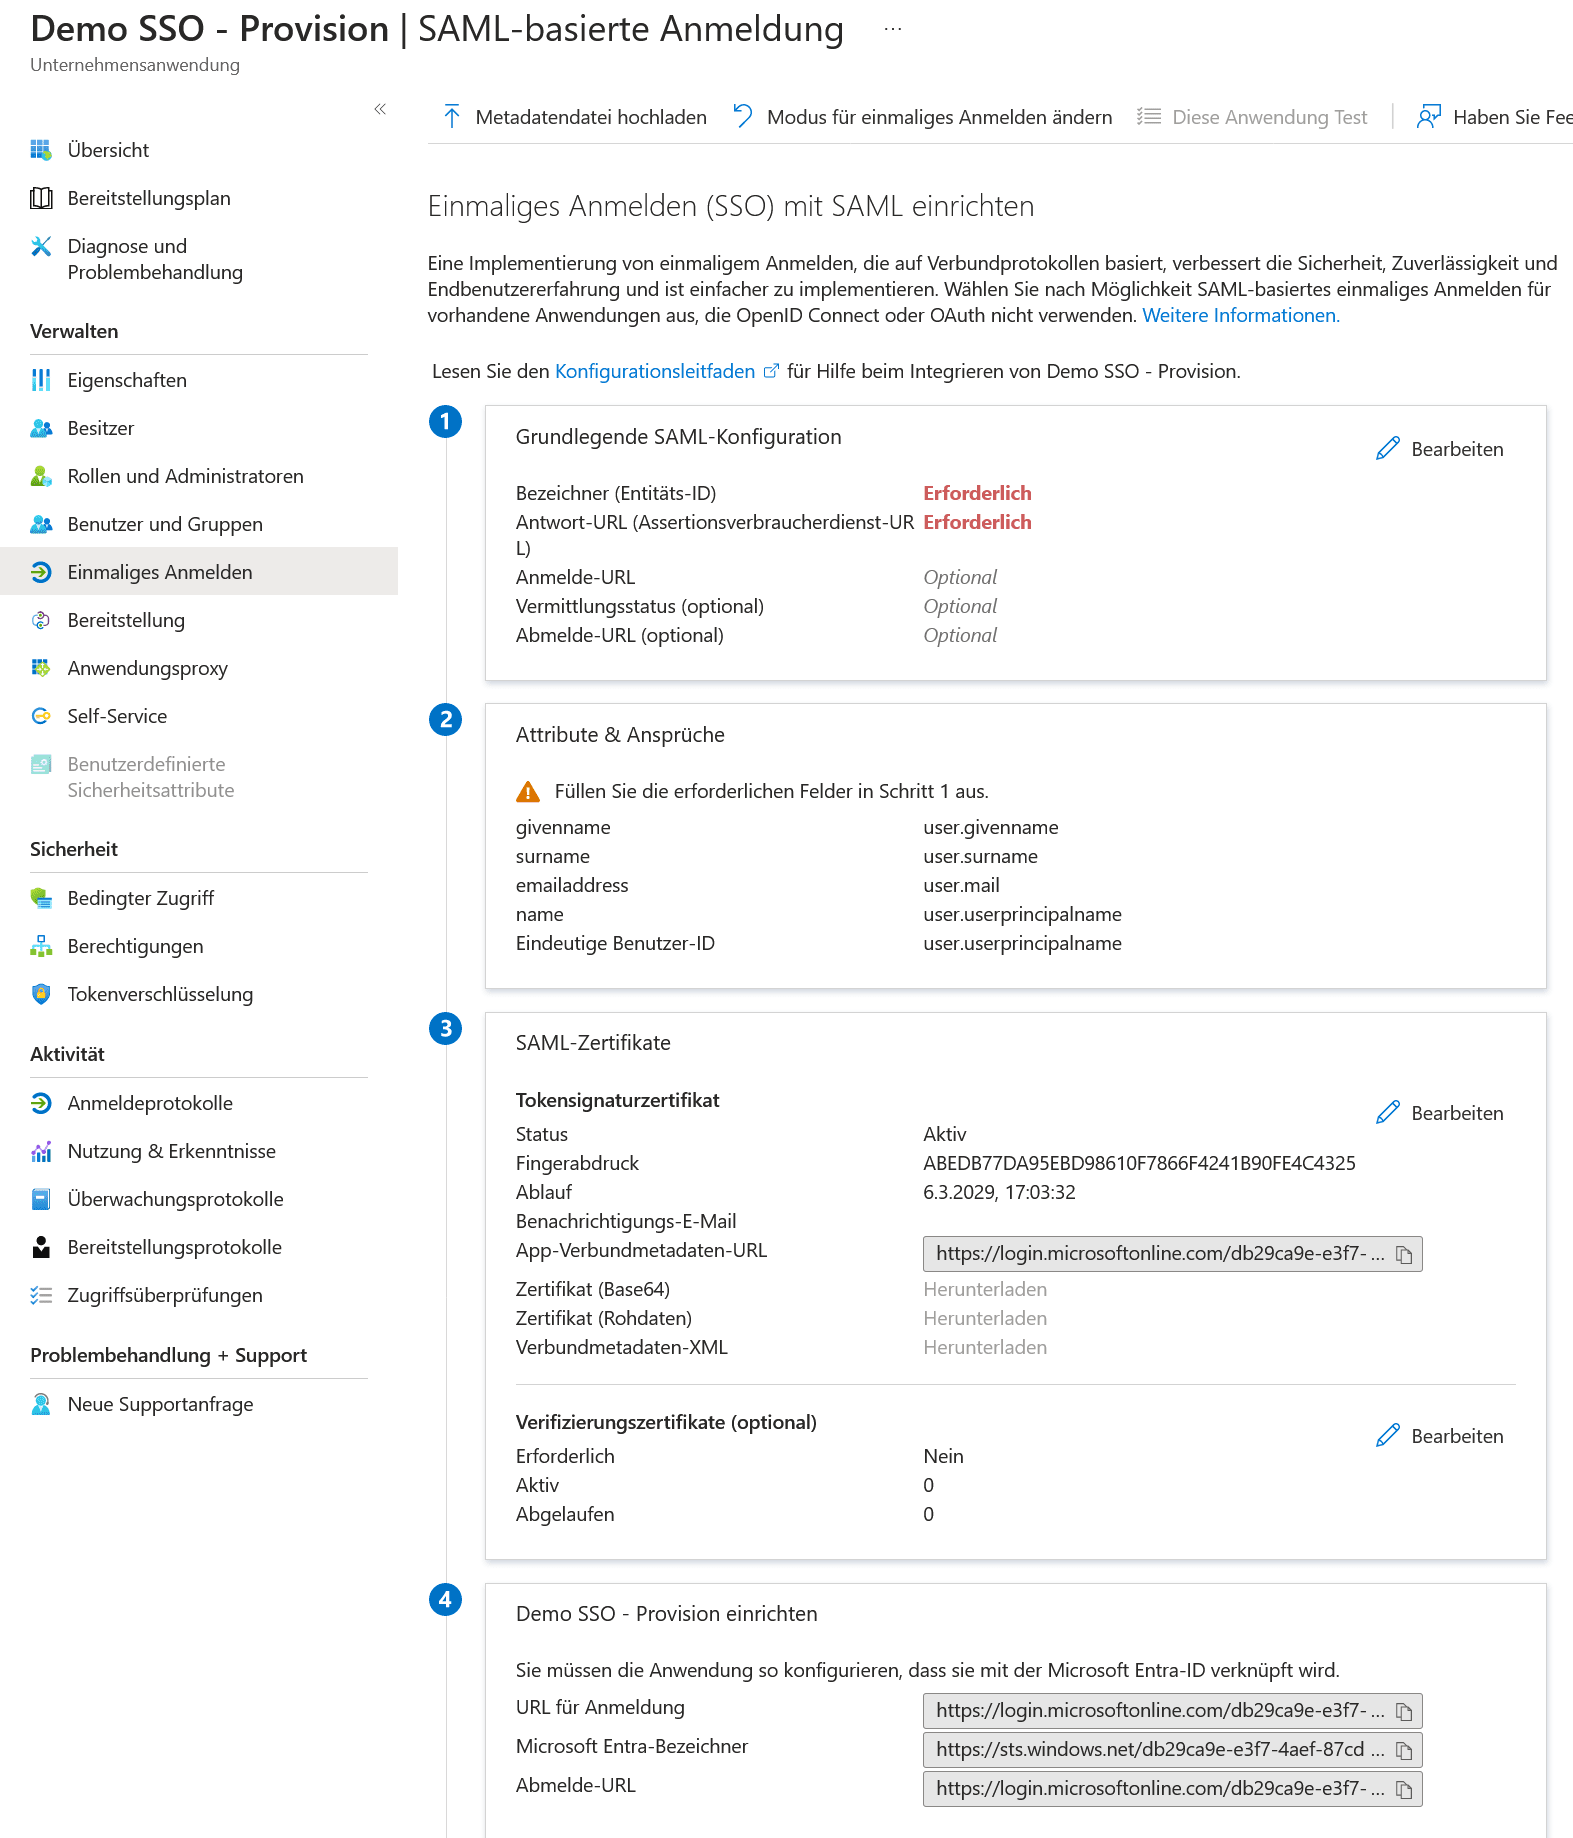
For now, please just leave the following settings open.
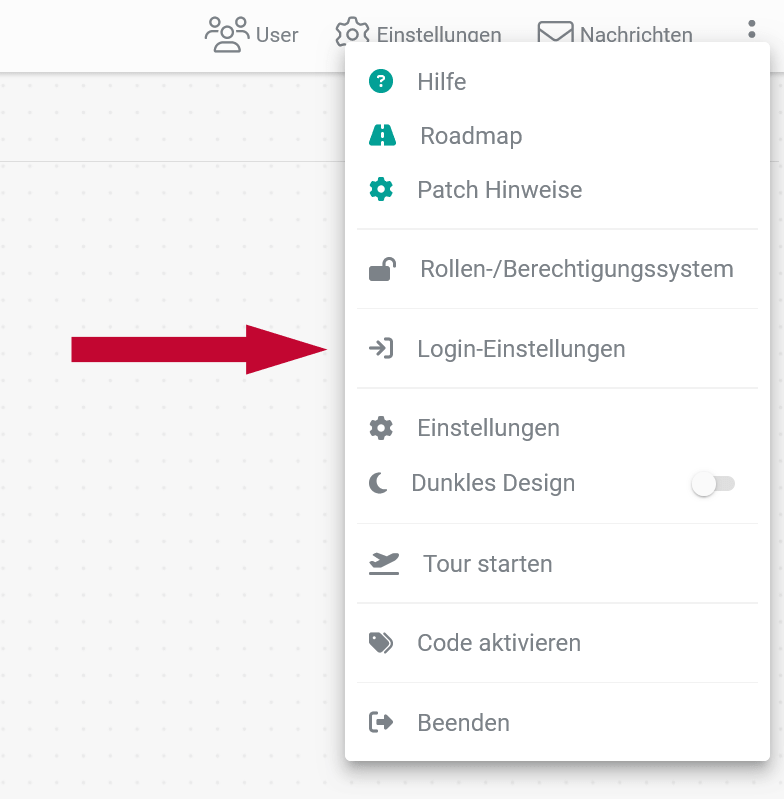
- To finish setting up SSO (Single Sign-On), you now also need to enable Single Sign-On in your TuCalendi account. Go to your TuCalendi account and click the 3 dots in the top right menu. A menu opens where you select "Login settings".
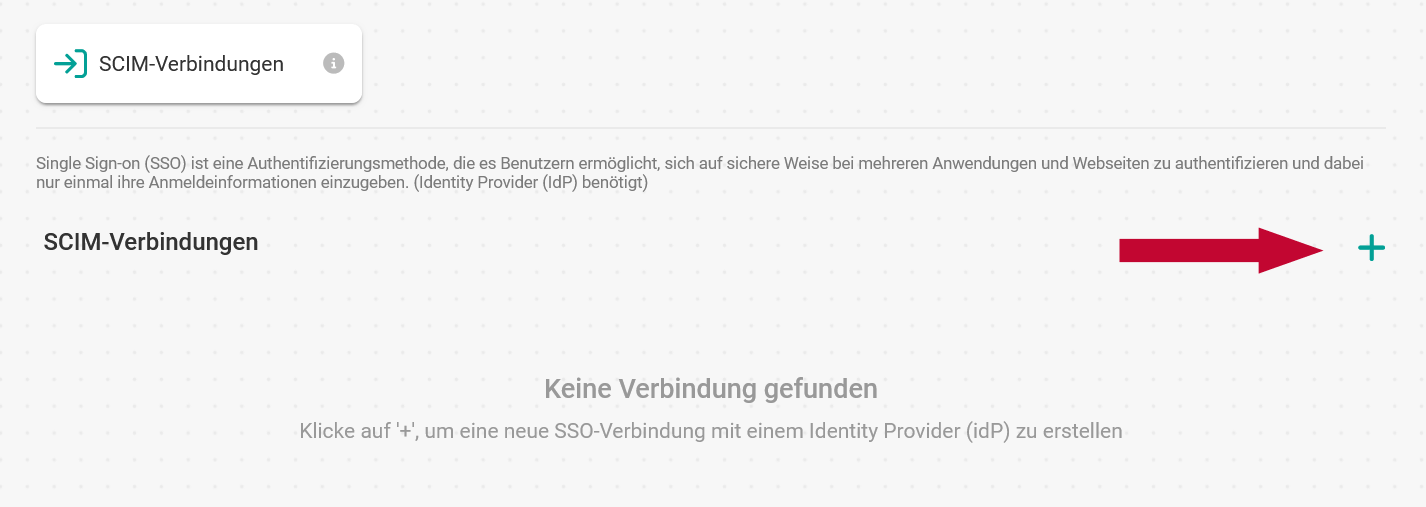
- Next, click the "+" to create a new connection.
- Then click the "Edit" icon and then "SSO settings" to open the data window. Now you'll copy the data from step 1 into TuCalendi and enter the data from TuCalendi into the SSO settings of your Entra ID application. The following image shows which data needs to go where.
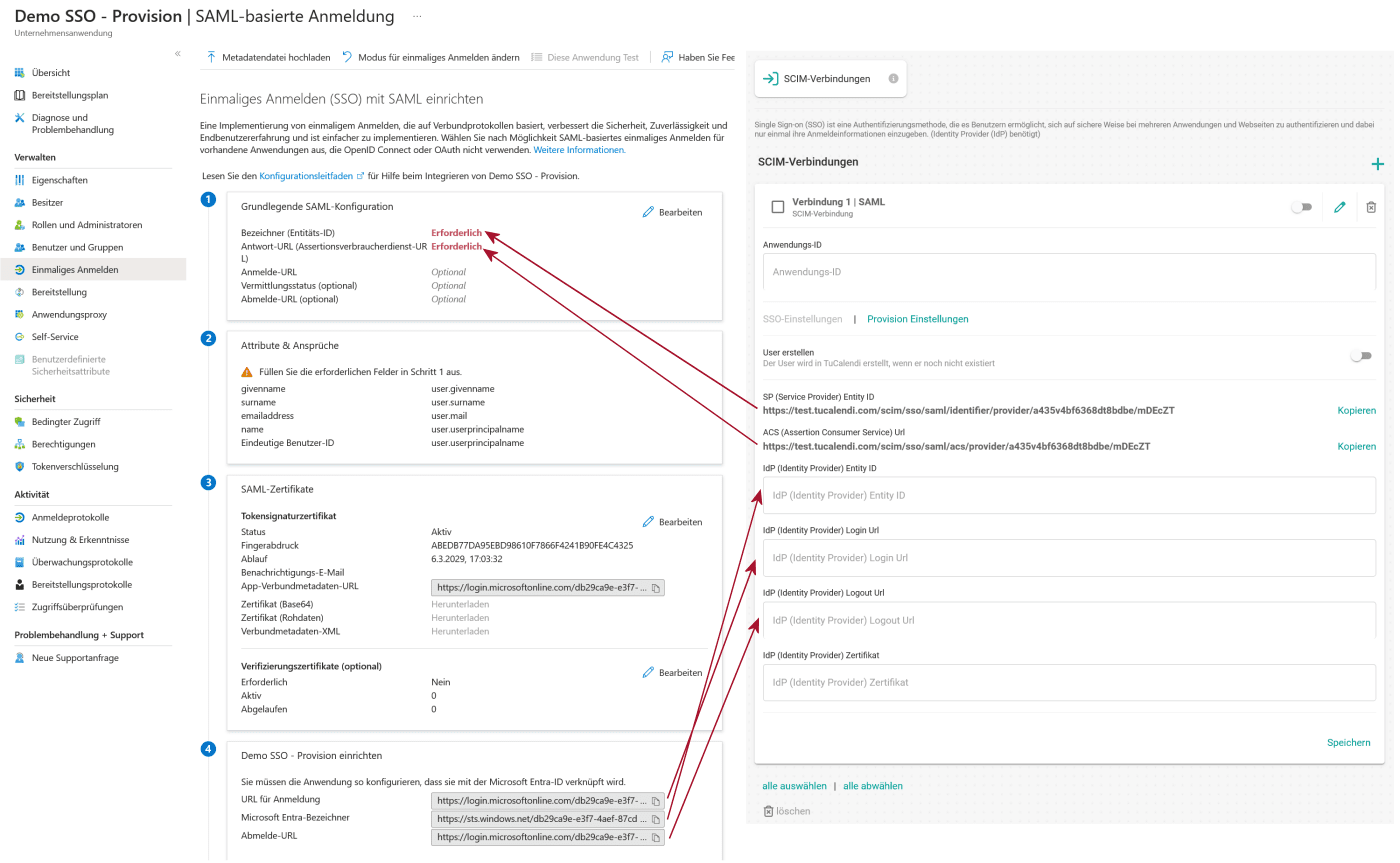
In your Entra ID application, edit section "(1) Basic SAML Configuration" and enter the data from TuCalendi (as shown in the image) into the corresponding fields. The 3 other fields
- Sign on URL
- Relay State (Optional)
- Logout URL (Optional)
must stay empty.
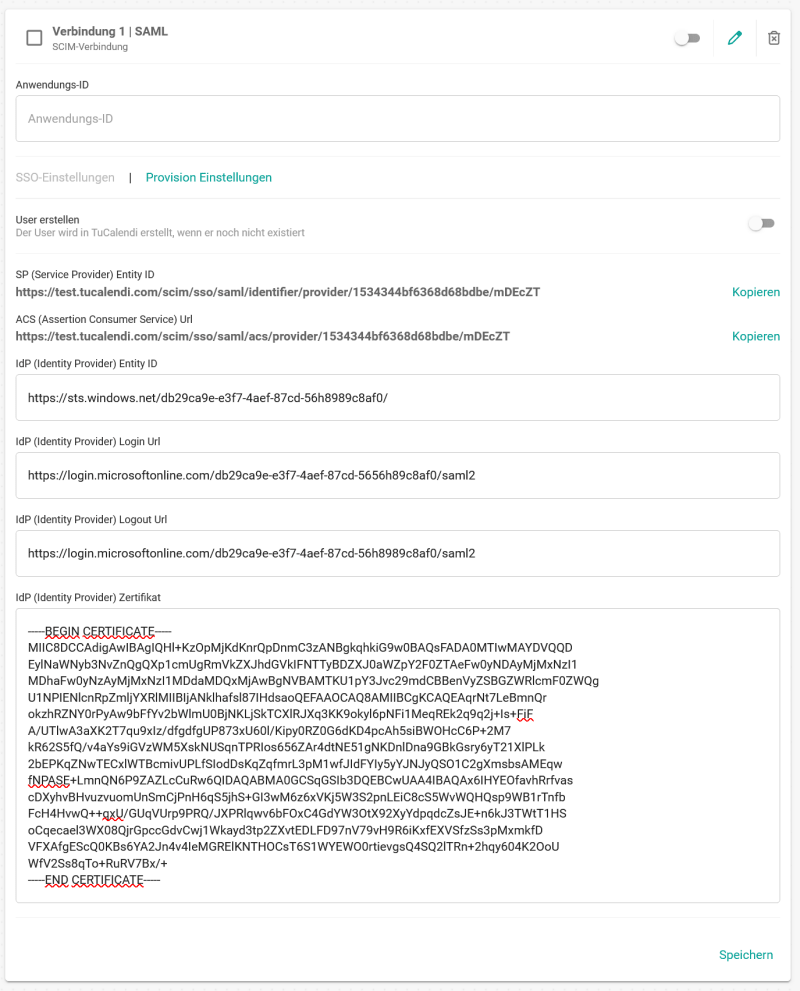
- Now download the SAML certificate from "(3) SAML Certificates" in "Base64" format, open it with a text editor and copy its content. Paste the copied content into the "IdP (Identity Provider) certificate" field in the TuCalendi SSO settings.
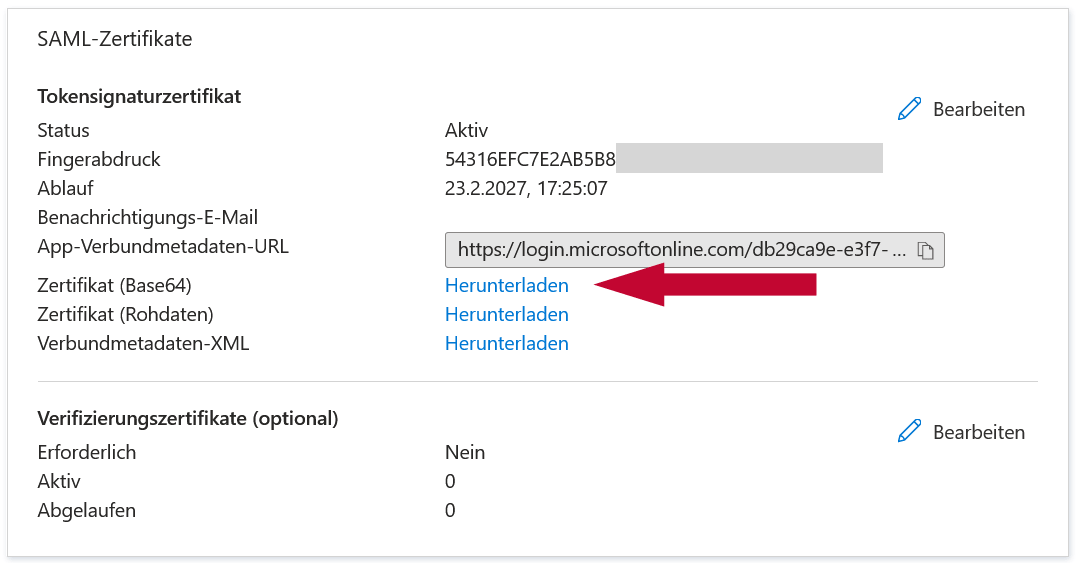
It should then look something like this:
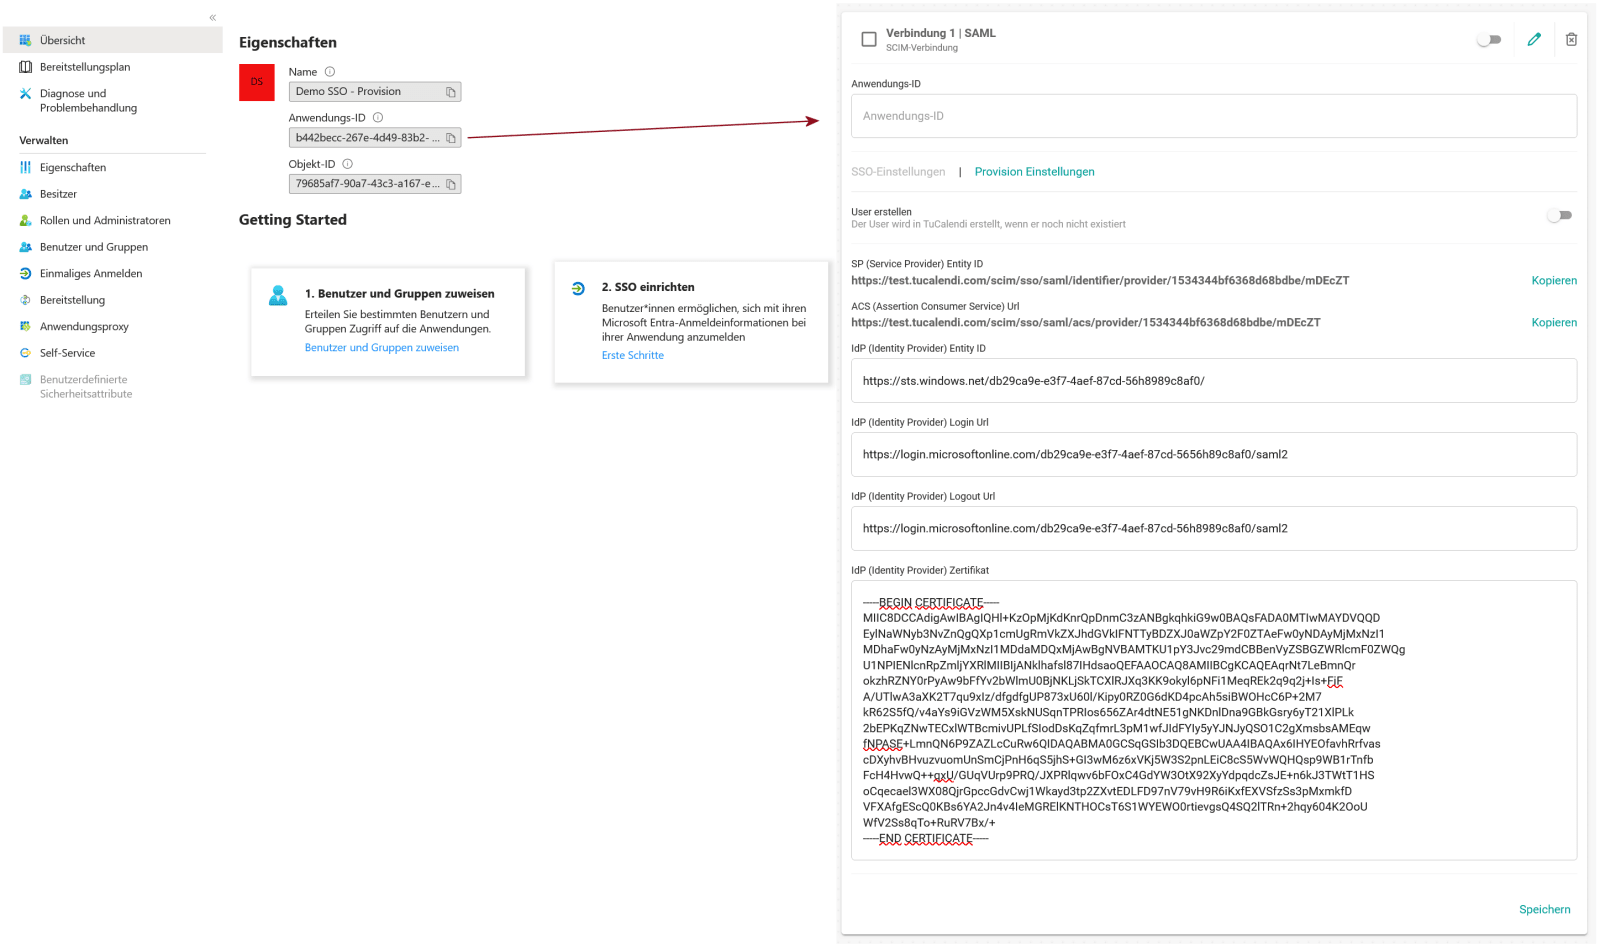
- Copy the Application ID and paste it into the "Application ID" field in TuCalendi. You'll find the Application ID in the overview of your Entra ID application.
- Now just save everything, both in your TuCalendi account and in your Microsoft Entra ID account, and you're done.
If everything is set up correctly, all assigned users should now be able to log in to TuCalendi via SSO with their Microsoft account (https://myaccount.microsoft.com).
If you run into any problems or difficulties during setup, our support team (support@tucalendi.com) is happy to help and will assist you with the setup as best they can.