
Once you have set up the integration between TuCalendi and ClickUp, you need to connect the events you want with ClickUp. This way, when your customers schedule a meeting with you or confirm attendance to any event, the task is created in the corresponding ClickUp workspace.
Log in to TuCalendi with your username and password. Go to the "Calendars" option.
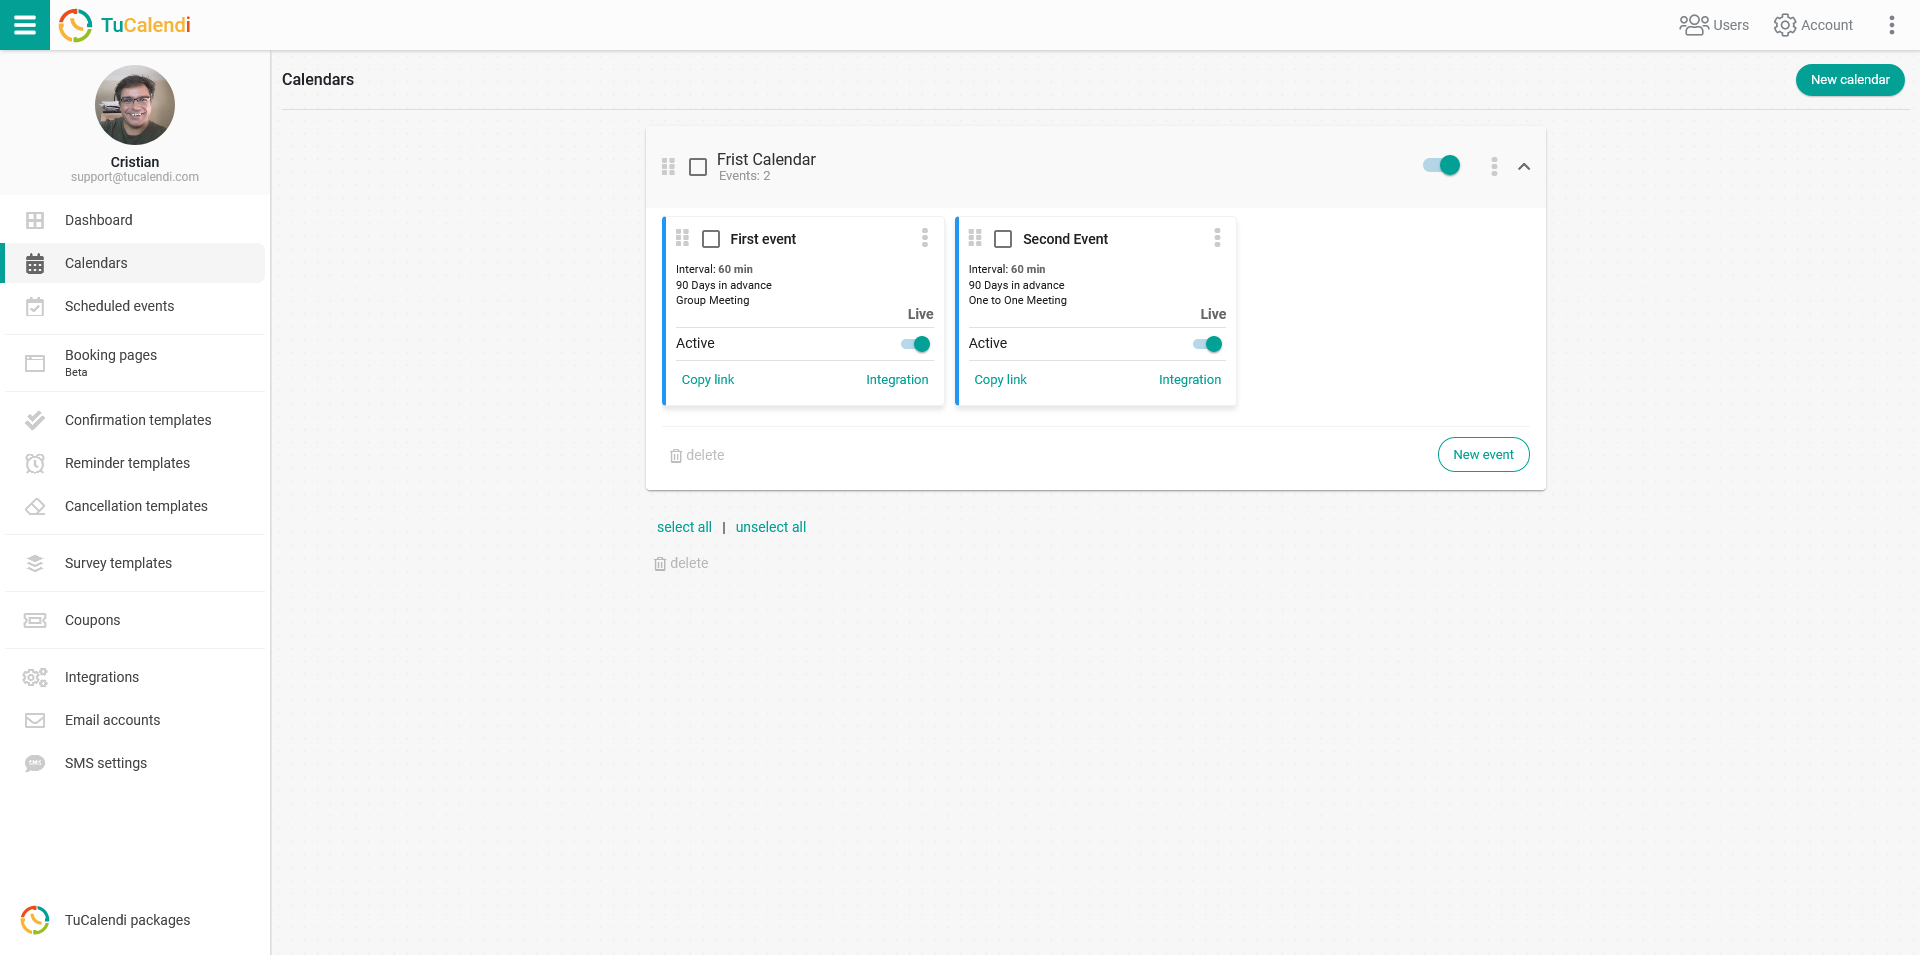
Locate the event you want to connect to ClickUp and click on the event name.
All the event configuration options appear in the horizontal menu.
Click on "Integrations".
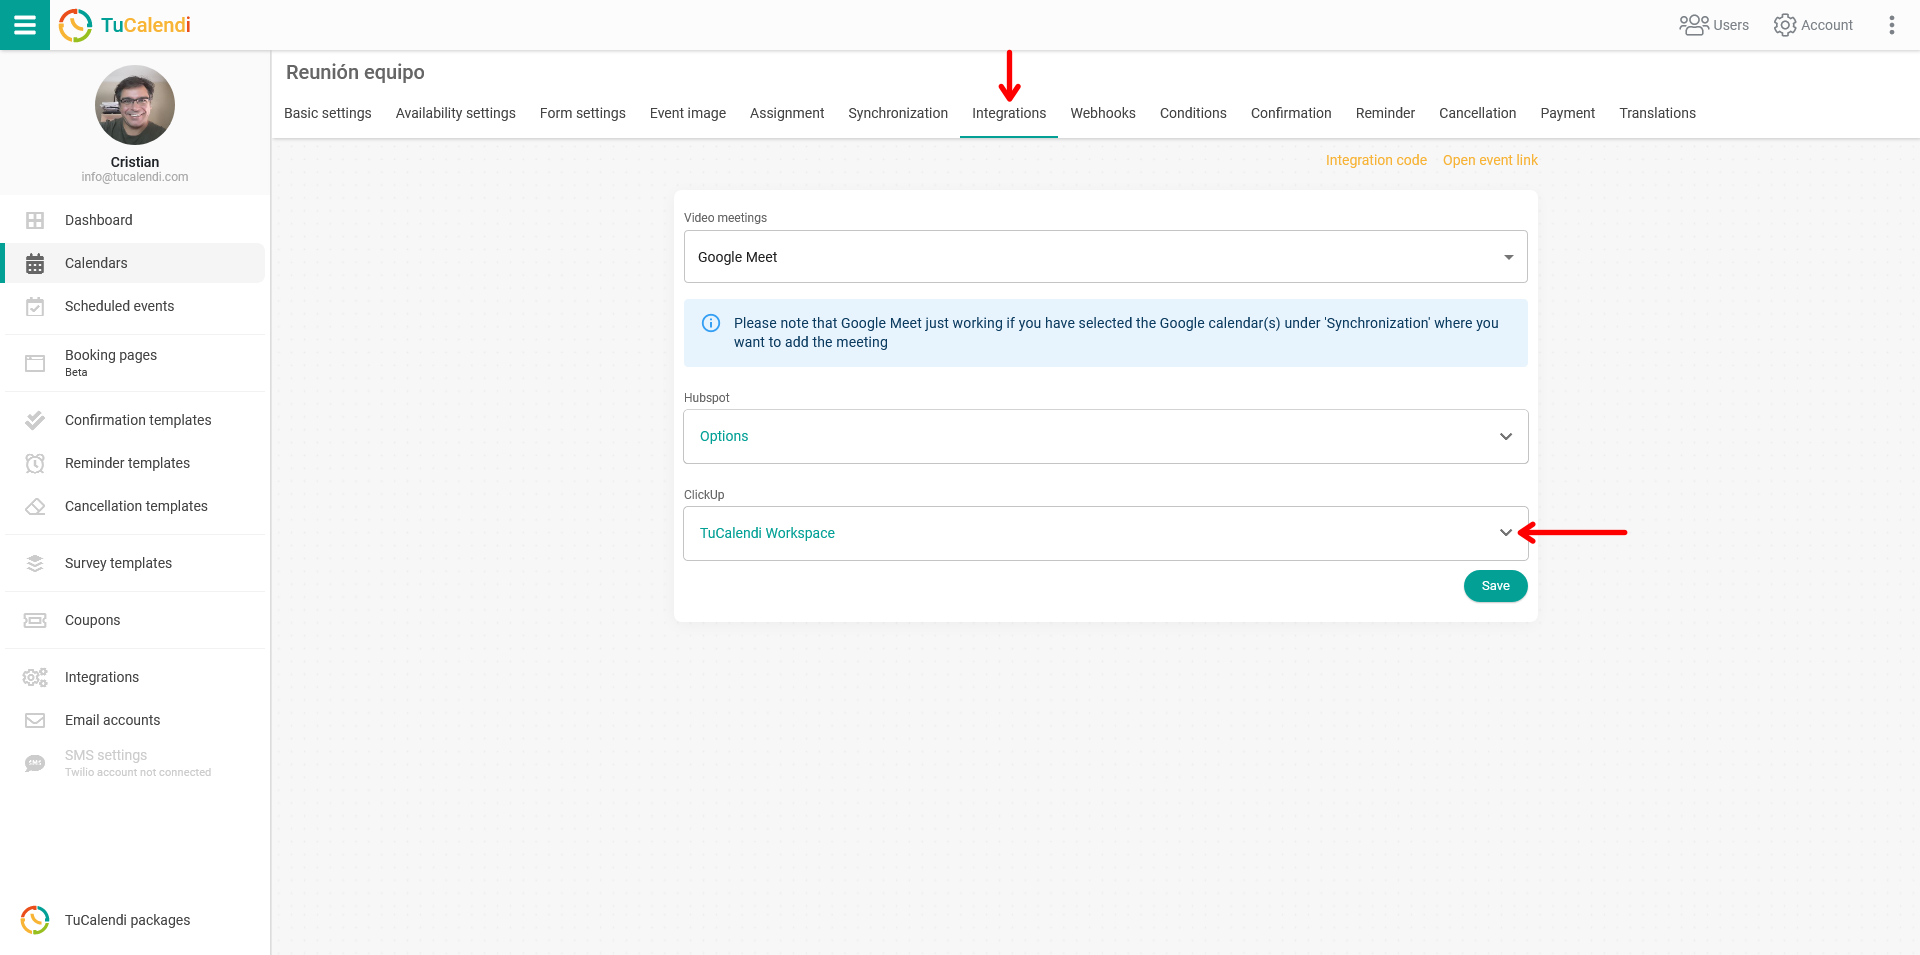
In the "ClickUp" block, expand your workspace and choose where you want the task to be created once your clients have scheduled a meeting with you from TuCalendi.
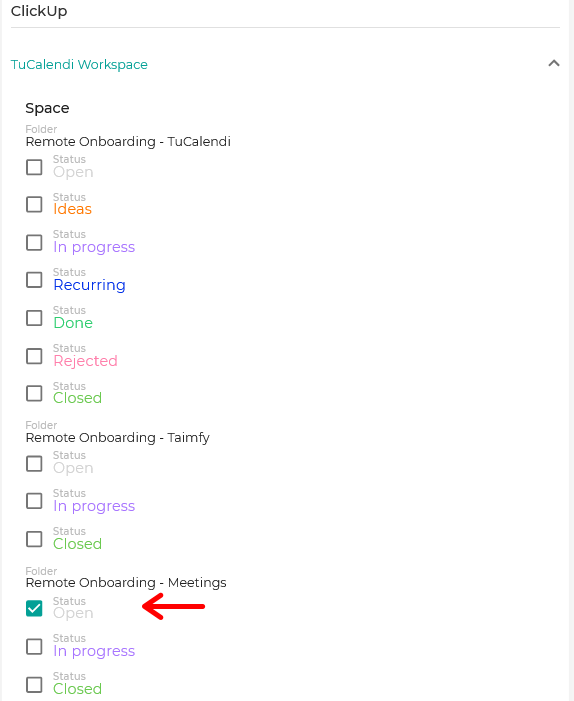
In our case, our TuCalendi workspace has different folders, and we want a task to be created in the "Meetings Folder" of our ClickUp workspace every time a client schedules a meeting, appointment or event with us.
When you have done this, click "Save" and the integration of the event with your ClickUp workspace is complete.
REMEMBER: Before connecting the event with ClickUp, you must have integrated TuCalendi with ClickUp.