
If you have your own domain, you can add a CNAME record to your domain's DNS records so that it points to your booking page domain on meetfy.online. This makes the process transparent to your customers.
The option to create a CNAME record pointing to your meetfy.online domain is only available on TuCalendi's paid plans. On the Basic Plan, which is completely free but has limitations, you can create your booking page, but you can't use a CNAME record pointing to it.
What is a CNAME record?
A canonical name record, usually known by the abbreviation CNAME, is a type of record in the domain name system (DNS) that maps an alias of a domain name to another domain.
CNAME records are often used to point to a host or to point the "www" version of a domain to the main domain.
You create the CNAME record through your domain provider, which is usually where you purchased your domain name. The most popular domain hosts include GoDaddy, enom and 1&1 IONOS, to name a few.
Let's create a CNAME record at GoDaddy. If you use a different domain provider, the process is similar, but the screens you go through will look different.
If you created your account directly in TuCalendi V3 or have already completed the migration to this version, the CNAME setup is different from the one described in this article. In TuCalendi V3, the CNAME record in your DNS manager must point to cnameserver.meetfy.me. It must not point to your account domain on meetfy.online. Please see the updated tutorial: How to configure a CNAME in TuCalendi.
1. Access your domain provider
This is usually where you bought your domain. In our example, we use GoDaddy.
2. Add the CNAME record to your domain's DNS records
To add the record, follow the steps below.
If you don't use GoDaddy, check your domain provider's help section for more specific instructions.
- Select the domain you want to work with and click "Manage DNS":

- Choose "Add" in the DNS settings:
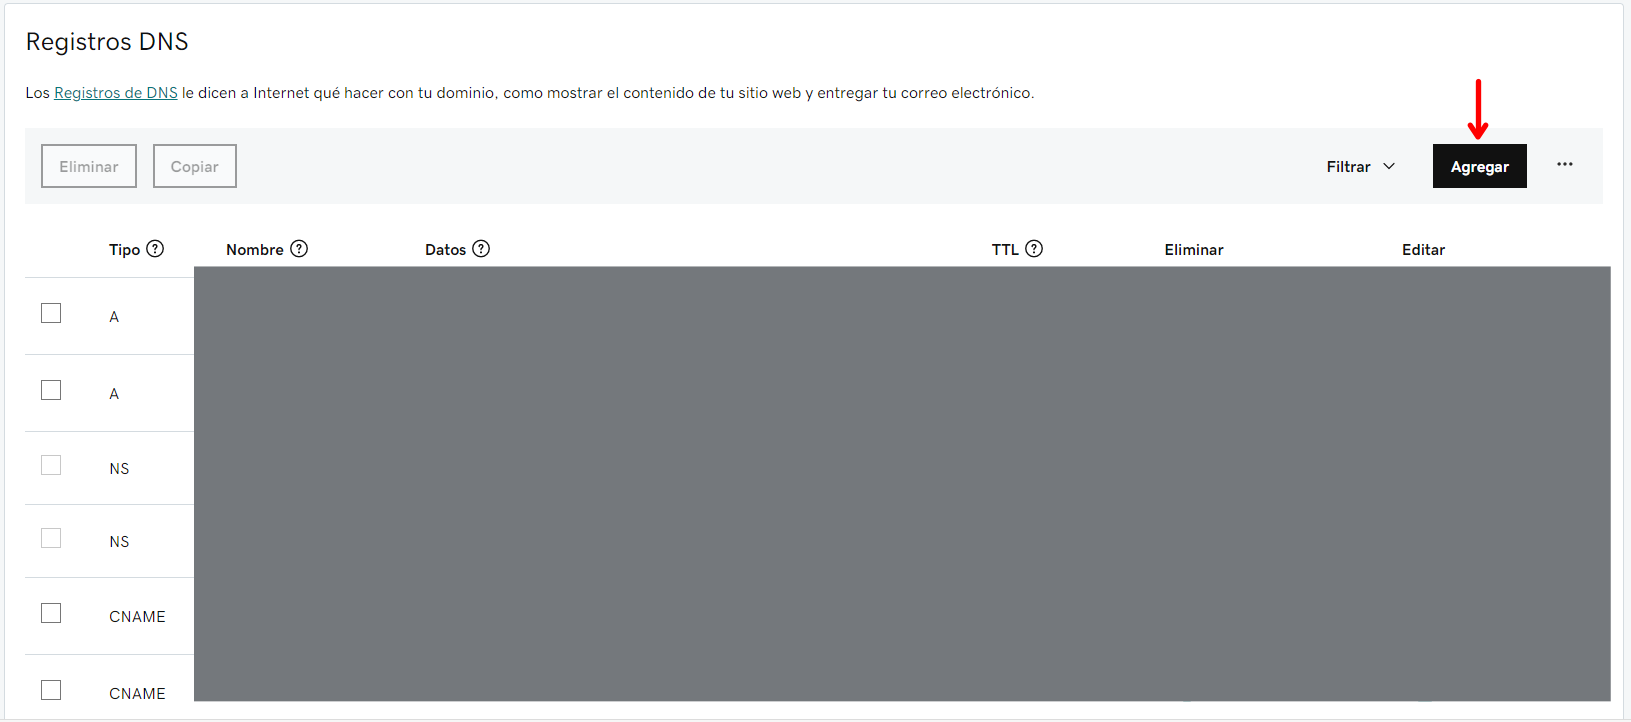
- Select the record type and fill in the remaining parameters.
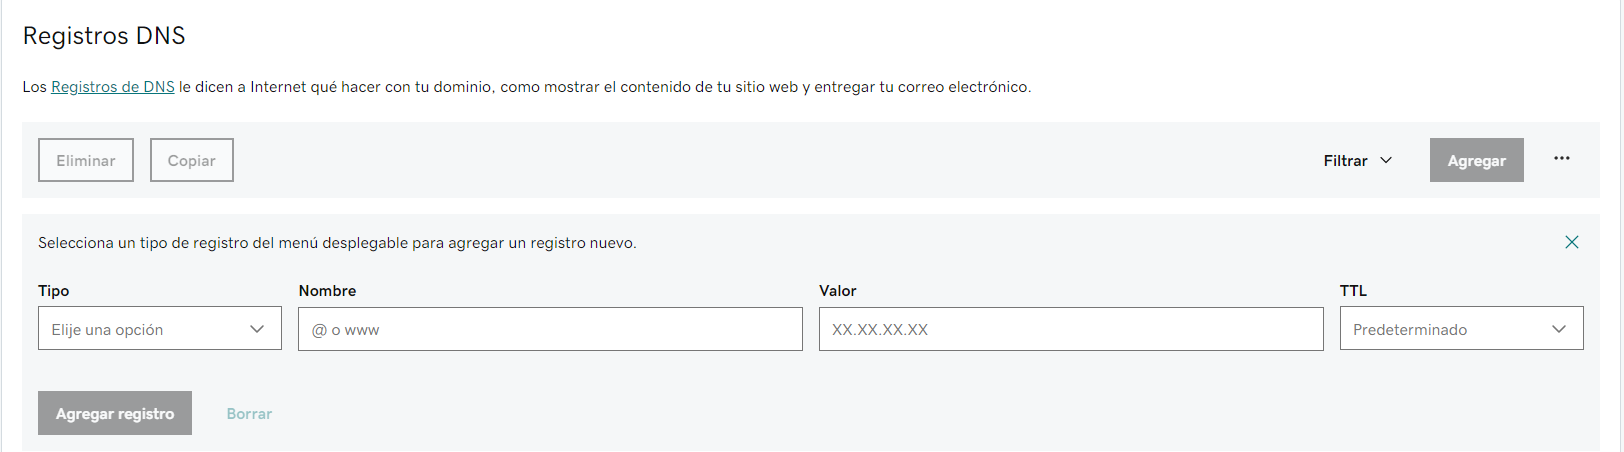
In the "Type" field, open the drop-down menu and select "CNAME".
In the "Name" field, enter the subdomain alias you want. In our example, we use "Bookings".
The "Value" field defines where the record you are creating will point to. We want to point it to the domain we created for the TuCalendi booking page. In our example, we named it "wehelpyou.meetfy.online".
Finally, in the "TTL" field, select 1 hour or set the value to 3600 seconds.
Click "Add record".
The record will be created and will appear in the list of records associated with the domain:

CNAME record changes can take up to 48 hours to propagate across the network, but they usually take effect very quickly.
3. Go back to your TuCalendi account
Go to "Booking Pages" and click "Edit" on the domain you created.
In the window that appears, enter the domain alias:
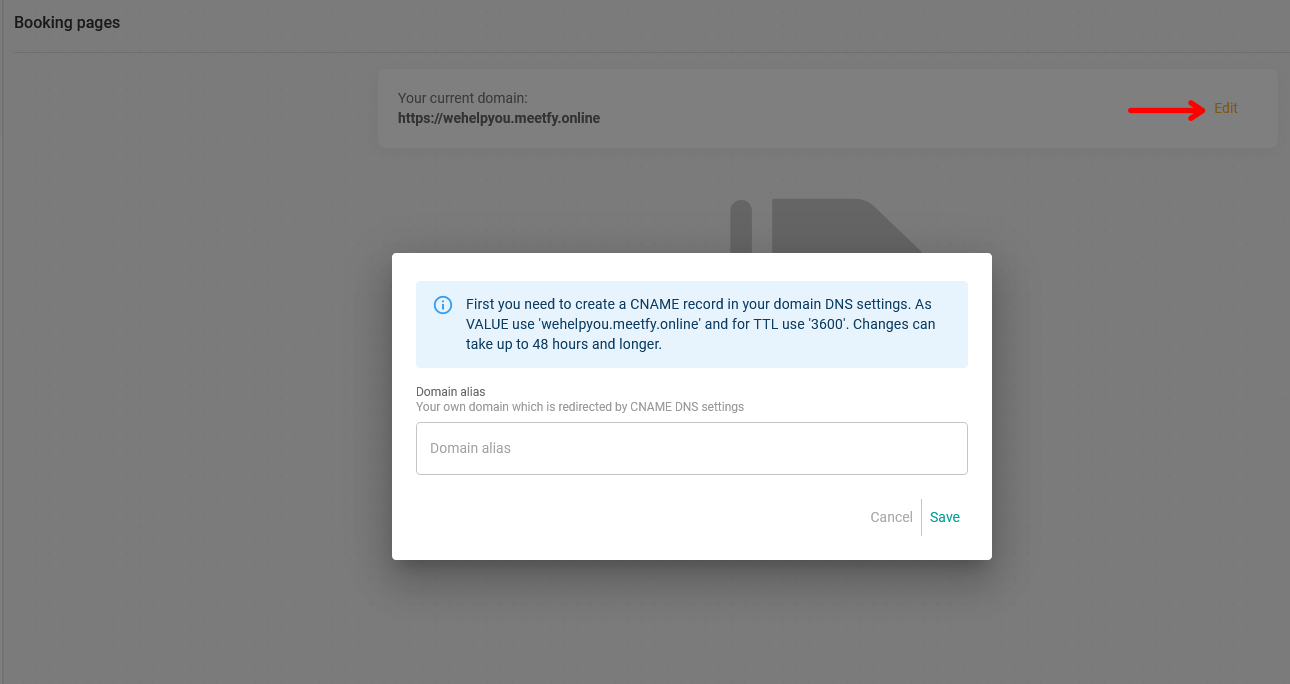
In the "Domain Alias" field, enter the alias you created for the CNAME record. In our example, it is "bookings.ulawbox.com".
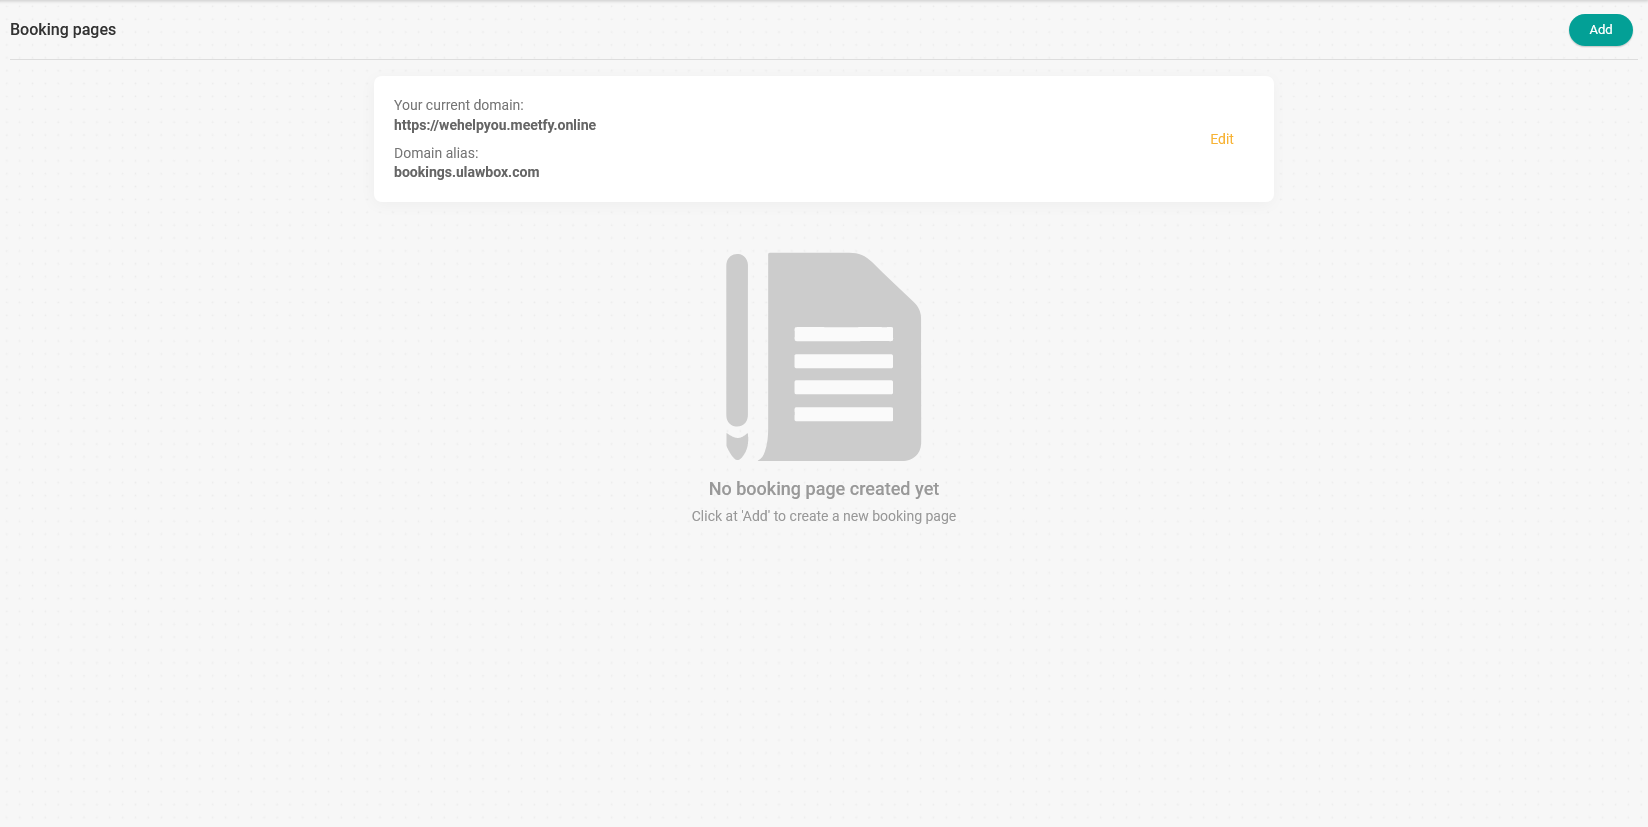
These are the steps you need to follow to create a CNAME record at GoDaddy and get your custom domain up and running for your TuCalendi booking page.