
With Microsoft Entra ID (formerly Azure Active Directory), you can provision user data and sync it with your TuCalendi users. In this article, you'll learn how to use the provisioning feature of Microsoft Entra ID. This setup requires that you've already created an SSO connection in TuCalendi. If you haven't done this yet, you need to do it first before you can use provisioning.
This feature is only available with a TuCalendi Pro account.
The user provisioning feature
User data and groups set up in Entra ID can be synced with TuCalendi. For example, when a new user is added to Entra ID, a new user can automatically be added to TuCalendi and can then start working with TuCalendi.
You can use the provisioning feature with the following actions:
- Add, update and deactivate users
- Add, update and remove groups
Note:
Provisioning can't remove users from your TuCalendi account, but it can deactivate them.
To sync groups, you need a paid license for your Microsoft Entra account.
Enable provisioning in TuCalendi
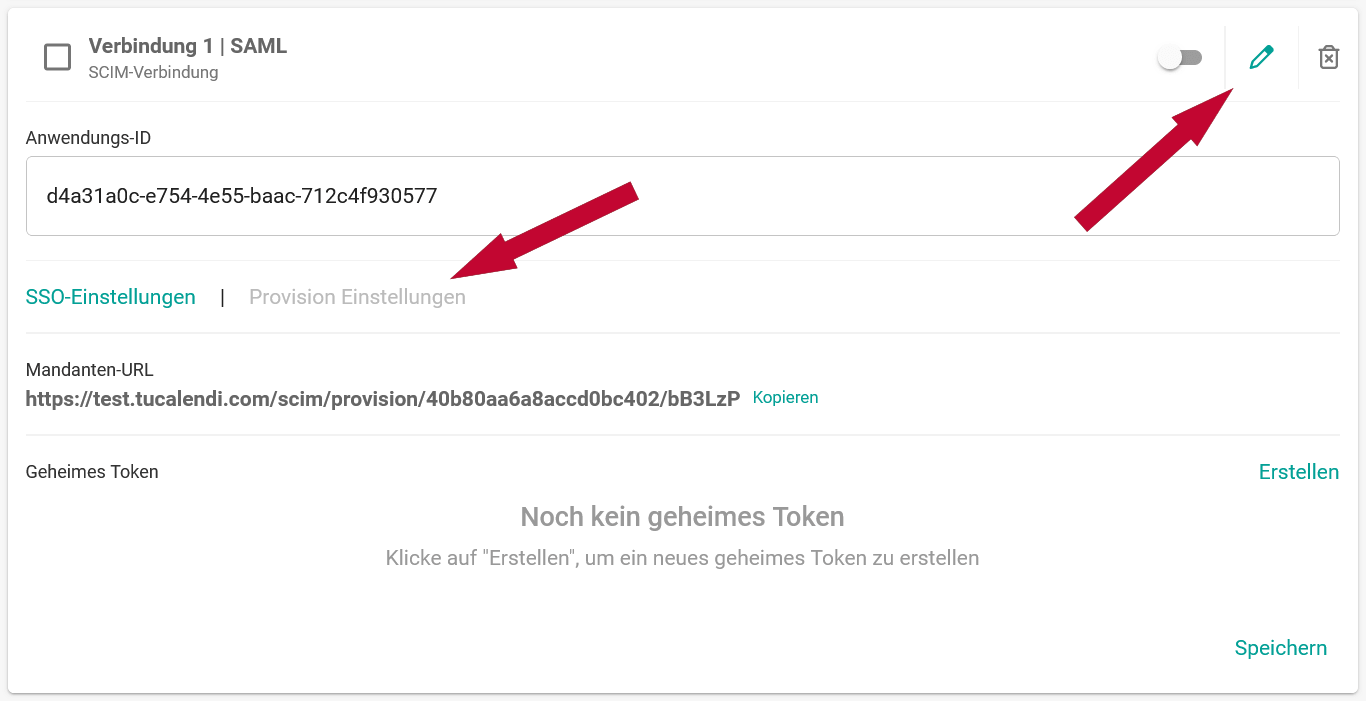
1. Open the SSO connection you already created (set up SSO connection) and click "Provision settings".
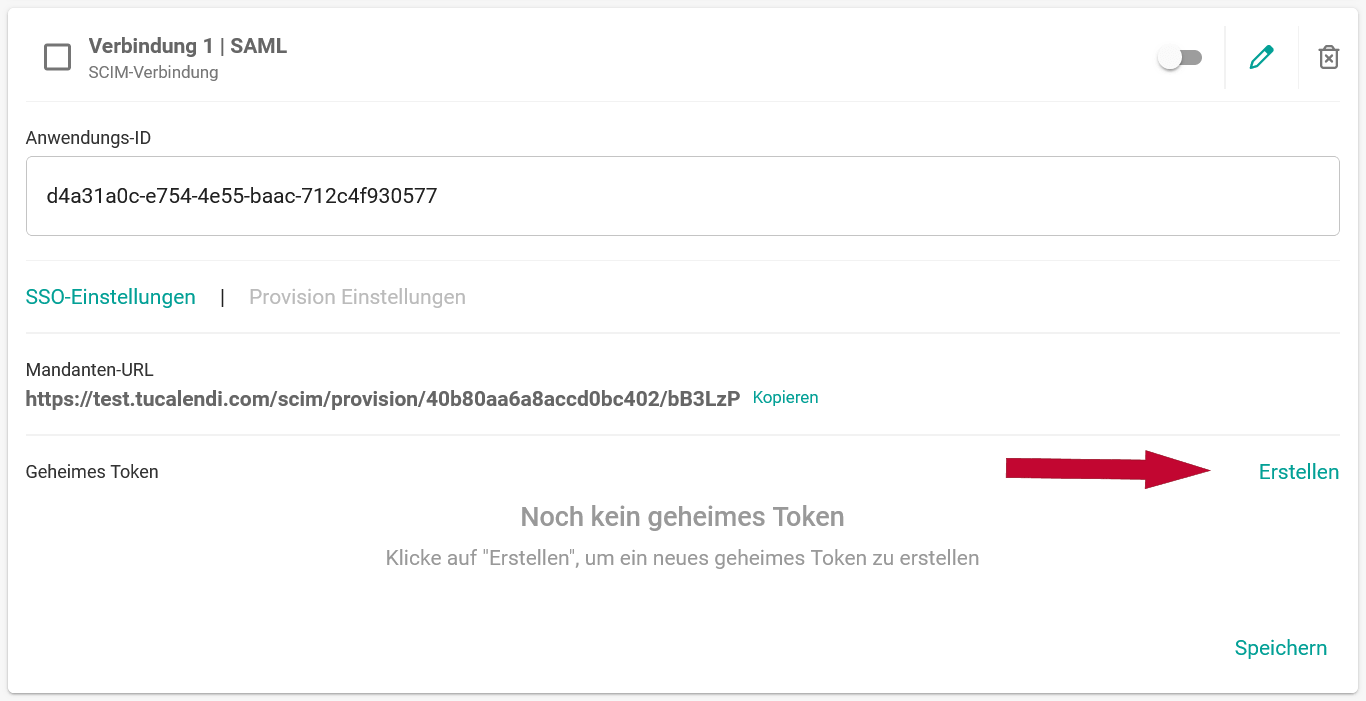
2. Create a new secret token, which you'll need to set up provisioning in the Entra ID application. To do this, click "Create".
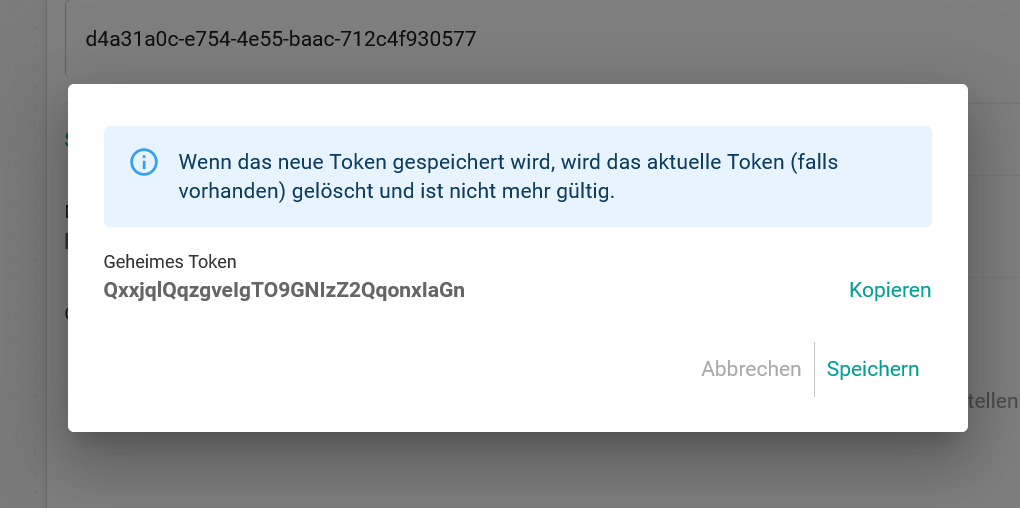
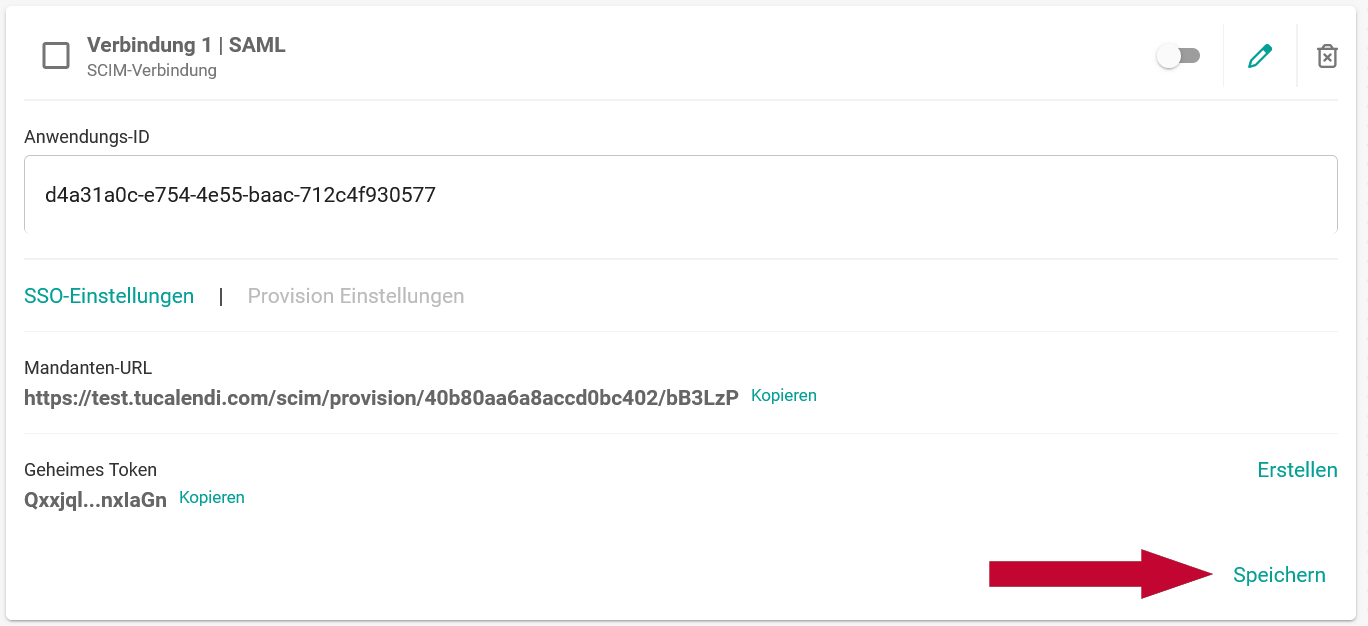
3. Then save everything and you're done.
Enable provisioning in the Entra ID application
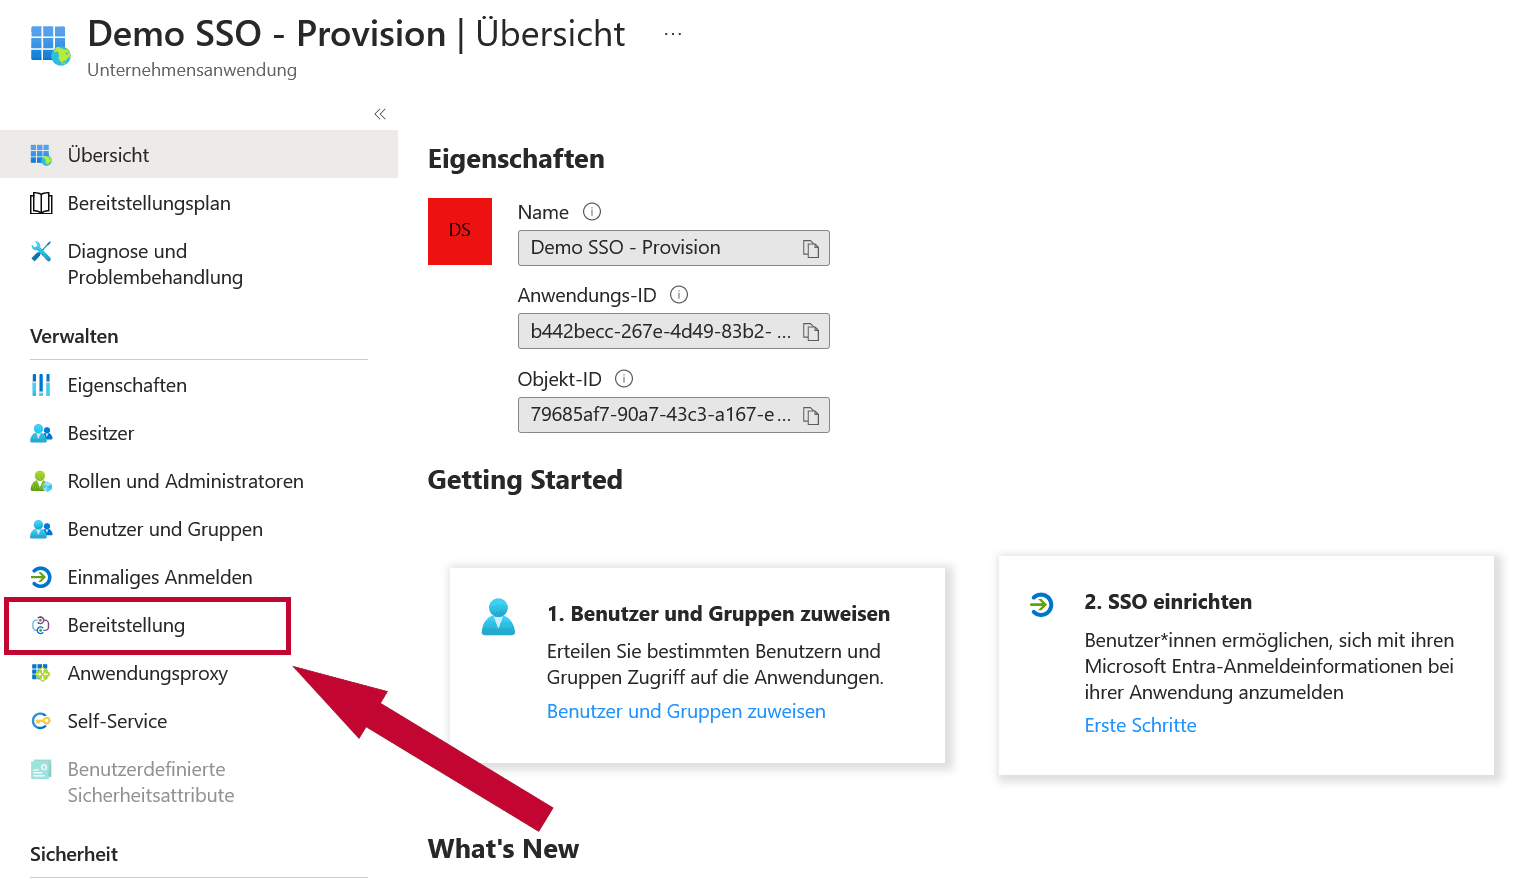
1. In the menu, click "Provisioning" to configure provisioning.
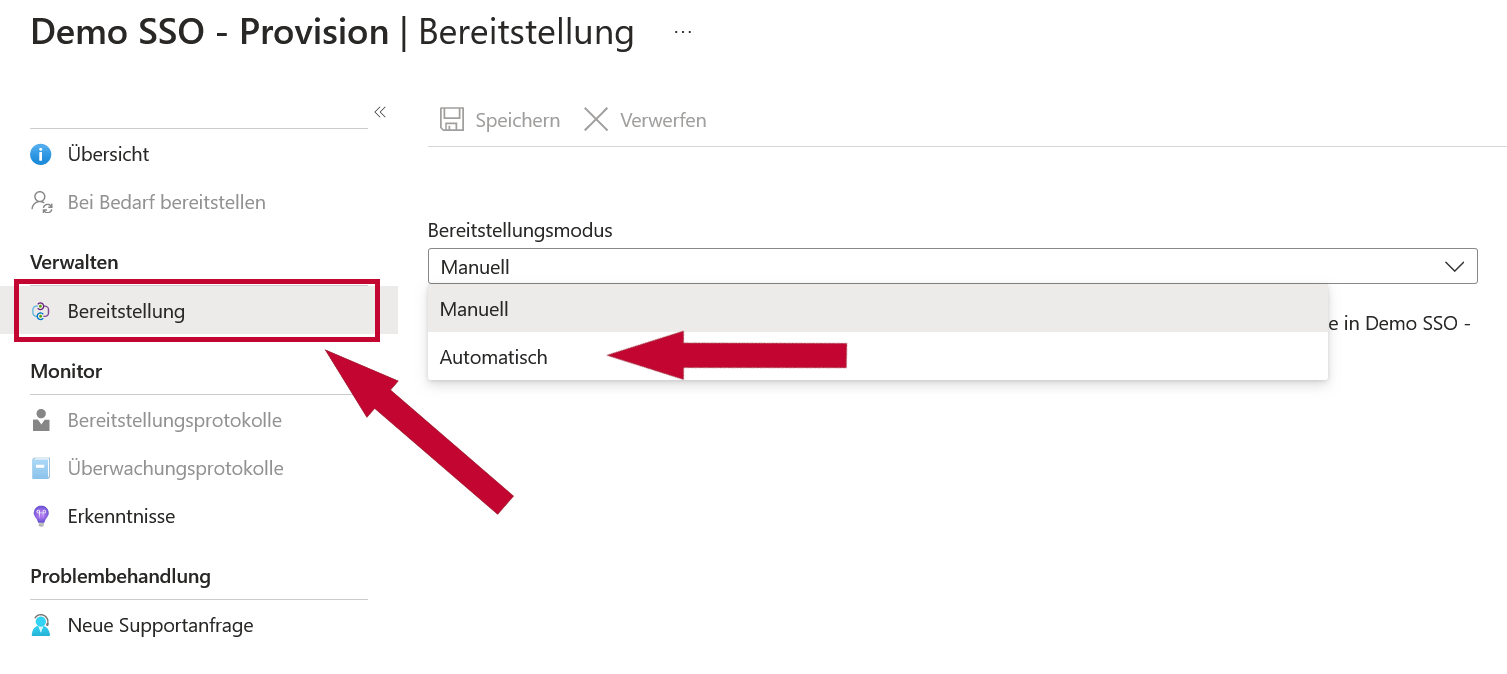
2. Click "Provisioning" and select "Automatic" as the provisioning mode.
3. Click "Admin Credentials". Now you need to enter the data from TuCalendi into the Entra ID application. The following shows which data goes where.
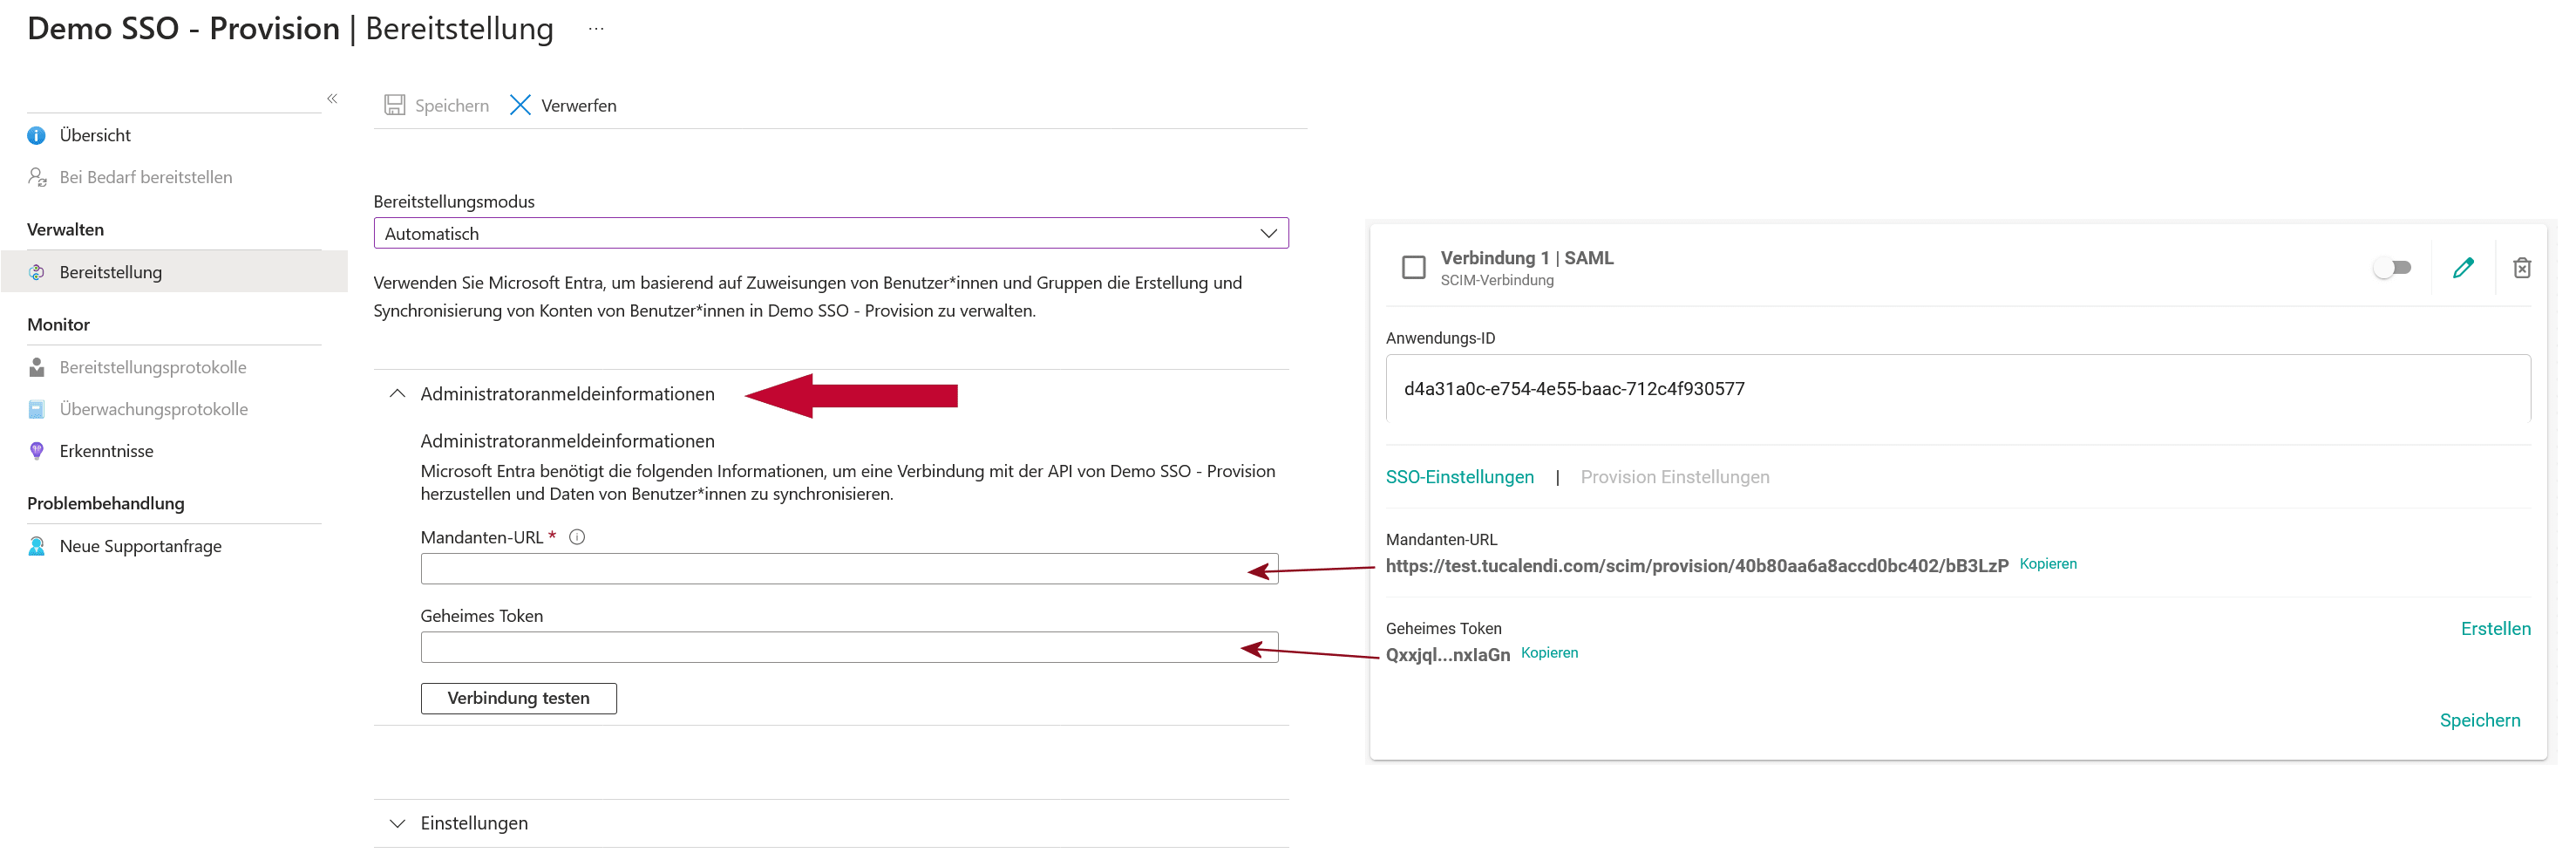
After entering the data, click "Test Connection". Once the connection has been tested, save it.
4. In the next option, "Mappings", you can choose which areas should be provisioned. You can provision users and groups (see the note above).
If you provision users, the following attributes must be mapped:
- userPrincipalName
- softDelete
- givenName
- surname
See the image for the exact mapping. The "userName" attribute maps to "userPrincipalName", which is usually the user's email address. If that's not the case, the "userName" attribute should be mapped to the user's email address. It's very important that the "userName" attribute is an email address, because it's needed for matching.
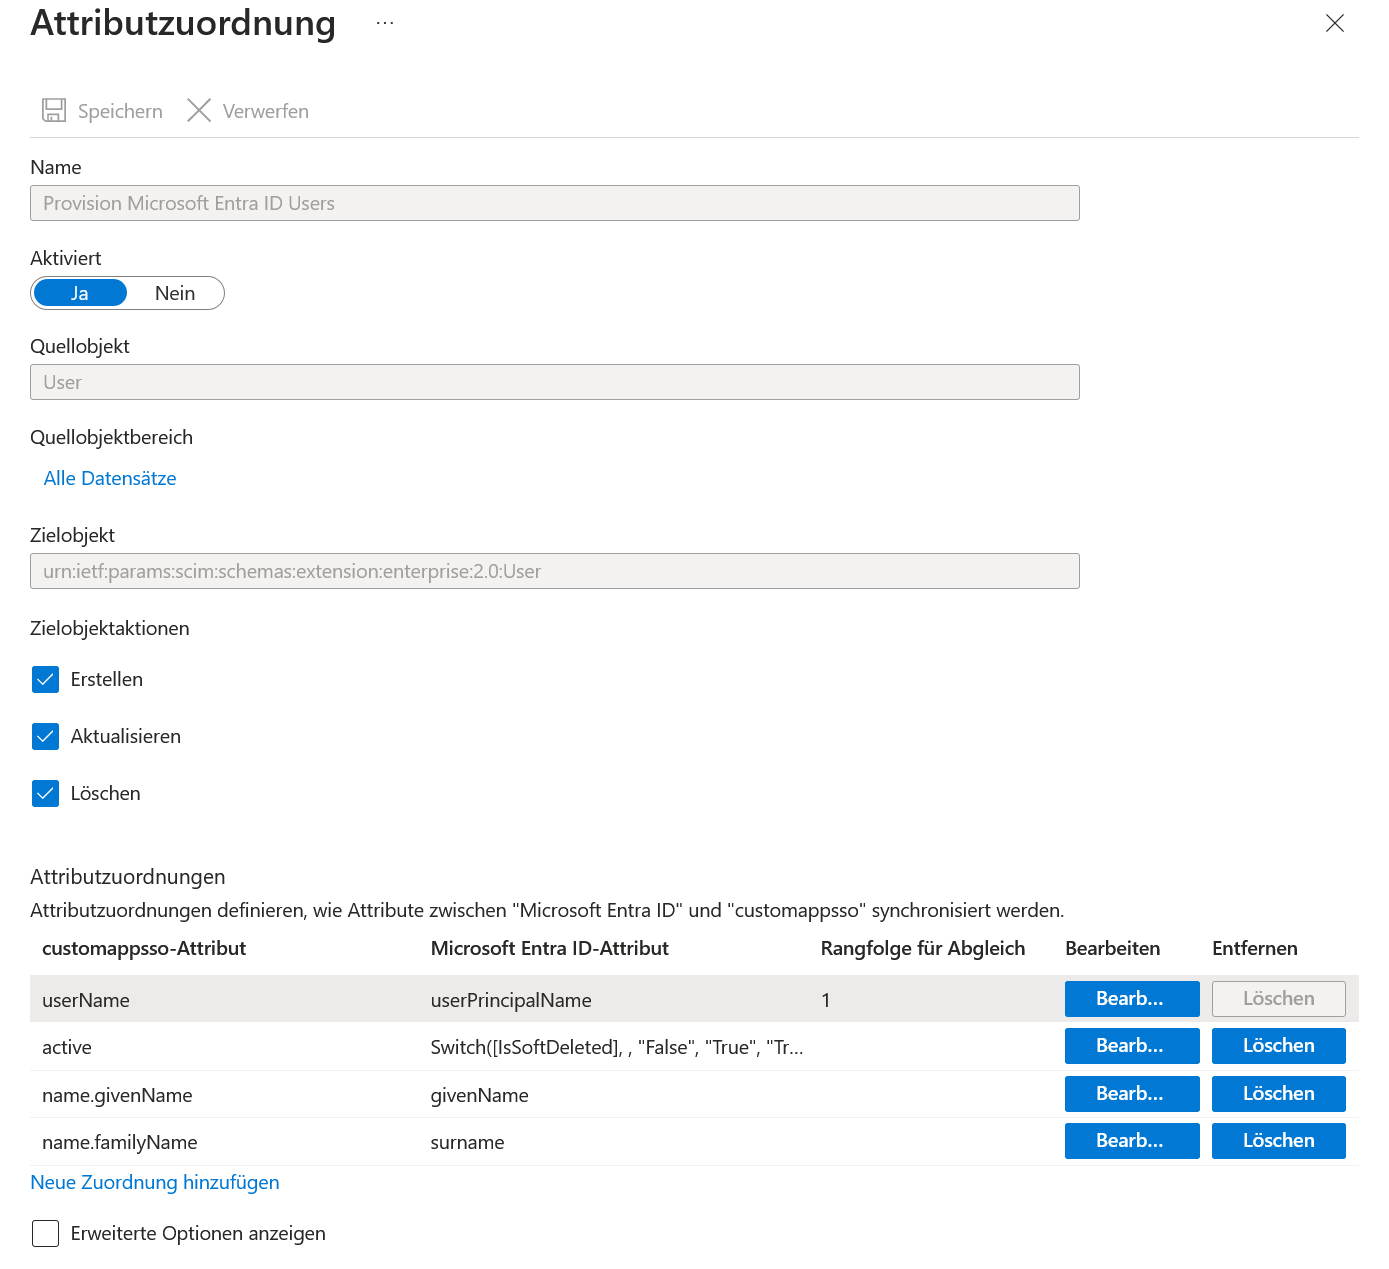
All other attributes should be removed.
If you provision groups, the following attributes must be mapped:
- displayName
- members
See the image for the exact mapping. The attributes "displayName" and "members" are required. "displayName" is very important and is needed for matching.
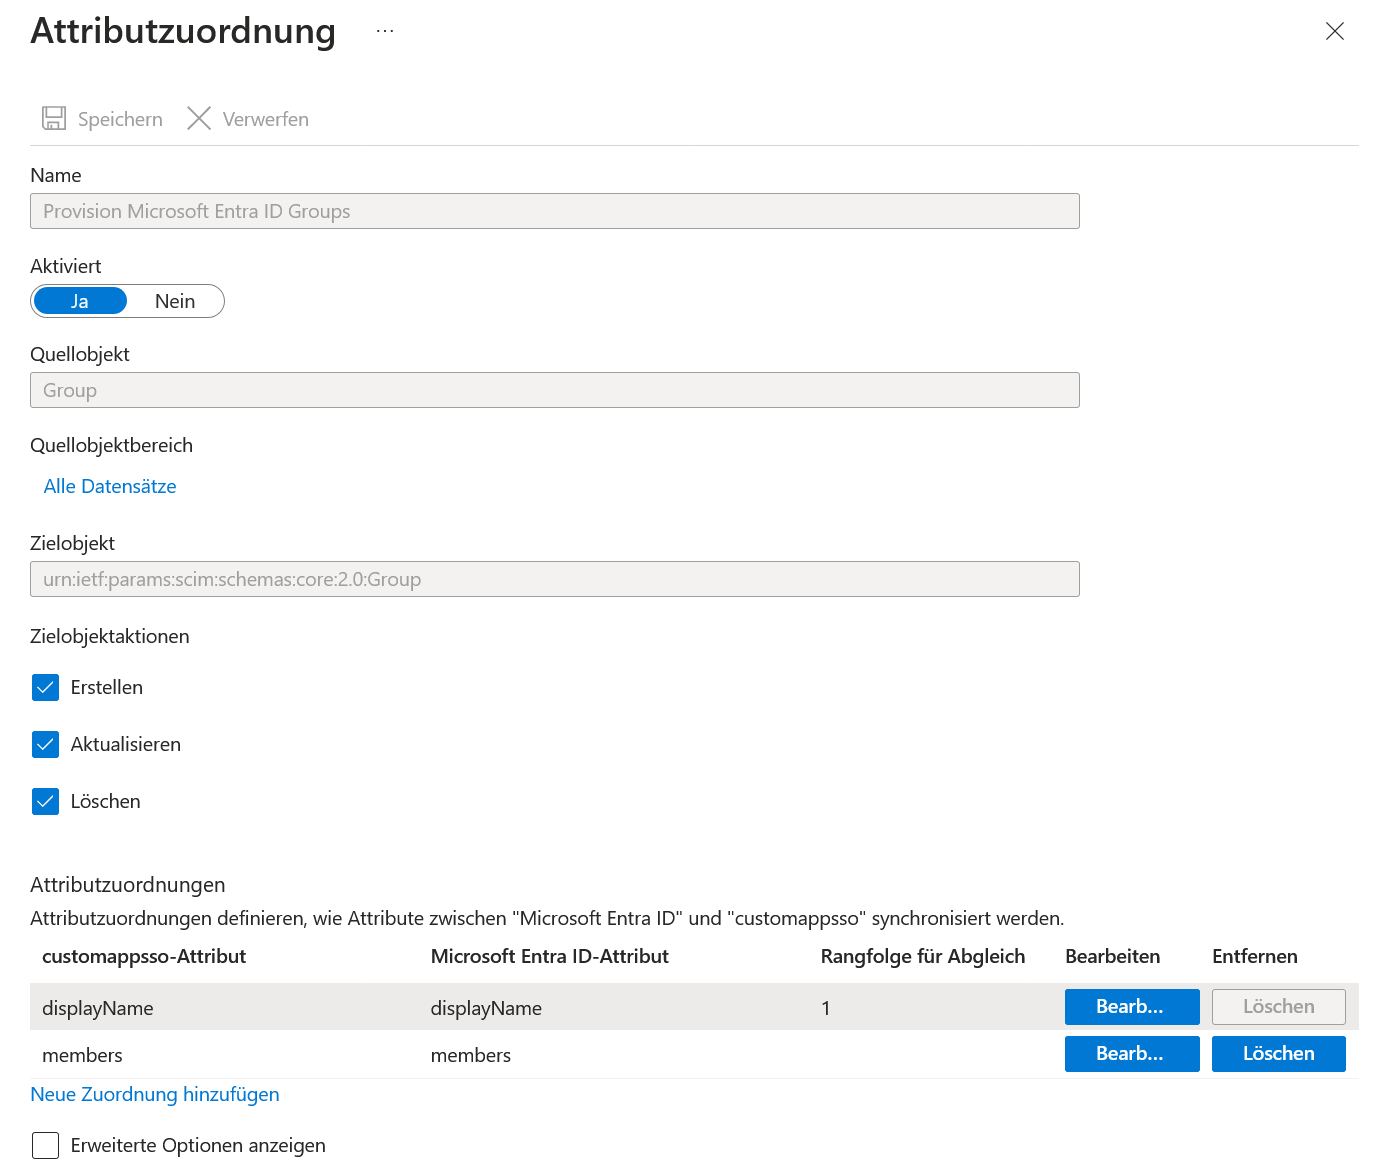
All other attributes should be removed.
5. Once everything is set up, you can start provisioning.

If everything is set up correctly, the assigned users and/or groups will now be automatically provisioned and synced.
If you run into any problems or difficulties during setup, our support team (support@tucalendi.com) will be happy to help and will assist you with the setup as best they can.