How to Book a Location-Based Appointment in the New TuCalendi Widget
This tutorial explains the basic workflow of the new TuCalendi widget when a booking includes a physical location and a map integrated within the widget itself. This is one of the new features available when you upgrade to the latest version of TuCalendi, in which the booking process uses the new meetfy.me domain.
The new version of the booking widget has been developed from scratch to offer a clearer, more efficient experience that’s ready for the platform’s upcoming capabilities. Additionally, Widget v3 is designed to integrate with location features, surveys, and the upcoming AI agents developed by the TuCalendi team.
In this tutorial, we’ll focus solely on showing how the end user sees the booking process with the integrated location and map. In other tutorials, we’ll explain in detail how to add different locations, how to create a survey that includes location selection, and how to associate that survey with the corresponding meeting type.
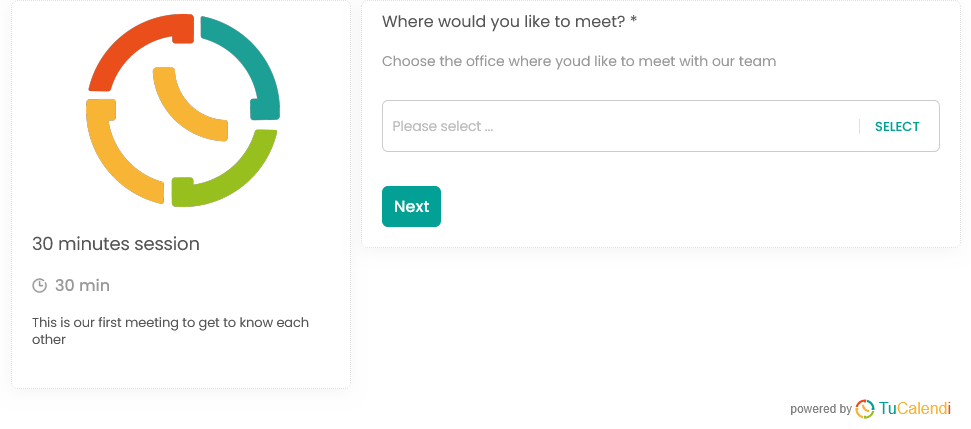
Step 1. Select the appointment location
Upon opening the widget, the user must first select where they want to meet. This option is especially useful when an organization offers appointments at different offices, locations, or service centers.
In this first step, the widget displays the configured location prompt, a selection field, and the Next button. The user must choose a location before continuing with the booking process.
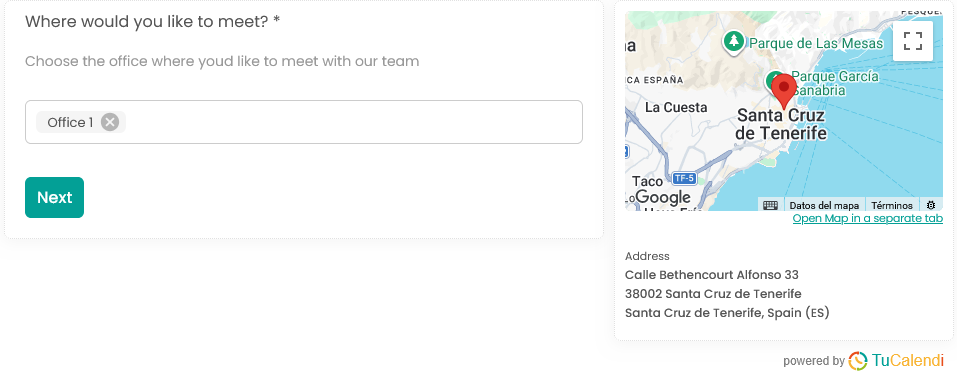
Step 2. View the location, address, and map
Once the location is selected, the widget displays the chosen office along with the full physical address and an embedded map. This allows the user to visually confirm where the meeting will take place before proceeding.
This view helps reduce confusion during the booking process, as the location information is visible from the start and guides the user through the following steps.
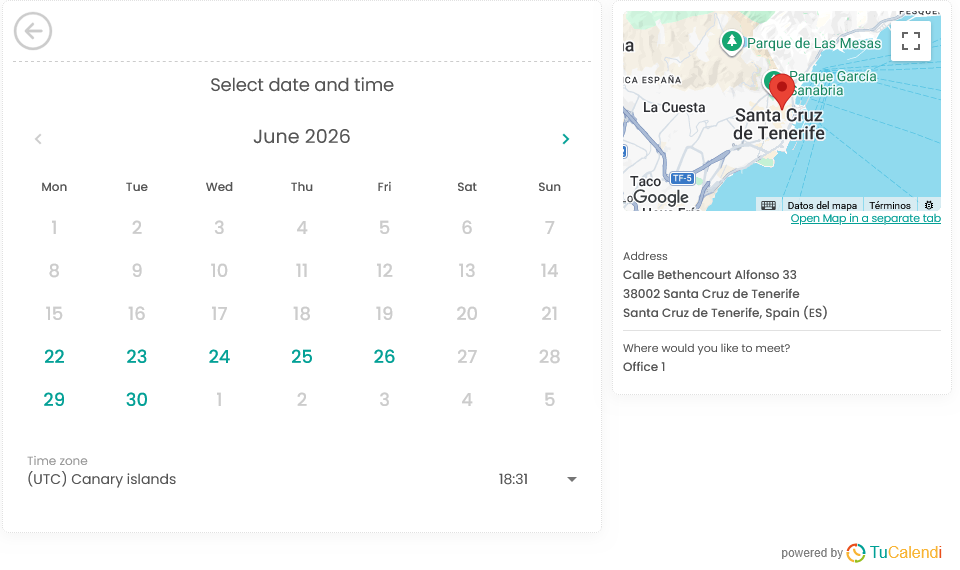
Step 3. Select an available date
After confirming the location, the widget displays the calendar with the days available for that appointment. The location information remains visible on the side, including the map, address, and selected office.
This allows the user to choose a date without losing sight of where the meeting will take place. Additionally, the widget displays the corresponding time zone to ensure the booking is made correctly.
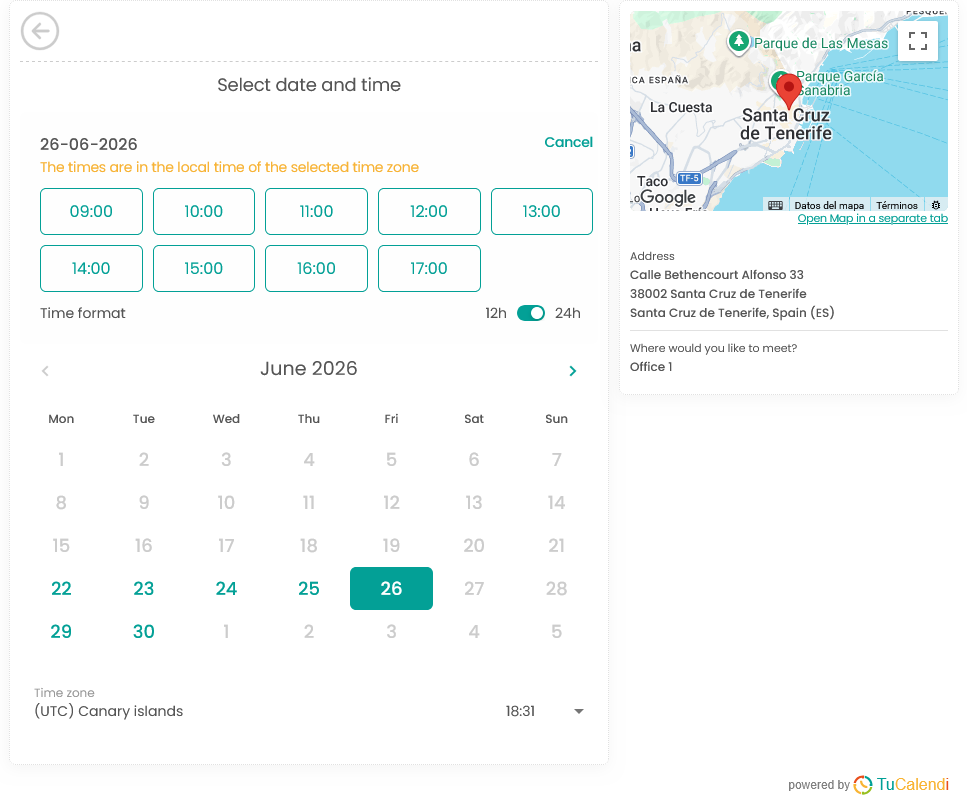
Step 4. Choose an available time
When a day is selected, the widget displays the available times for that date. The user can choose the time slot that best suits their needs and, if desired, switch between 12-hour and 24-hour formats.
During this step, the physical location remains visible on the side. This allows the user to confirm the date, time, and location of the meeting all at once.
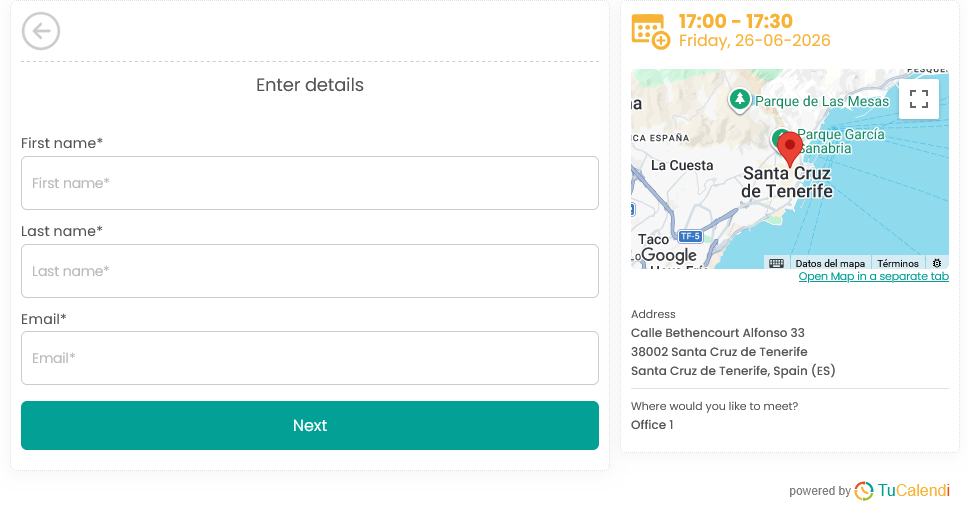
Step 5. Enter the reservation details
Once the time is selected, the widget prompts the user to enter the information needed to complete the reservation. In this example, the form includes first name, last name, and email address.
The appointment summary remains on the side, showing the selected time, date, map, address, and chosen location. This allows users to review the key details before continuing.
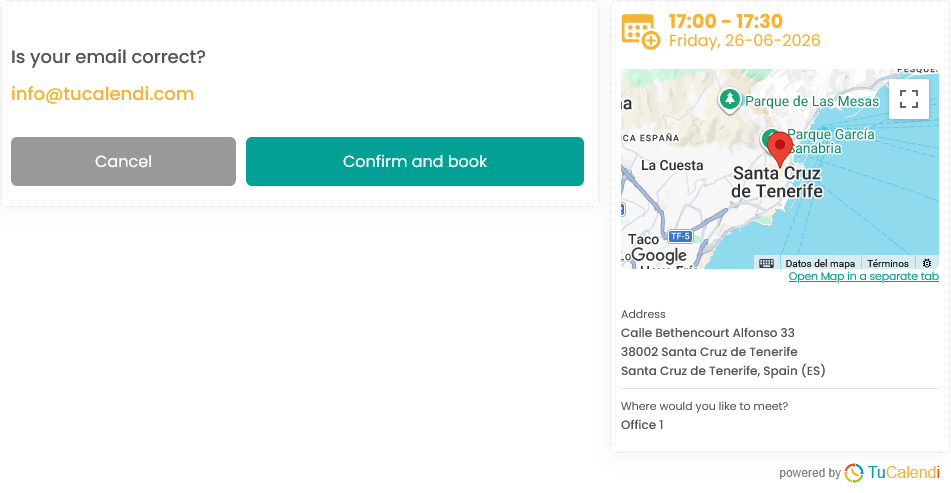
Step 6. Confirm the booking
After entering the information, the widget displays a confirmation screen to verify that the email address is correct. In this step, the user can cancel or click “Confirm and Book” to complete the process.
The appointment summary remains visible, including the time, date, physical address, map, and selected location. This makes it easy to do a final review before definitively confirming the reservation.
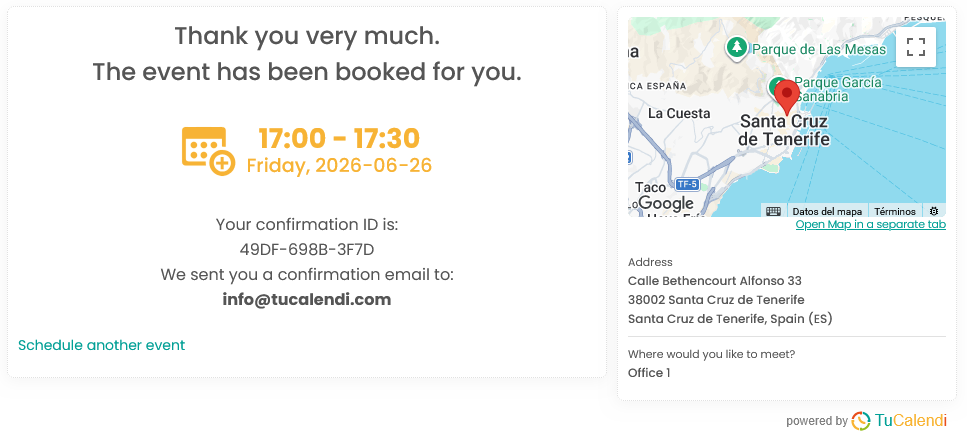
Step 7. View the final confirmation
When the booking is successfully completed, the widget displays the final confirmation screen. It indicates that the event has been booked and shows the date and time of the appointment, the confirmation code, and the email address to which the confirmation was sent.
In addition, the user can still view the physical location of the appointment along with the map and address, making it easier to remember where the meeting will take place.
Summary
The new TuCalendi widget, available after upgrading to the latest version with meetfy.me, also allows you to manage reservations with a physical location and an integrated map. The user selects where they want to meet, reviews the address, chooses an available day and time, enters their information, and confirms the booking. Other tutorials will explain how to add locations, create a location poll, and associate it with the corresponding meeting type.