How to Customize the Appearance of the New TuCalendi Widget
This tutorial explains what the new TuCalendi widget theme is as used on the meetfy.me domain and how to create a template to customize the widget's design in the new version of the platform. The appearance settings allow you to define the widget’s visual and behavioral options to tailor the booking experience to the identity of each account, brand, hub, or booking flow.
In this article, we’ll focus on the general process: accessing the appearance section, creating a template, giving it an alias, editing its main options, and assigning it to the corresponding elements. In other tutorials, we’ll explain each customization option available within the editor in greater detail.
What Is the Appearance of the New TuCalendi Widget?
The widget’s appearance is a configuration template that lets you customize how the TuCalendi Widget is displayed to end users. This template can include options such as text colors, time format, date format, language, visual theme, border, shadow, currency position, image display, and other settings related to the widget experience.
The most important point is that creating or editing a template does not automatically apply the changes to all elements. For the appearance to be reflected in the widget, you must assign the template to the corresponding elements, such as a hub or a survey with routing.
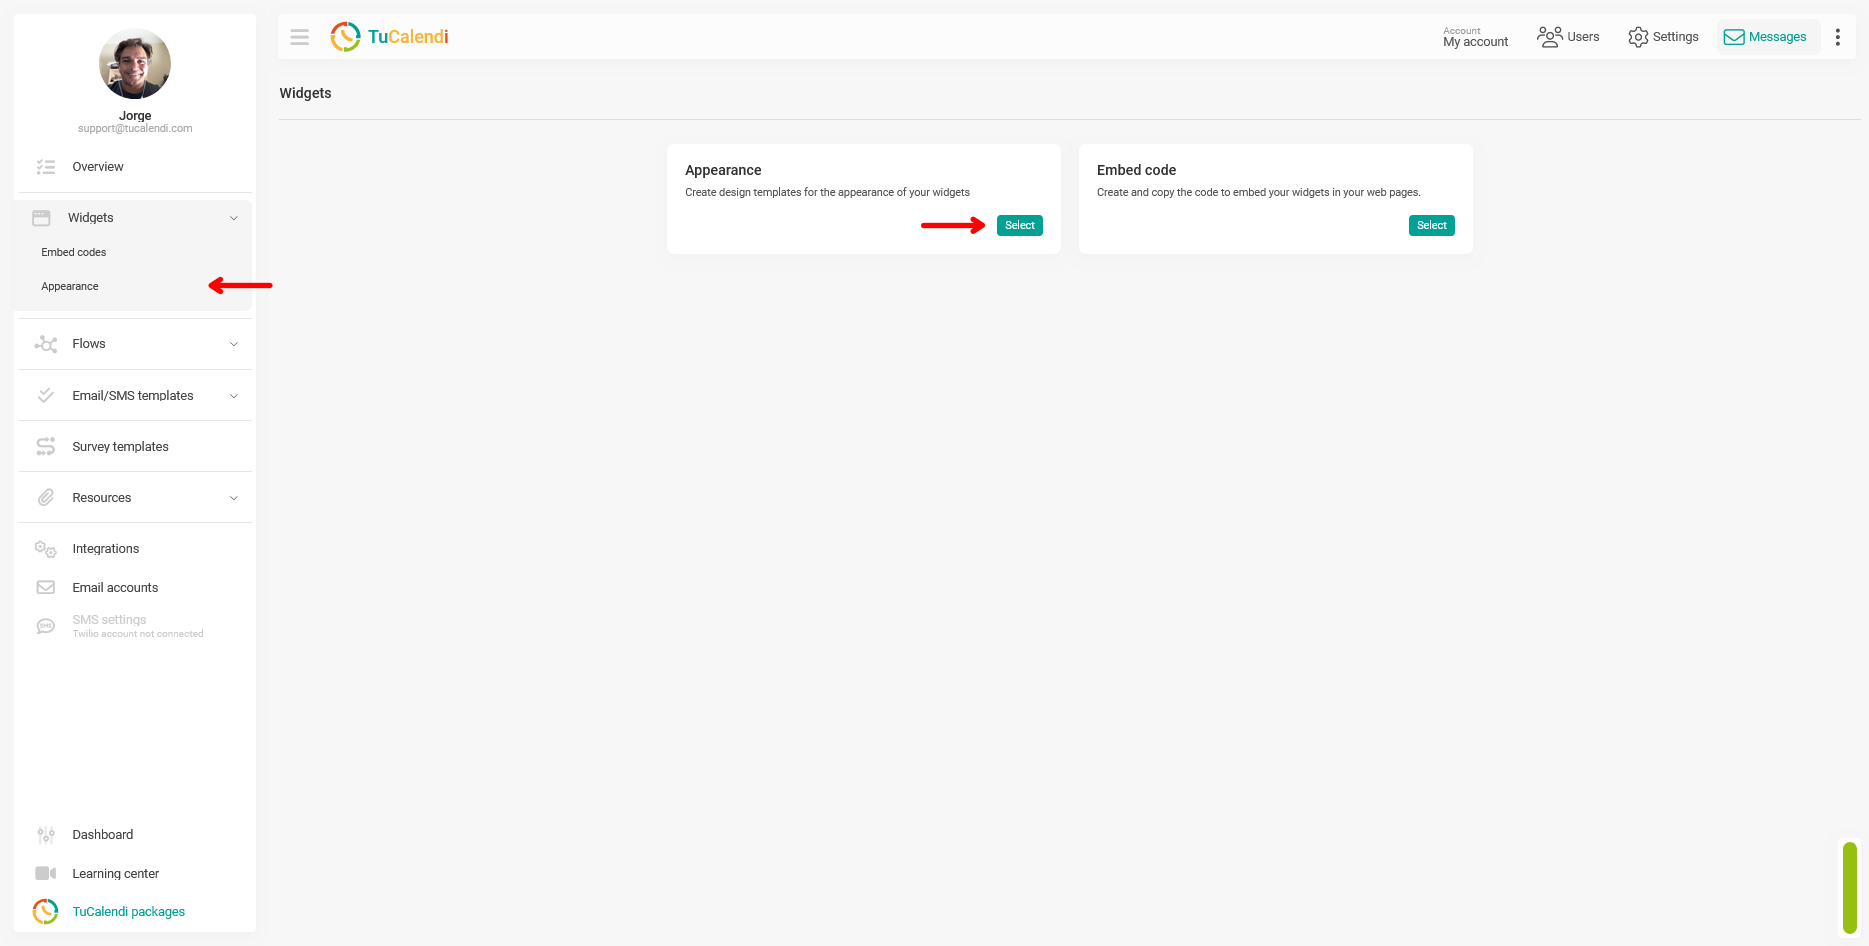
Step 1. Access the widget’s Appearance section
To get started, go to the TuCalendi side menu and open the Widgets section. Within that section, select the Appearance option. You can also access it from the main Widgets view by clicking the Appearance block.
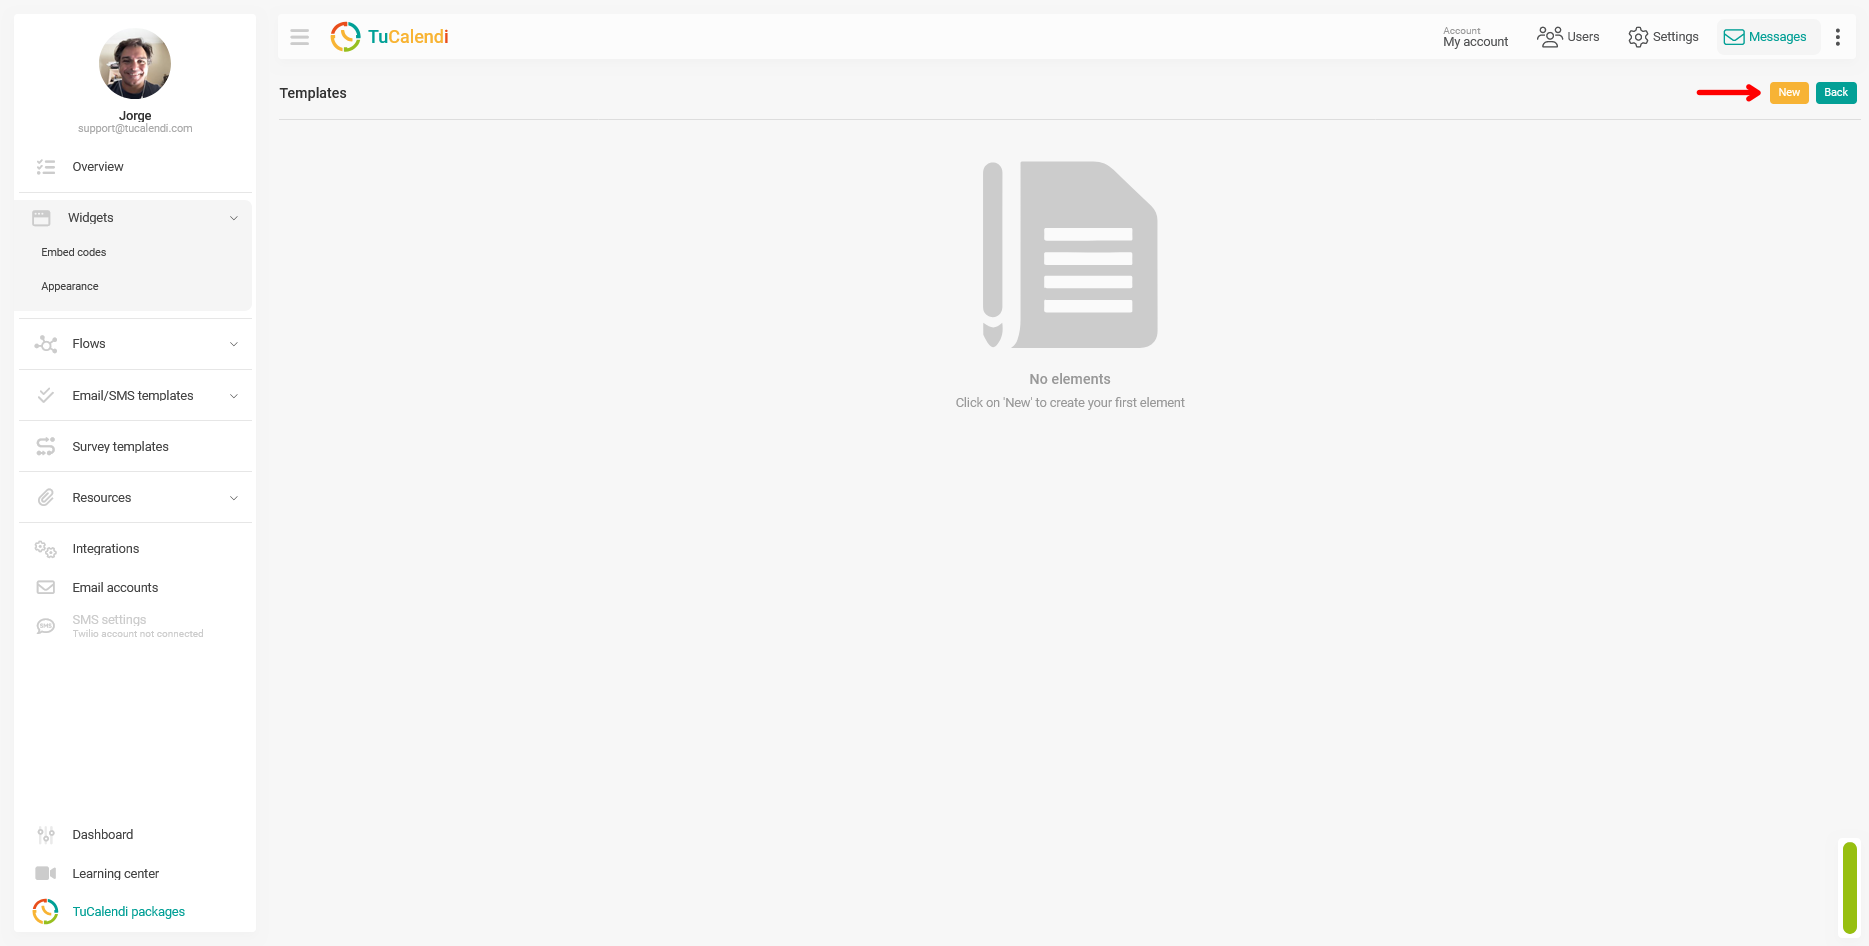
Step 2. Create a new template
Once you’re in the Appearance section, a list of available templates will be displayed. If no templates have been created yet, the screen will indicate that there are no items.
To create a new template, click the "New" button located in the upper-right corner of the screen.
Step 3. Give the template an alias
When you create a new template, TuCalendi will display a window where you must enter an alias. The alias is the internal name that will help you identify the template within your account.
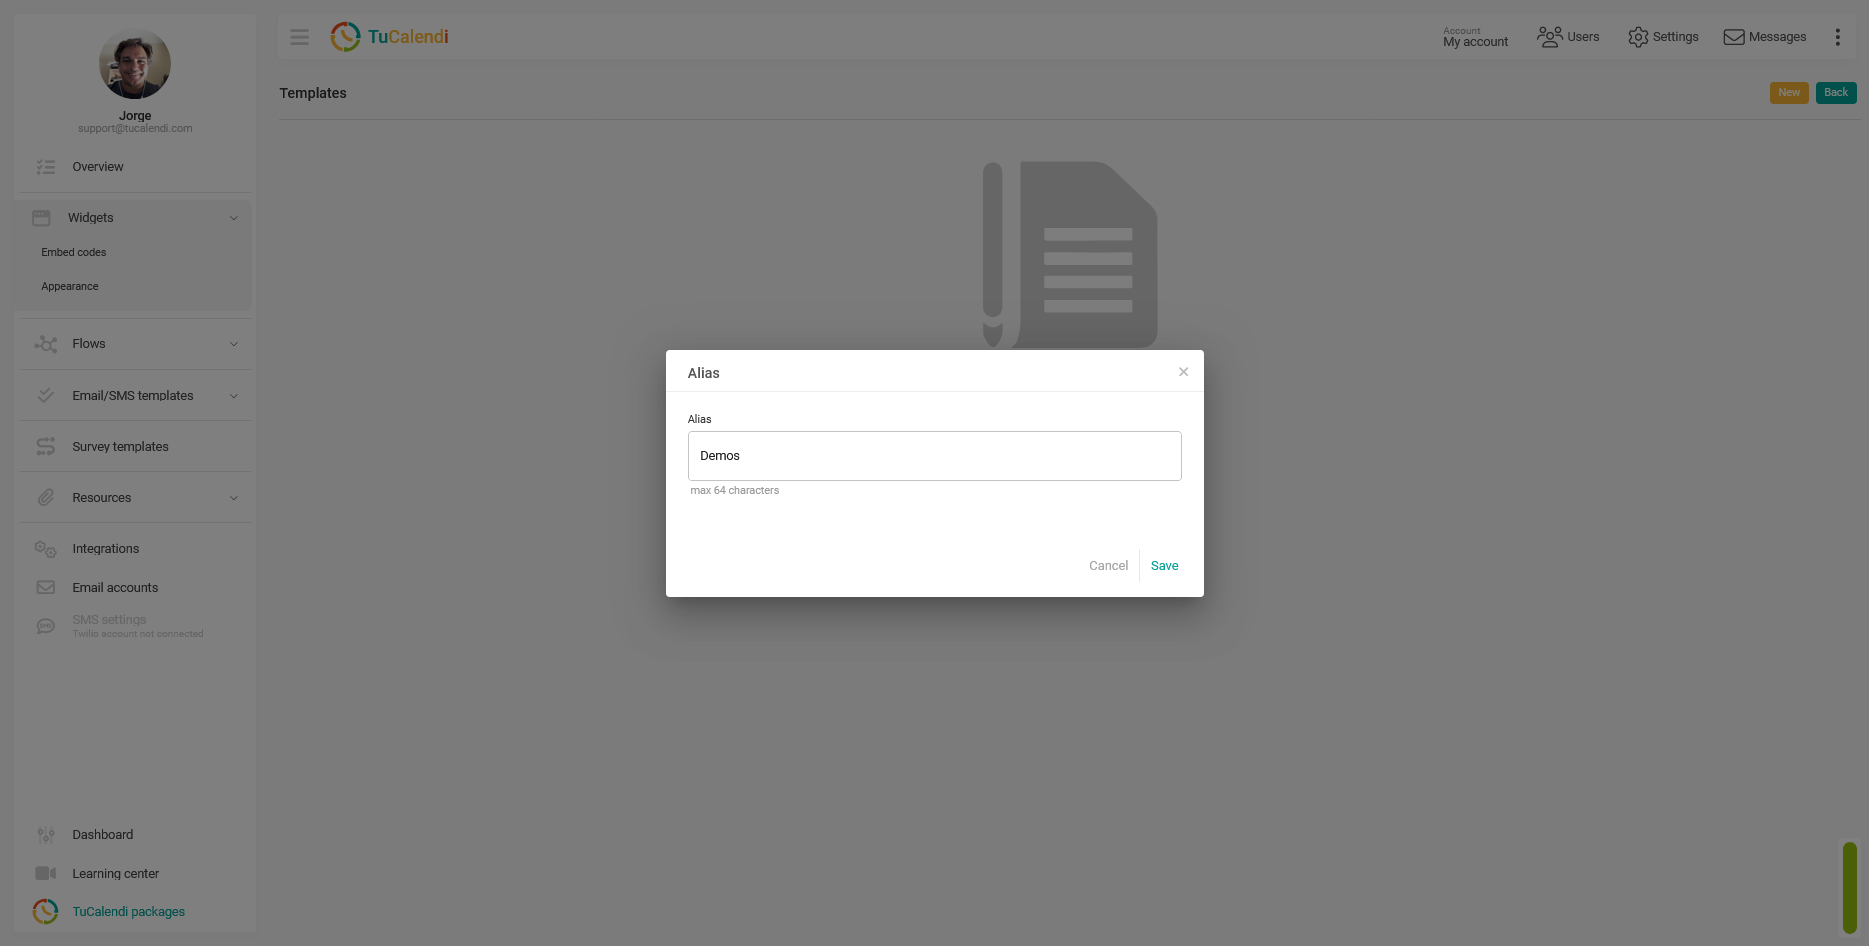
After entering the alias, click “Save” to create the template.
Step 4. Edit the template to customize it
Once created, the template will appear in the list. To configure it, click the “Edit” option.

This will take you to the appearance editor, where you’ll see the current customization options for the new TuCalendi widget.
Step 5. Customize the Widget v3 options
The editor displays the available options for customizing the widget’s appearance and certain behaviors. Current options include color settings, formats, language, visual theme, borders, shadows, and other presentation elements.
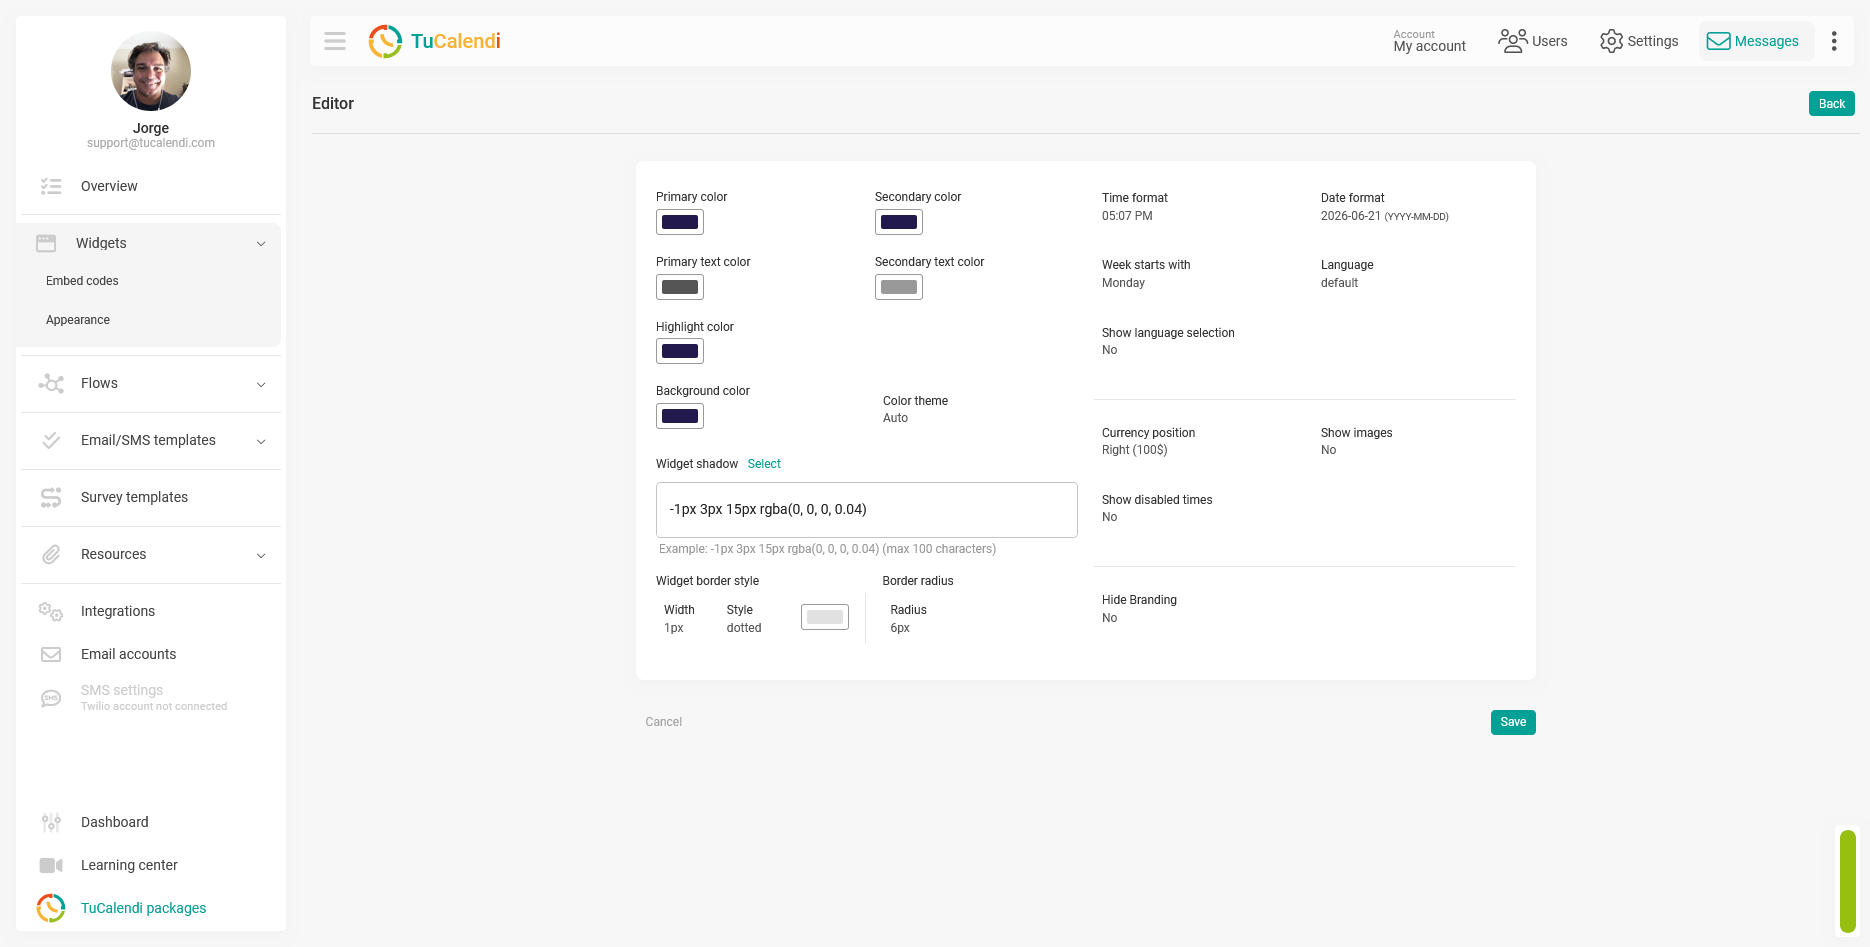
Once you’ve made the necessary changes, click “Save” to save the template settings.
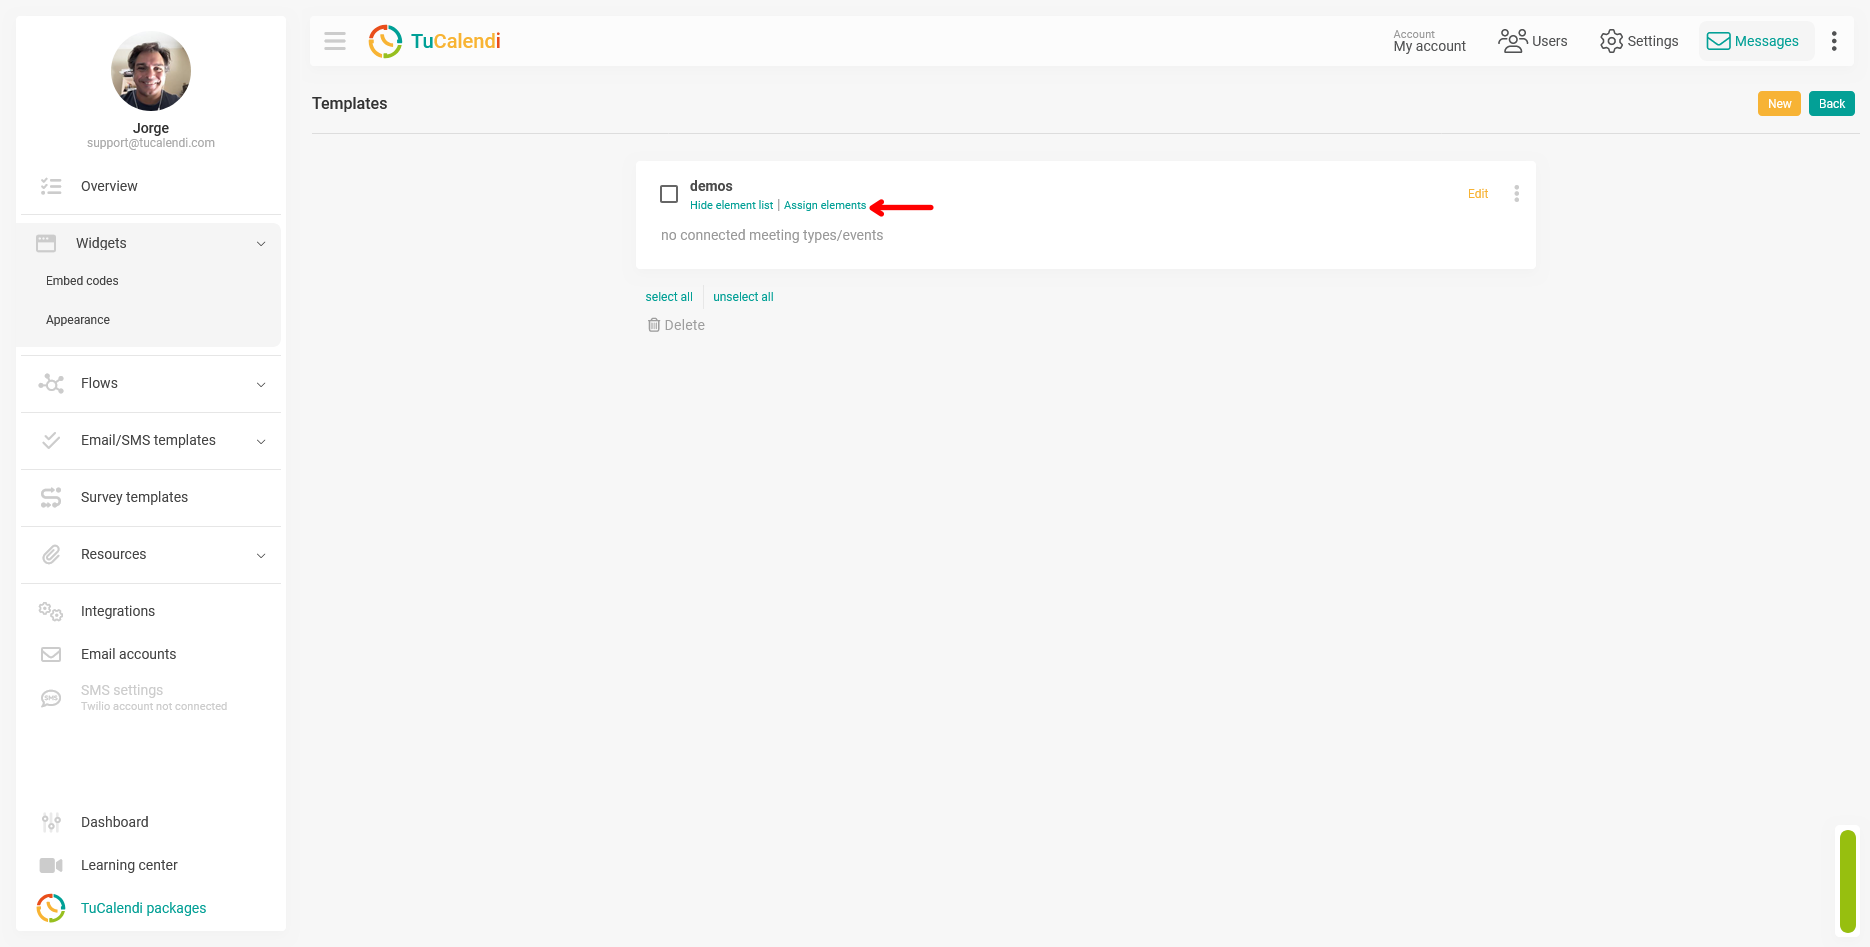
Step 6. Assign Elements to the Template
After creating and customizing the template, it’s important to assign it to the elements where you want it to apply. If no elements are assigned, the template may be created correctly, but its changes won’t be reflected in any active widgets.
From the template list, click “Assign Elements” to select where that style will be applied.
Step 7. Link hubs or surveys and apply the changes
Clicking “Assign Elements” will open a linking window. In this window, you can select the elements to which you want to apply the appearance template.
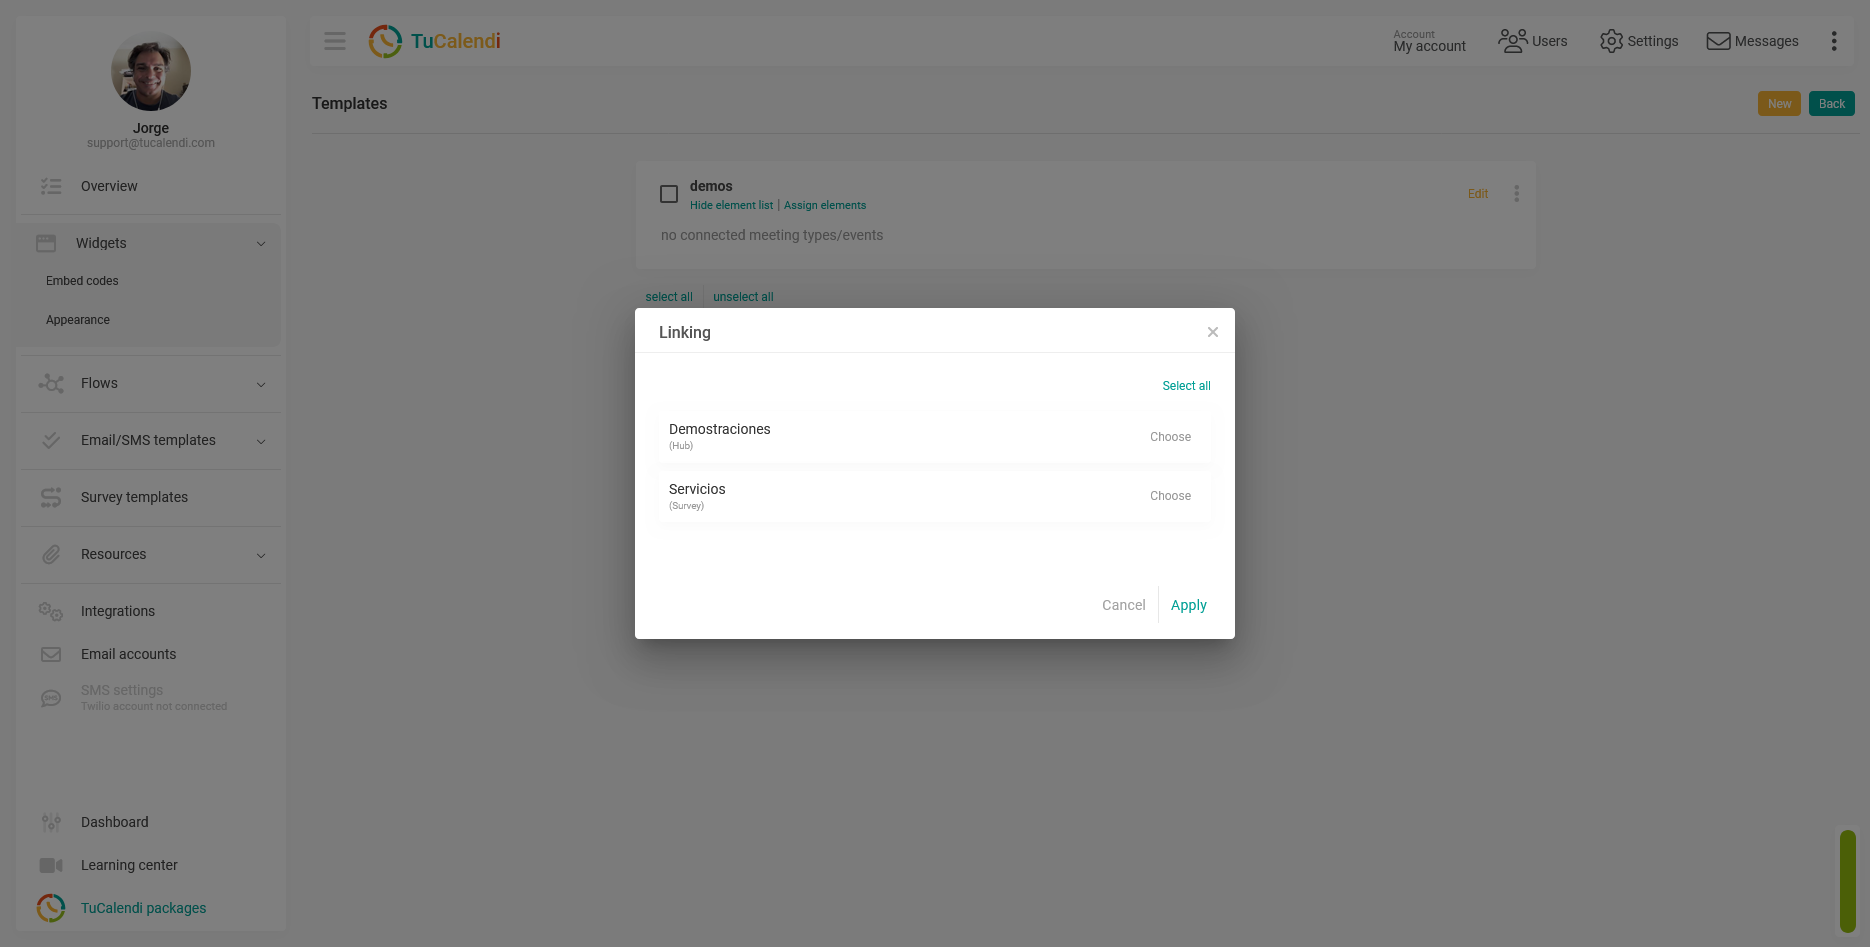
Once you’ve selected the elements, click “Apply” to save the link.
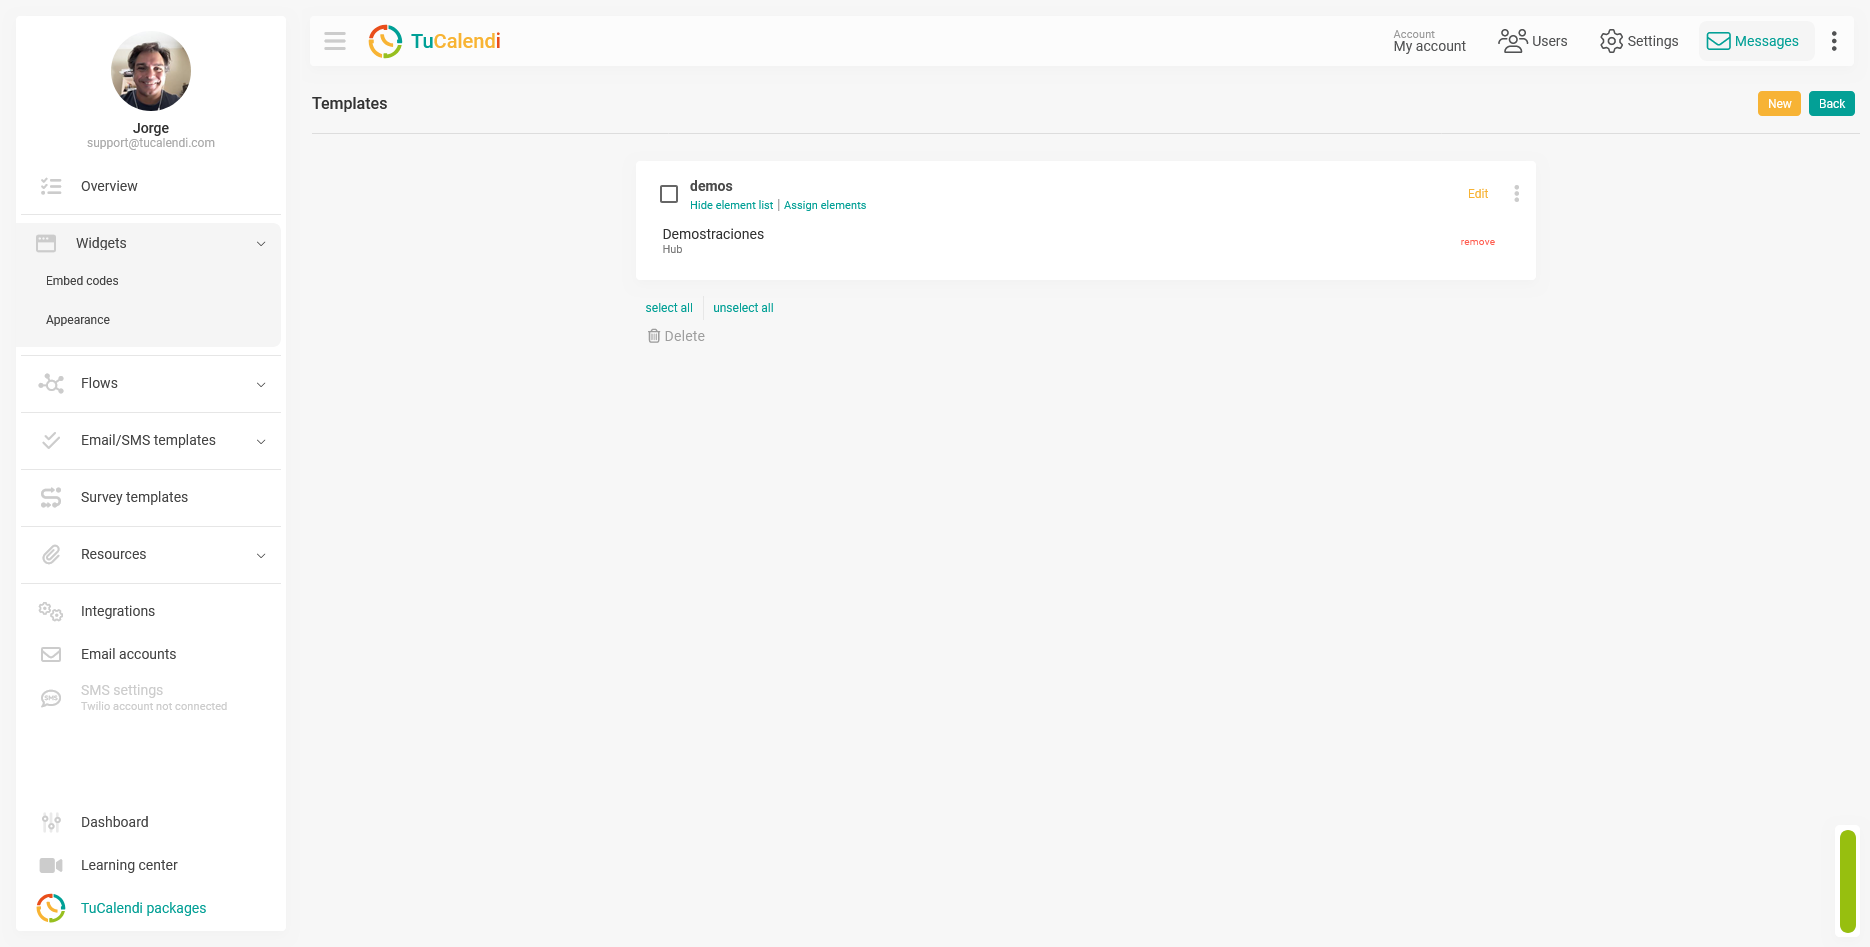
Step 8. Verify that the template has elements assigned to it
After applying the link, the template will display the assigned element in the list. This allows you to confirm that the theme is already associated with a specific hub or survey.
From this same view, you can review which elements are linked, edit the template, or remove an assignment if you need to modify the settings later.
Summary
The new TuCalendi Widget’s “Appearance” feature allows you to create design templates to customize how the widget is displayed to end users
The “Appearance”section is especially useful when you need to maintain a consistent visual experience across different widgets, hubs, or surveys with routing. Instead of configuring each widget independently, you can create a template, customize it, and assign it to the appropriate elements.