How to Hide the TuCalendi Brand in the Widget
This tutorial explains how to hide the TuCalendi branding in the new widget using a theme. This option is part of the widget's customization settings and allows you to create an experience that is more in line with your company's or project's visual identity.
If you’re using the Basic Plan, you’ll have access to other widget customization options, but the option to hide the TuCalendi branding won’t be available to apply the change.
Before You Begin
To follow this tutorial, you must go to the widget’s Appearance section. This process is explained in more detail in the general tutorial on how to create and assign a widget appearance template.
In this article, we’ll assume that you already know how to access the widget’s appearance settings, that you’ve created a template, and that you’re going to edit an existing template.
Step 1. Access the widget’s appearance settings
From the TuCalendi side menu, go to the “Widgets” section and select the “Appearance” option. From this section, you can create appearance templates or edit existing ones.
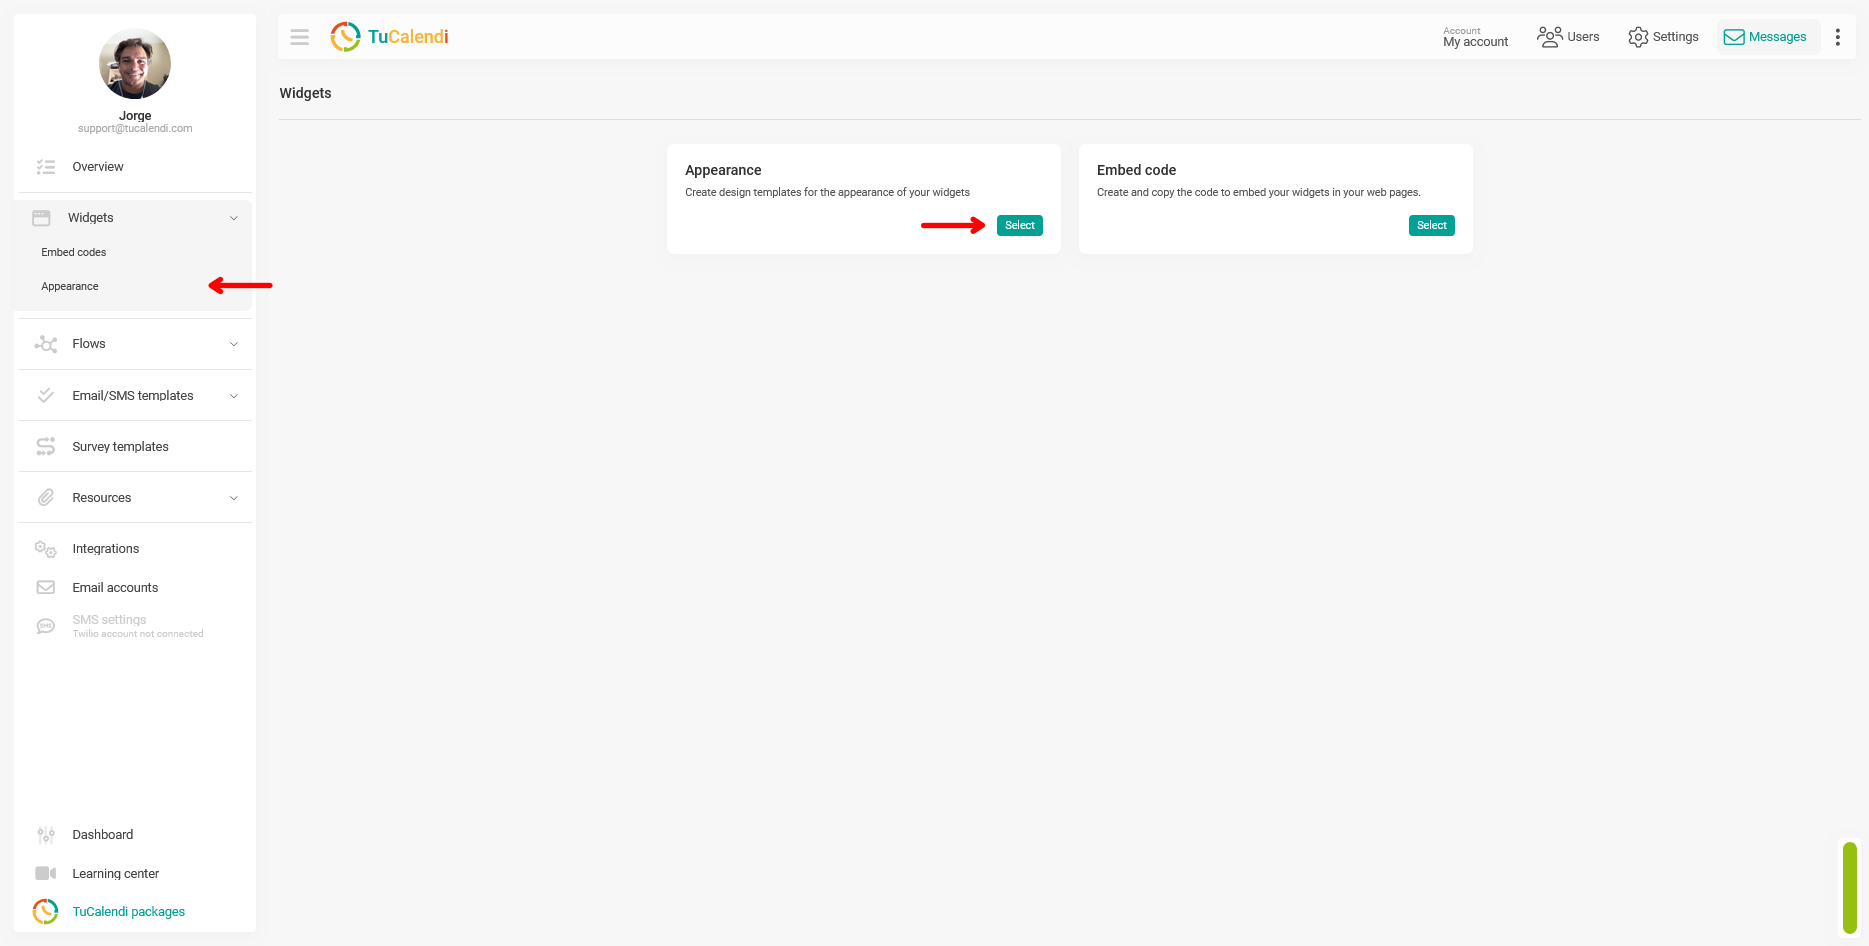
The widget appearance settings allow you to configure various visual and functional aspects of the widget, such as colors, formats, language, image display, borders, shadows, and the option to hide the TuCalendi branding.
Step 2. Create or edit a theme template
Once in the Appearance section, you can create a new template or edit an existing one. If you don’t have a template yet, create a new one and assign it an alias so you can easily identify it.
If the template already exists, click “Edit” to access its customization options.

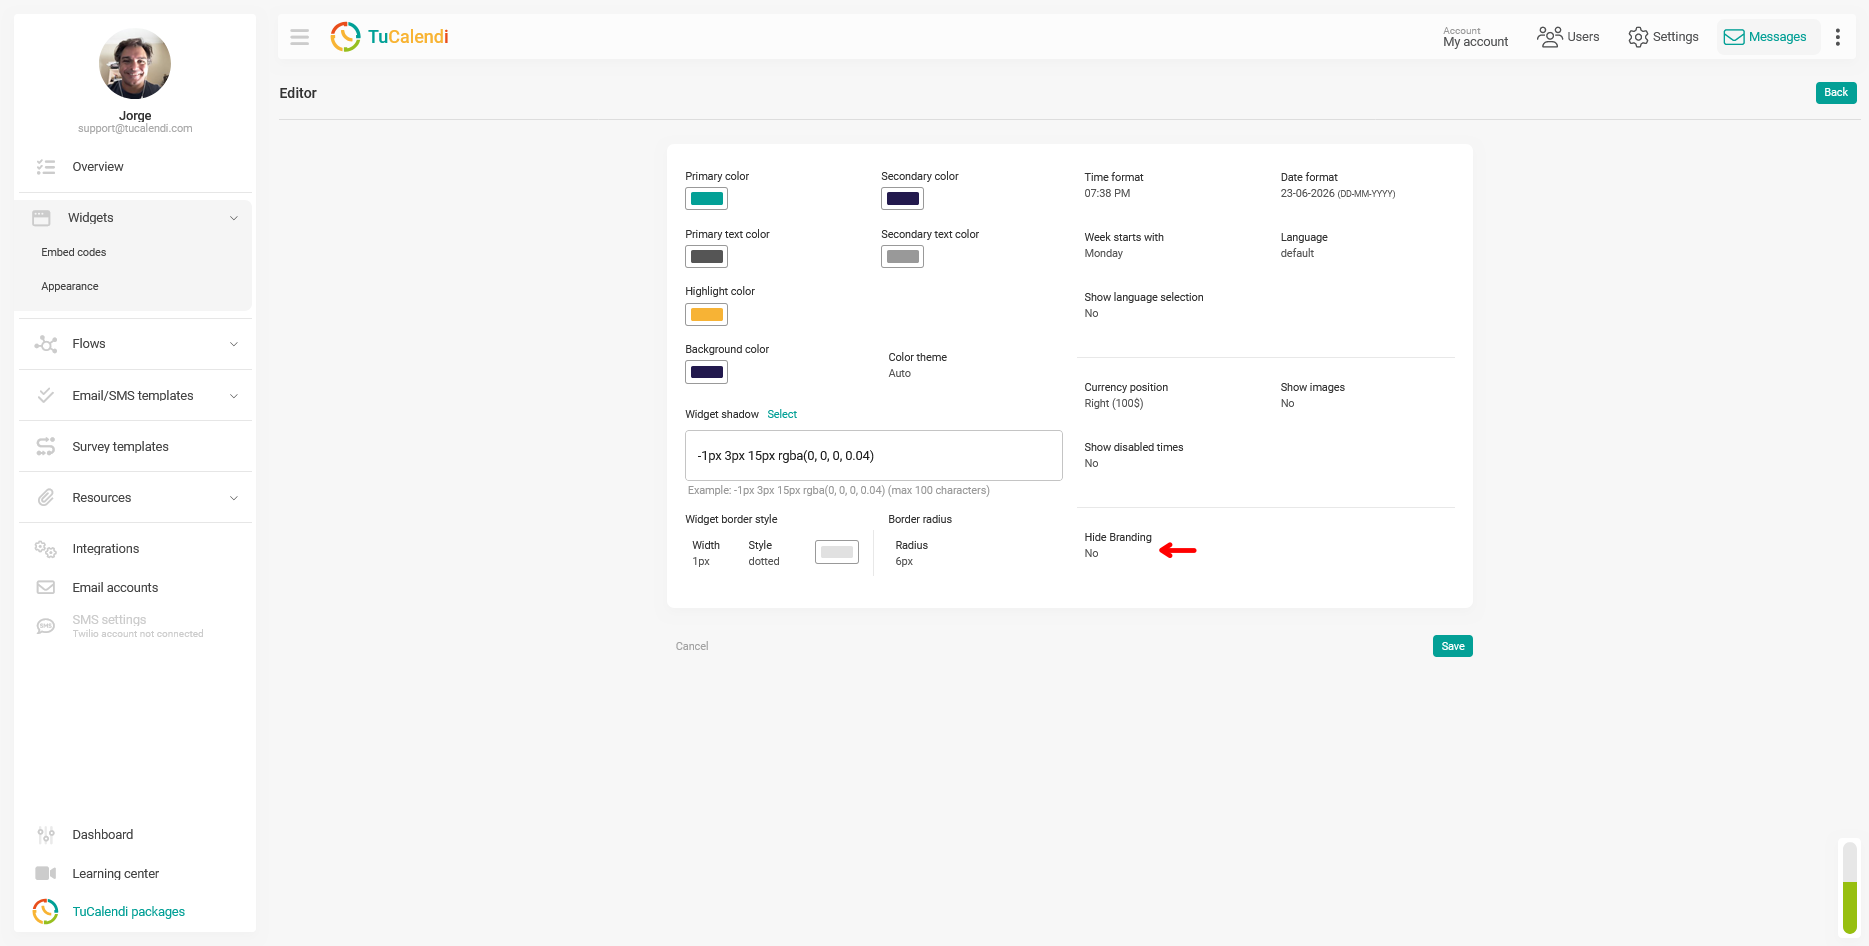
Step 3. Locate the “Hide Branding” option
Within the template editor, locate the “Hide Branding” field. This option is located in the lower-right corner of the customization panel.
The following screenshot shows exactly where the “Hide Branding” field is located within the widget’s appearance options.
Step 4. Enable the option to hide the branding
If your account is on the Pro Plan, you can set “Hide Branding” to “Yes” so that the TuCalendi branding does not appear in the widget. This way, the end user will see a booking experience that’s better aligned with your company’s brand identity.
If your account is on the free Basic Plan, you won’t be able to apply this change. In that case, the TuCalendi branding will continue to appear in the widget.
Step 5. Save the changes
After modifying the "Hide Branding" option, click "Save" to apply the settings to the appearance template.
This step is important because changes made in the editor aren’t applied until they’re saved correctly.
Step 6. Check the element assignment
Once the template is saved, verify that it is assigned to the correct element. You can assign a theme template to a hub or a survey with routing.
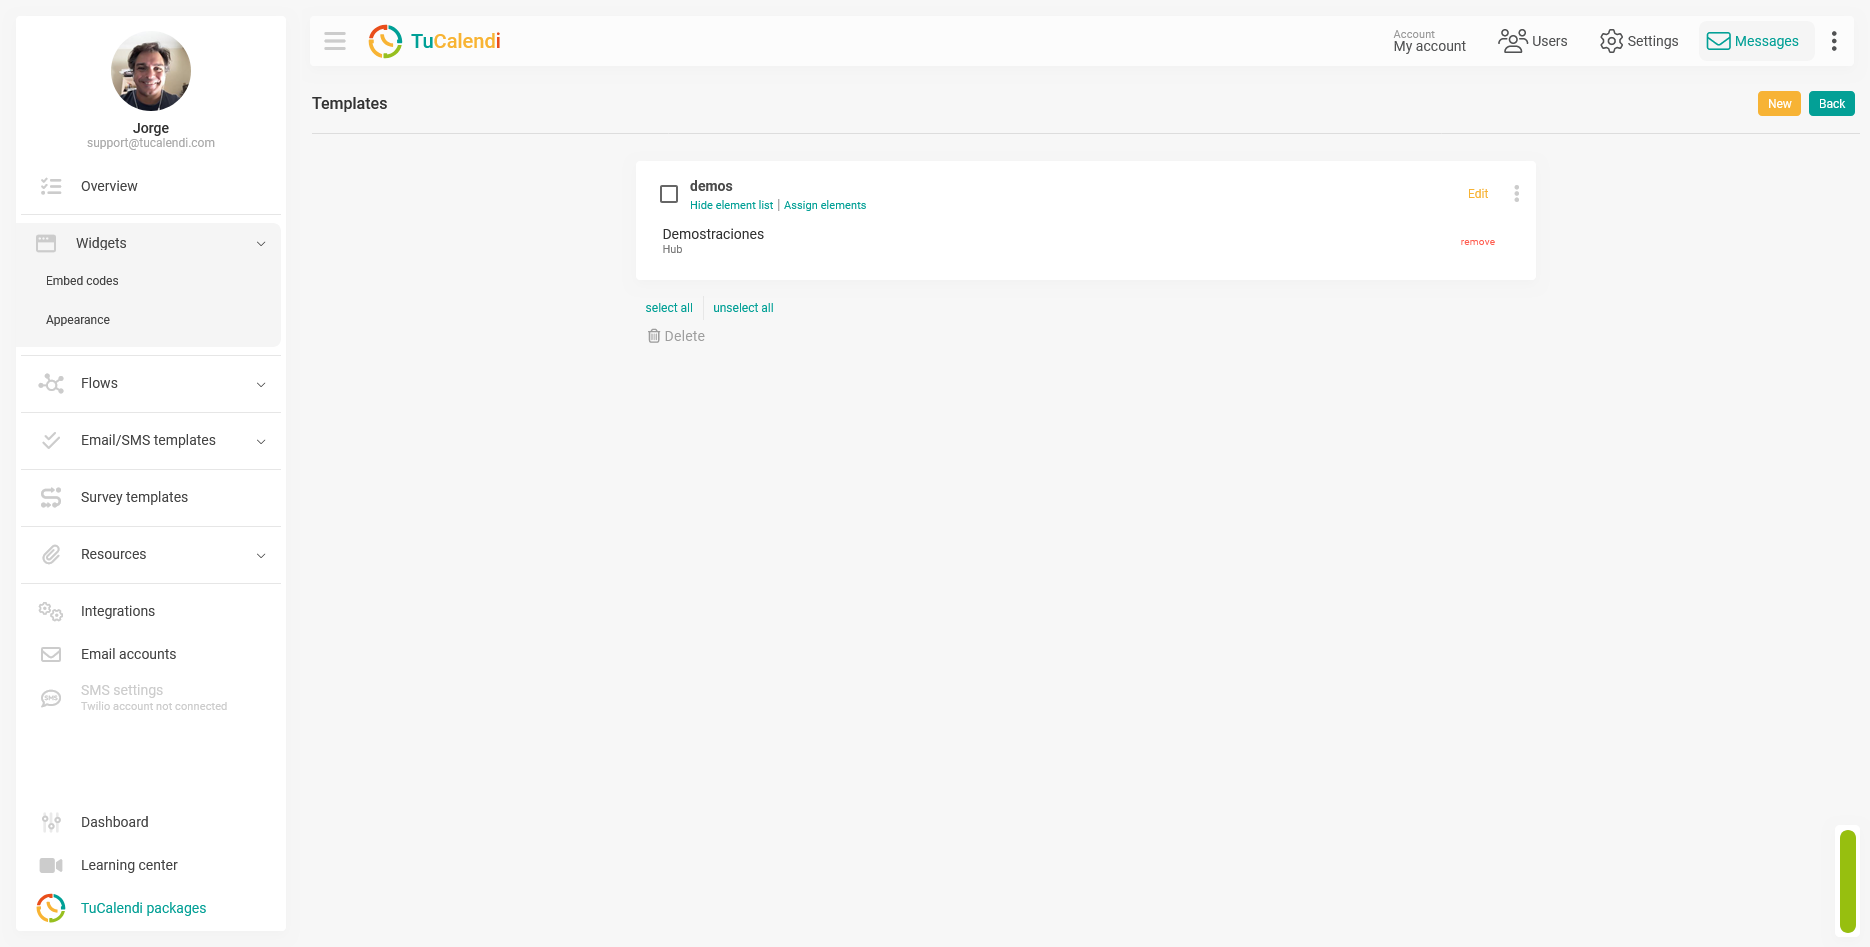
If you assign the template to a hub, the theme will apply to the meeting types included in that hub. If you assign it to a routed survey, the theme will apply to the booking flow associated with that survey.
Process Overview
The process for hiding the TuCalendi branding in the Widget consists of accessing the widget’s theme, editing a template, locating the “Hide Branding” option, enabling it if your account is on the Pro Plan, saving the changes, and verifying that the template is assigned to the corresponding hub or survey.