How to Change the Date and Time Format in the New TuCalendi Widget
This tutorial explains how to modify the date and time formats displayed in the new TuCalendi widget used on the meetfy.me domain. This configuration is part of the customization options available within a theme template.
Before continuing, we recommend reviewing the general tutorial on widget appearance, where we explain what a theme template is, how to create one, and how to assign it to hubs or polls. In this article, we’ll focus solely on configuring the Date Format and Time Format fields.
When to Use This Customization
The date and time settings allow you to adapt the widget to the format that best suits your users. For example, you can use a date format more common in Europe or the U.S., an international format, or a 12- or 24-hour time display, depending on your audience and the country where the widget is used.
This option is especially useful when working with users from different regions, when the account uses multiple hubs, or when you need to maintain a consistent experience across all booking flows.
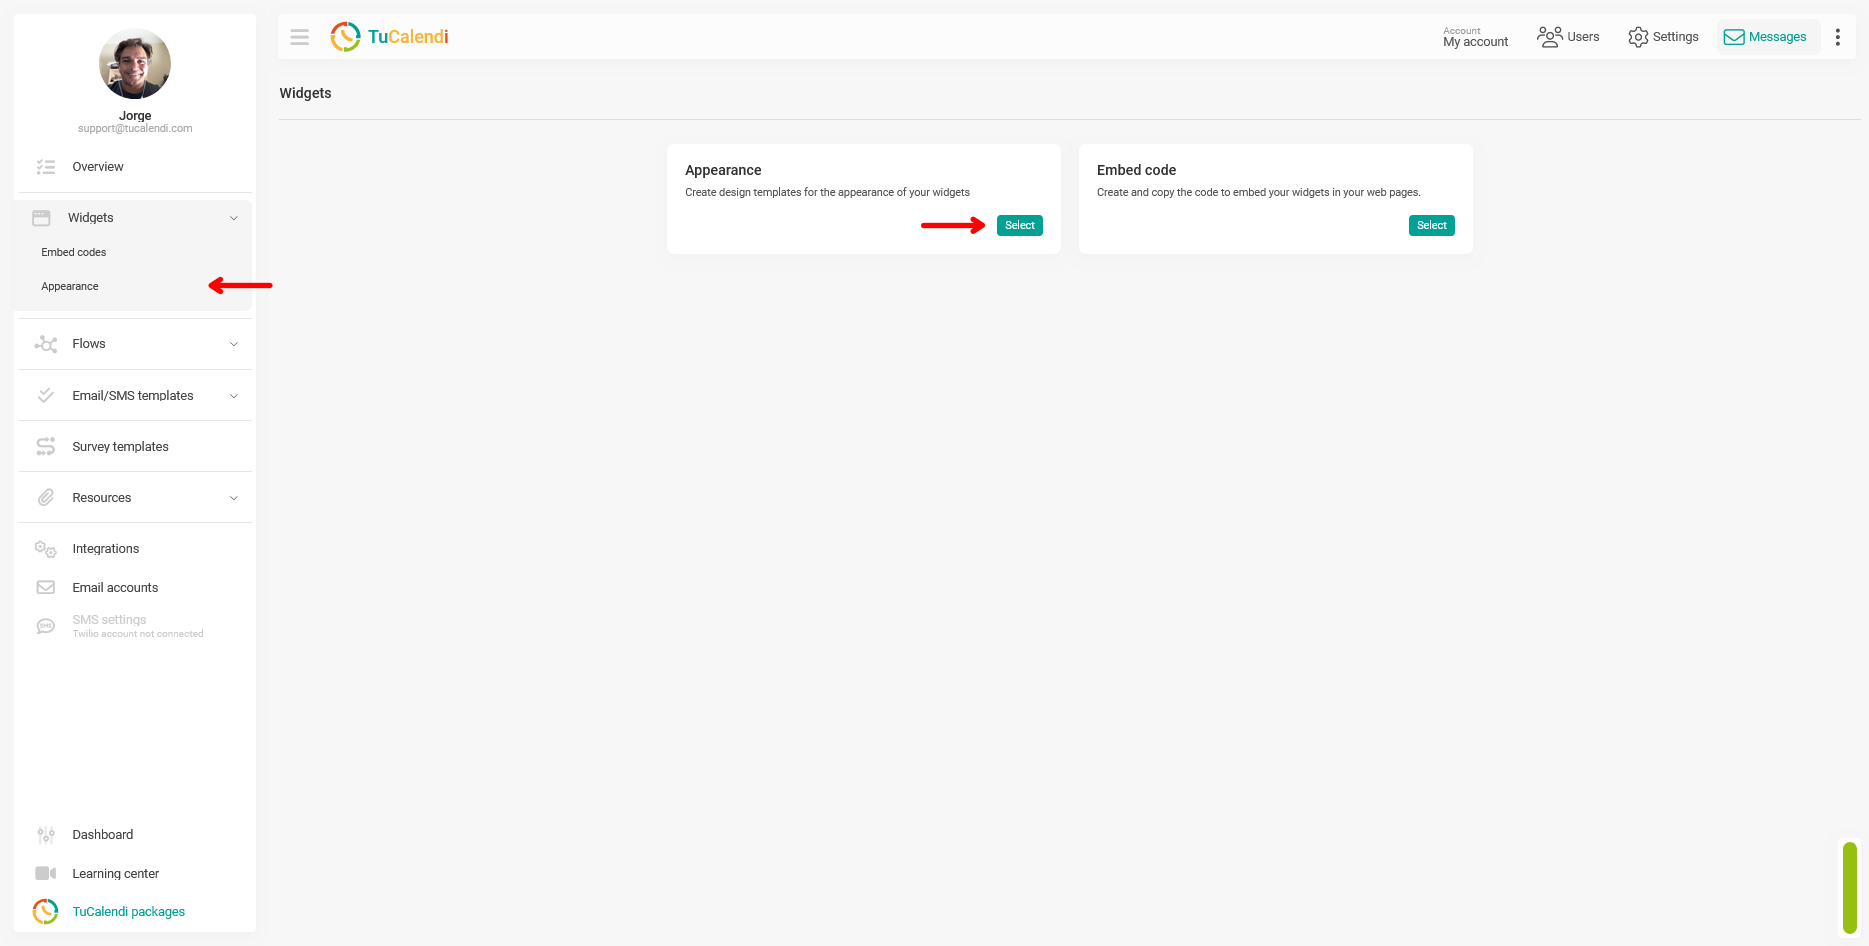
Step 1. Access the widget’s Appearance section
To modify the date and time formats, first go to the TuCalendi side menu. Go to the Widgets section and select Appearance.
Step 2. Create or edit an appearance template
Once in Appearance, you can create a new template or edit an existing one. If you haven’t created any templates yet, you’ll need to create a new one and assign it an alias.
If you already have a template, click “Edit” to access its customization options.

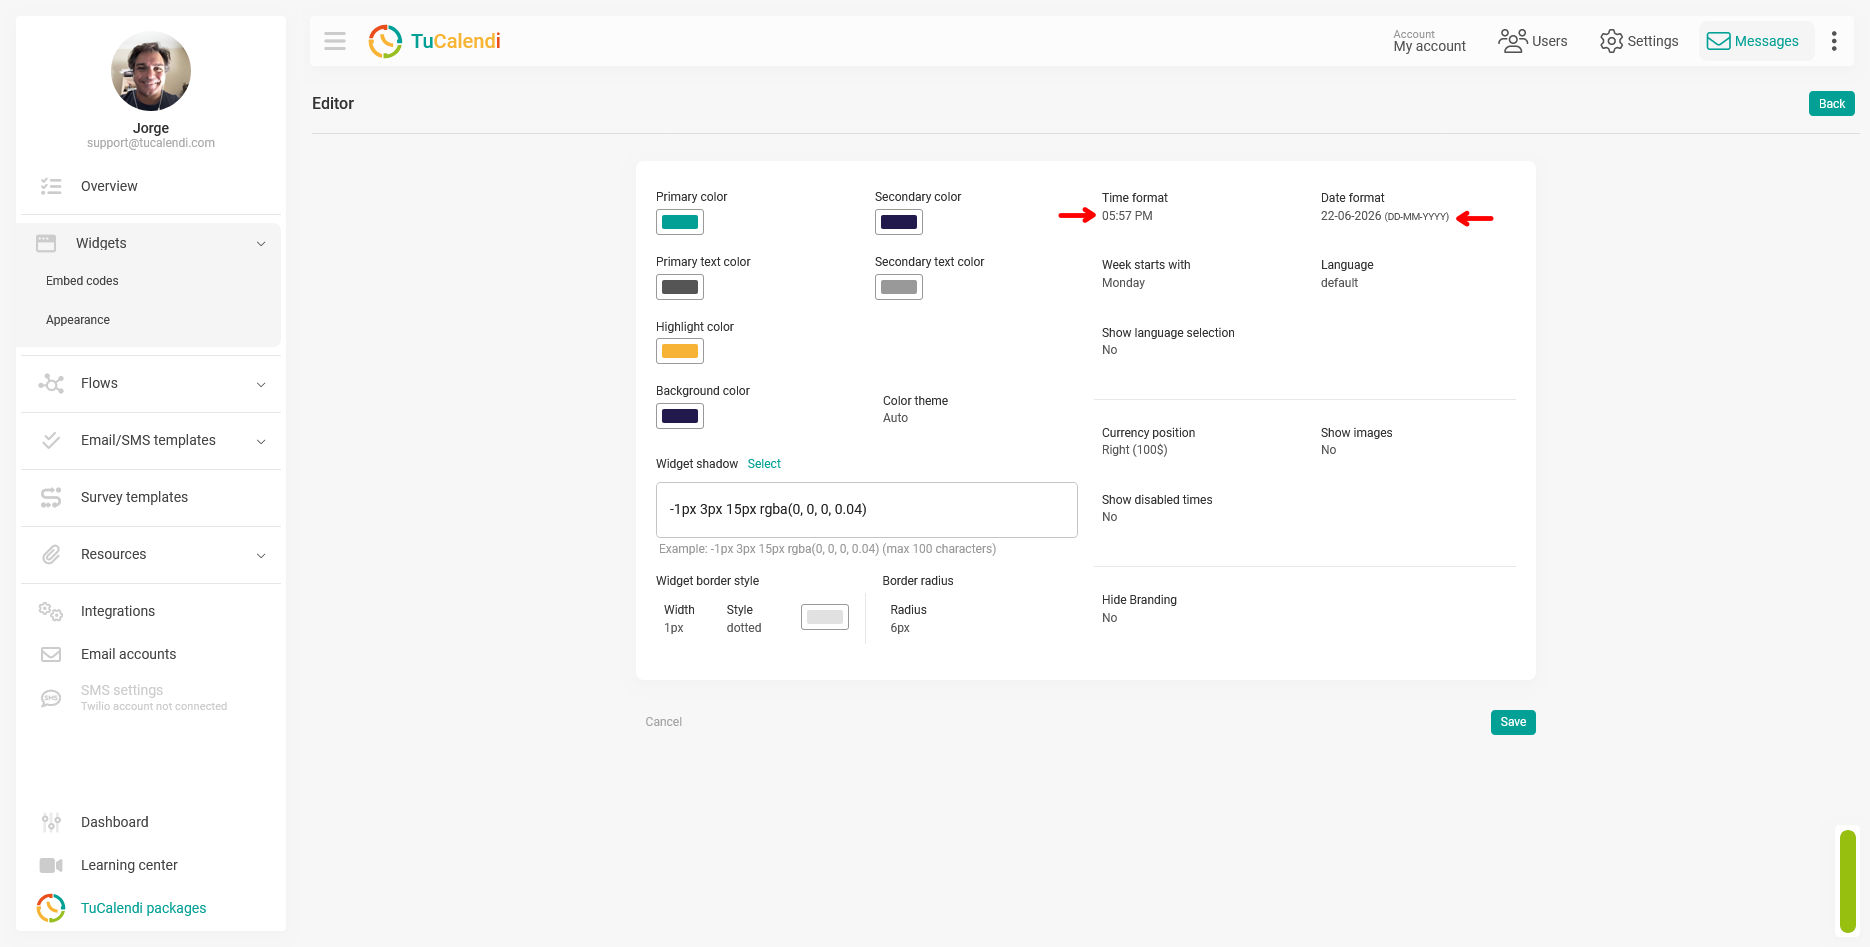
Step 3. Select the date format
Within the template editor, locate the “Date Format” field, located in the upper-right corner of the widget appearance template customization panel. Click that field to choose the format you want to use in the widget.
The date format determines how dates will be displayed during the booking process. It’s important to choose a clear format for the users who will be using the widget, especially if the account serves users from different countries or regions.
Step 4. Select the time format
On the same screen, locate the "Time Format" field, located next to the date format field. Click the field and select the format you want to display in the widget.
The time format affects how the available time slots for booking an appointment are displayed. You can use a 12-hour or 24-hour format, depending on your account’s preference or the market the widget is targeting.
The screenshot below shows exactly where the “Time Format” and “Date Format” fields are located within the appearance editor.
Step 5. Save the changes
After selecting the date and time formats, click “Save.” This step is necessary to ensure your changes are saved to the appearance template.
If you exit the editor without saving, the changes may not be applied. Therefore, before returning to the template list, make sure you have saved the settings correctly.
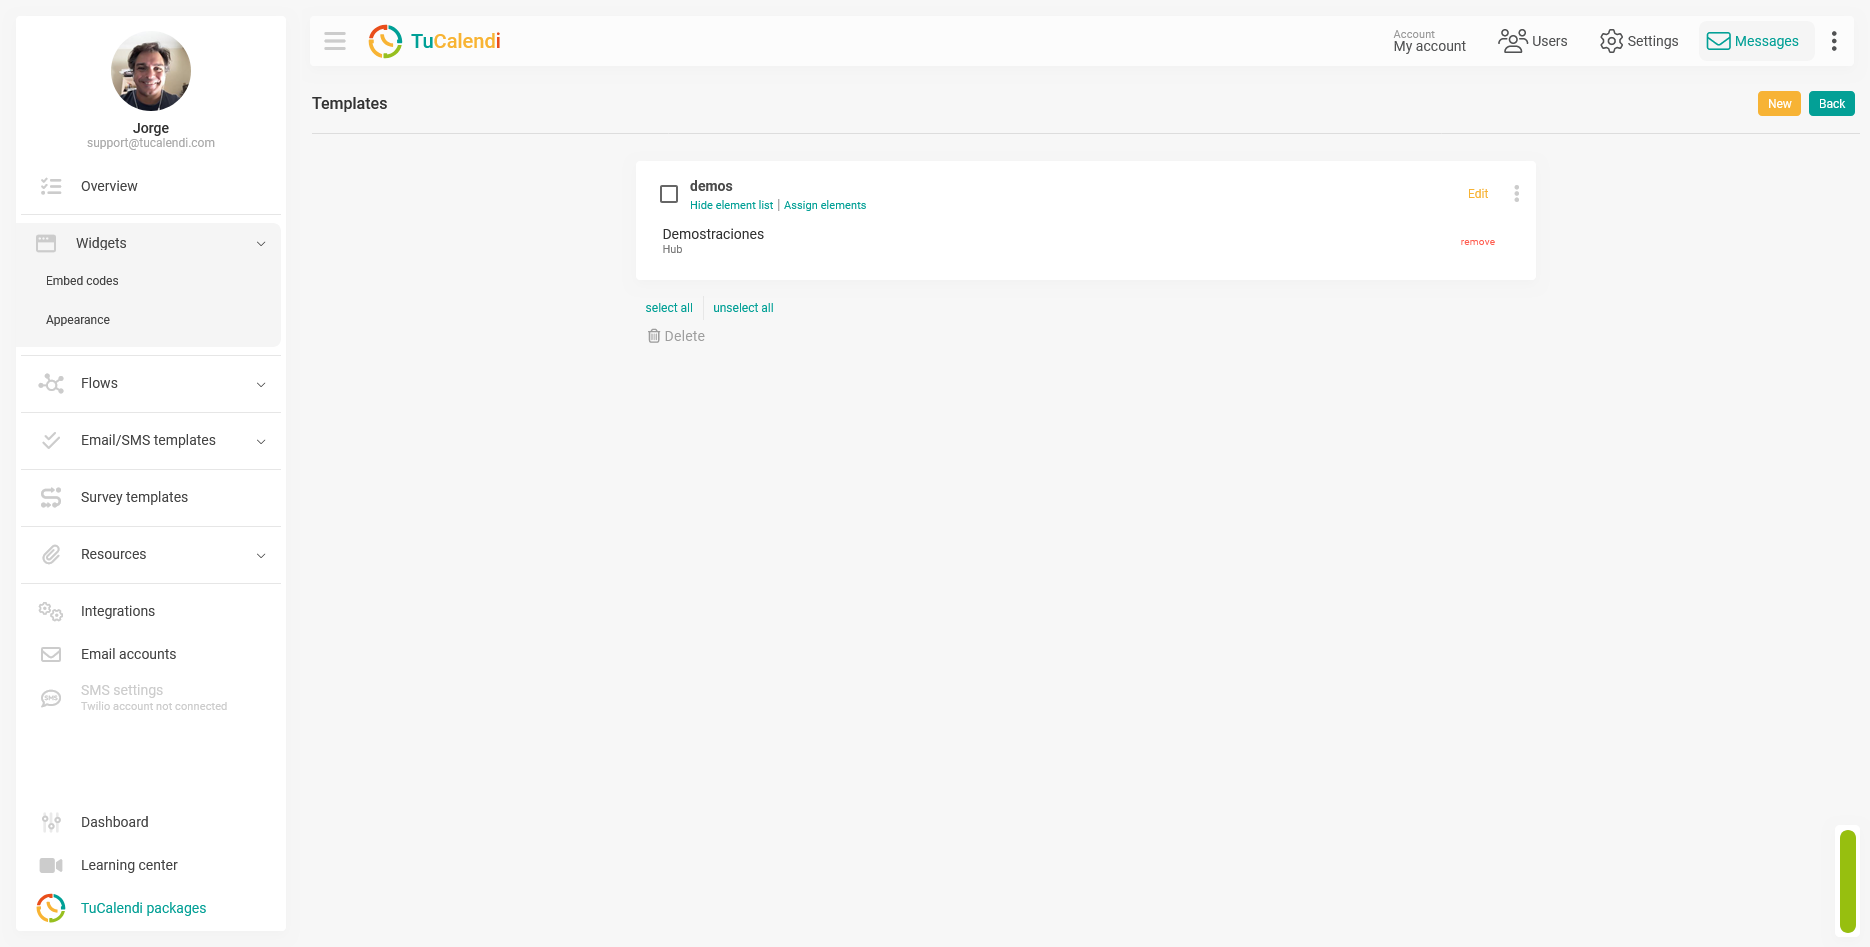
Step 6. Check the element assignments
Once the template is saved, it’s important to verify that it’s assigned to the correct elements. The template may be configured correctly, but if it isn’t linked to any elements, the changes won’t be reflected in the widget.
From the template list, check the “Assign Elements” option. The template must be linked to the hub or routed survey where you want to apply these formats.