How to Set Up a CNAME in TuCalendi
The CNAME option lets you use your own subdomain to share your TuCalendi booking pages. For example, instead of sharing a meetfy.me URL, you can use a URL associated with your own brand, such as booking.yourdomain.com.
To complete the setup, you need to do two things: first, create the CNAME record in your domain’s DNS manager, and then specify the CNAME you created in TuCalendi. You do not need to change TuCalendi’s default domain.
Before you begin
You need access to the control panel for the domain you want to use. This control panel is usually available through the company where you registered the domain or where you manage its DNS settings.
In this tutorial, we’ll use "booking.yourdomain.com" as an example. Always replace it with the subdomain you want to use on your own domain.
Step 1. Create the CNAME record in your DNS manager
Log in to your domain’s DNS manager and create a new CNAME record. Enter the subdomain you want to use for example, "booking" and set the destination or value of the record as follows:
The exact names of the fields may vary depending on your domain provider. Look for fields equivalent to Name, Host, or Alias for the subdomain, and Destination, Points To, or Value to enter cnameserver.meetfy.me.
Save the new record in your DNS manager before continuing.
Step 2. Go to Settings
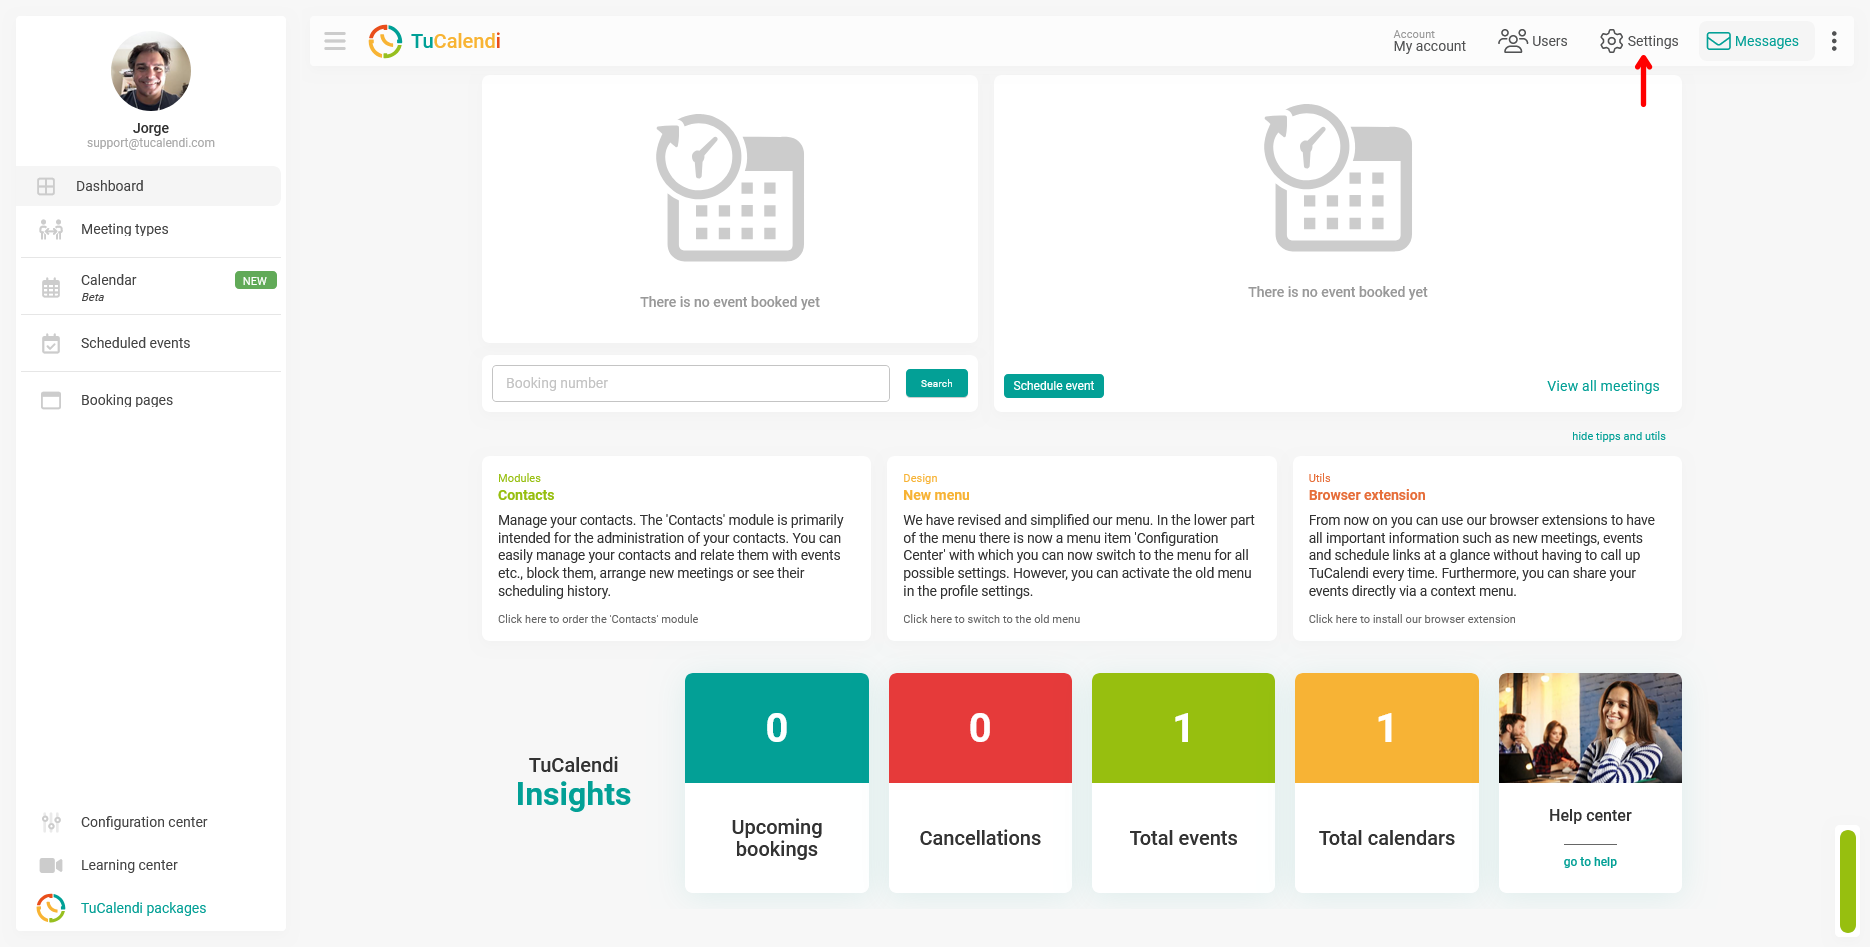
Click "Settings" in the top navigation bar of TuCalendi.
Step 3. Select "Domains and Brand"
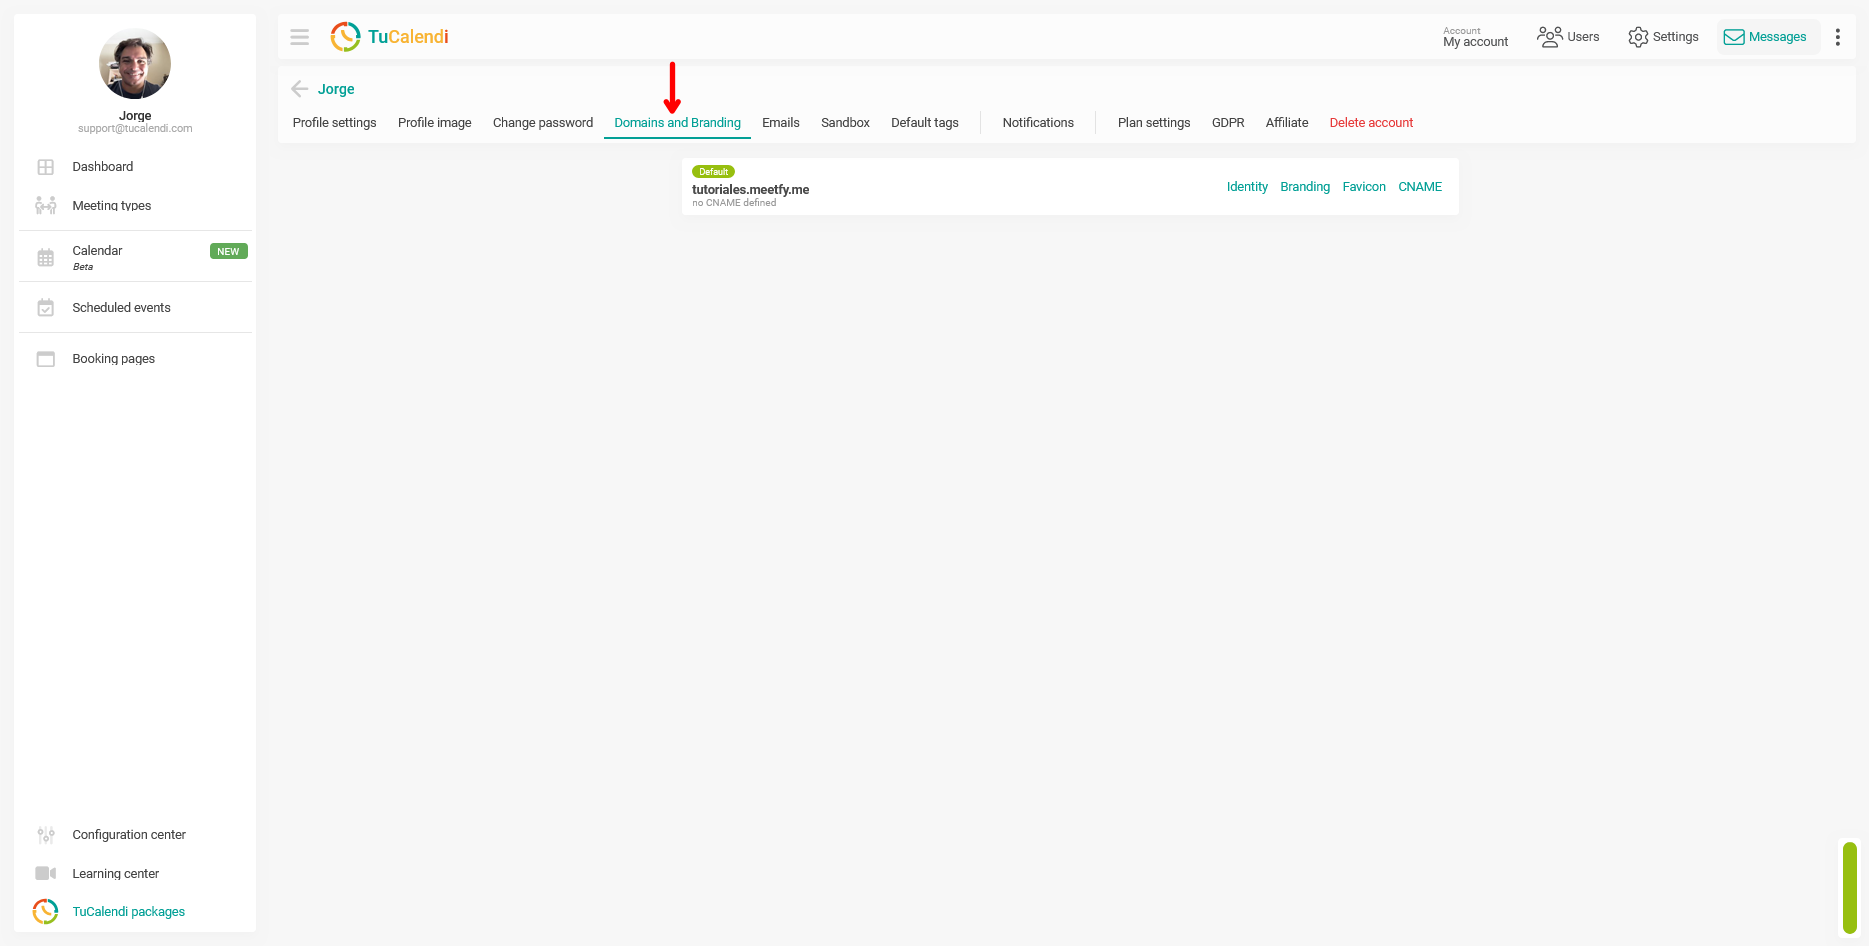
Next, select "Domains and Branding" from the horizontal menu.
Step 4. Open the "CNAME" option
Locate your active domain and click the "CNAME" link on the right. If no custom domain has been set up yet, you’ll see the message "No CNAME defined"
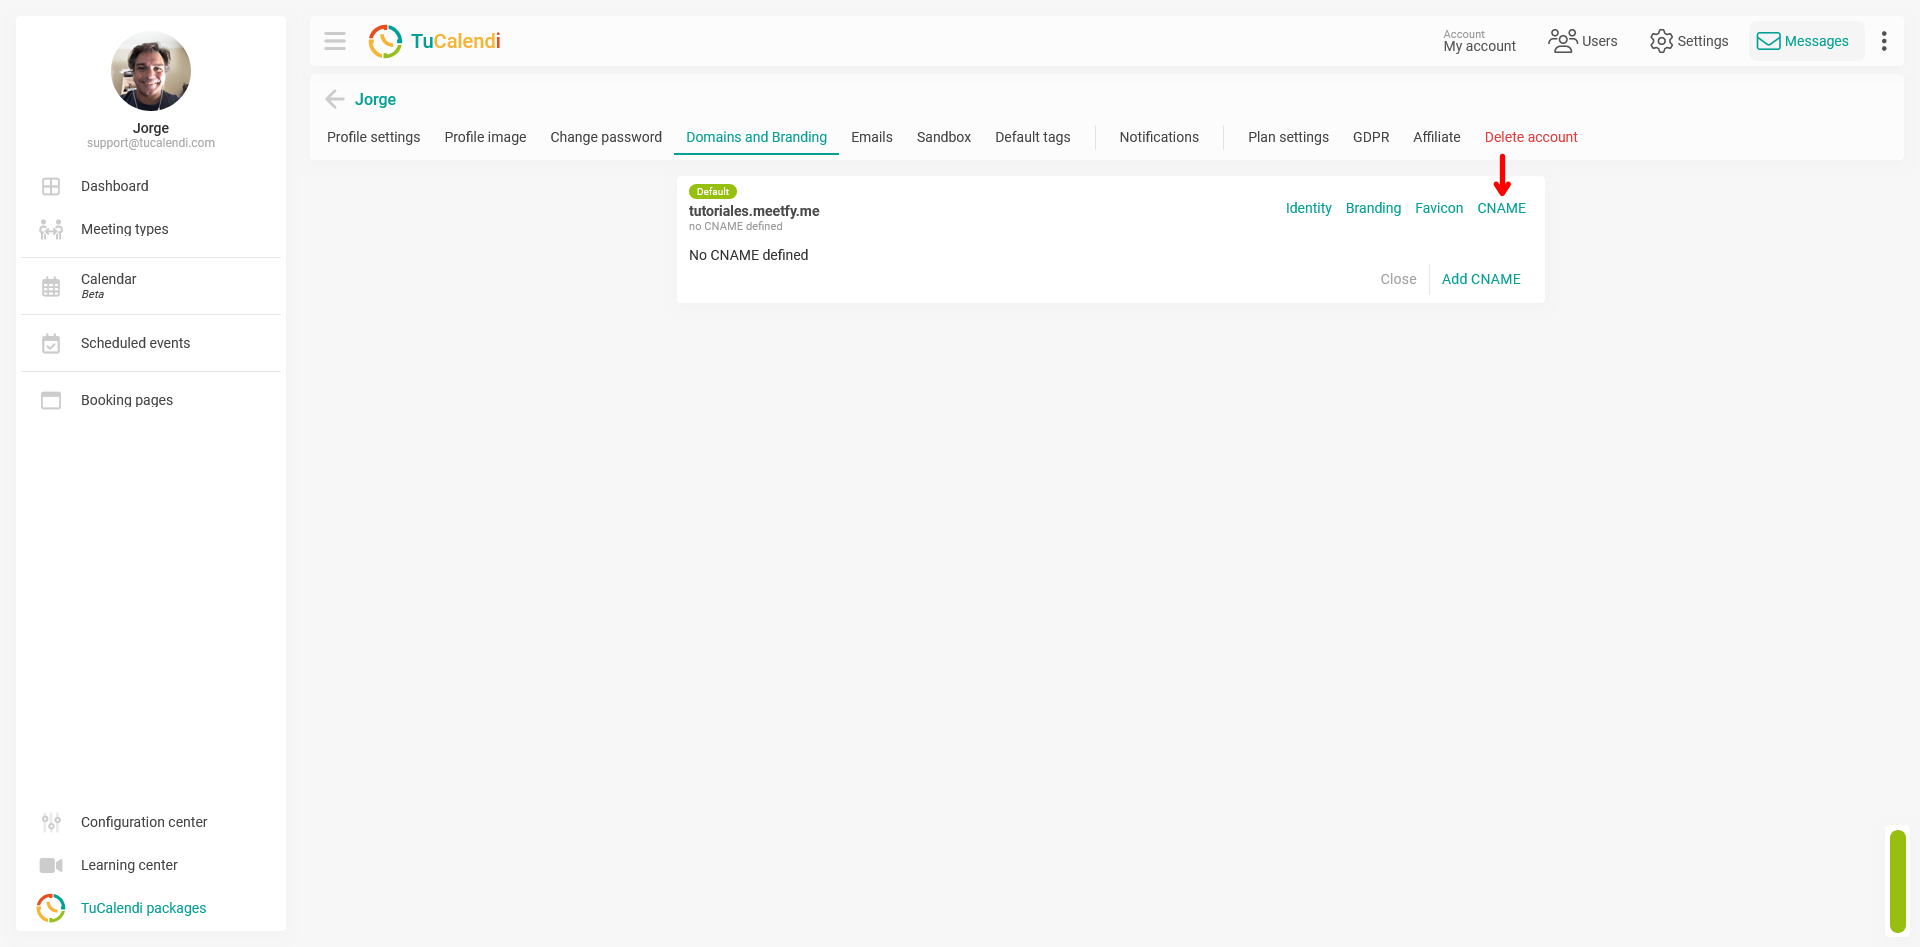
Then, click "Add CNAME"
Step 5. Add the CNAME you created in your DNS manager
A window will open with the "Canonical Name (CNAME)" field.
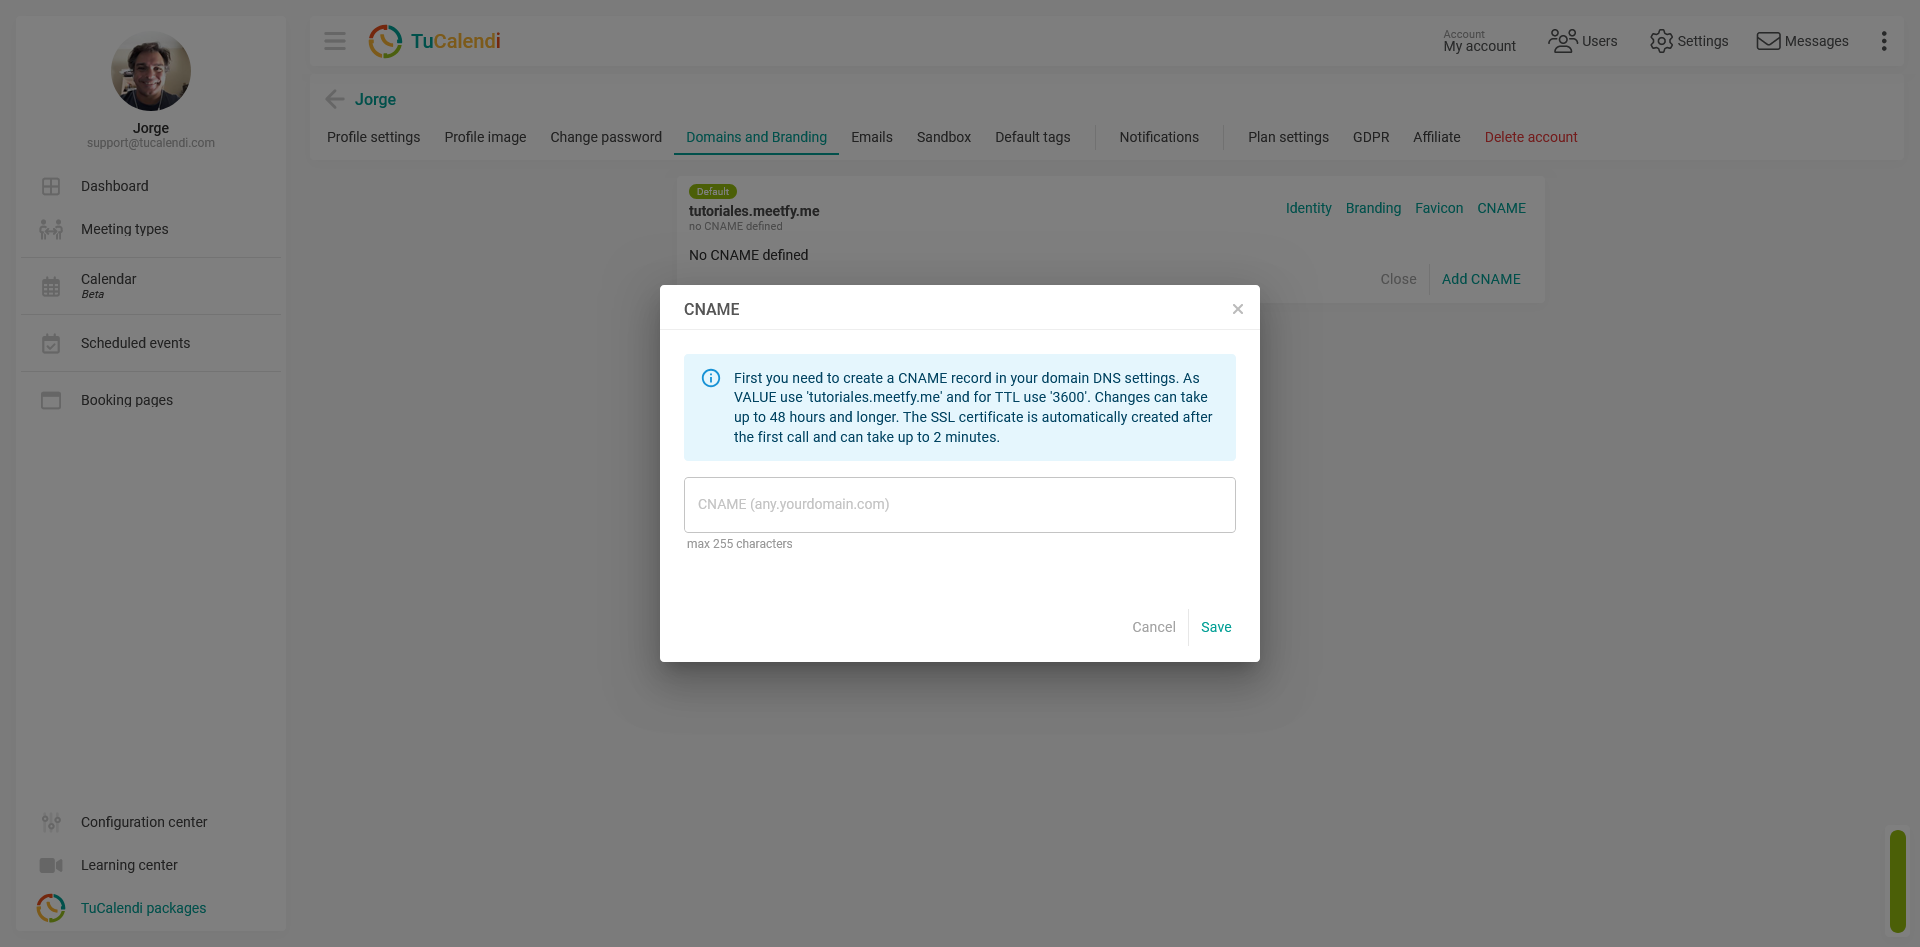
Enter the full name of the subdomain you previously created in your DNS manager, for example: booking.yourdomain.com.
Do not enter cnameserver.meetfy.me here: that address is used as the record’s destination in your DNS manager. In TuCalendi, you must enter your own brand’s CNAME that is, the subdomain you created.
Once entered, click "Save".
Step 6. Wait for the changes to propagate and verify the configuration
DNS changes can take up to 48 hours or more to propagate, depending on your domain provider. Once the CNAME is available, the SSL certificate will be automatically generated after the first visit to the custom domain; this final process may take up to two minutes.
Once the setup is complete, you’ll be able to use the custom subdomain to access your TuCalendi booking pages.
Process Overview
To connect a custom domain, first create a CNAME record in your domain’s DNS manager for the subdomain you want to use for example, booking.yourdomain.com and point that record to cnameserver.meetfy.me. Do not point it to your meetfy.me account domain. Next, in TuCalendi, go to "Settings" from the top bar, select "Domains and Branding" in the horizontal menu, click "CNAME", click "Add CNAME", enter the full name of the subdomain you created, and click "Save". It may take up to 48 hours or longer for the changes to propagate.